
Landscaping
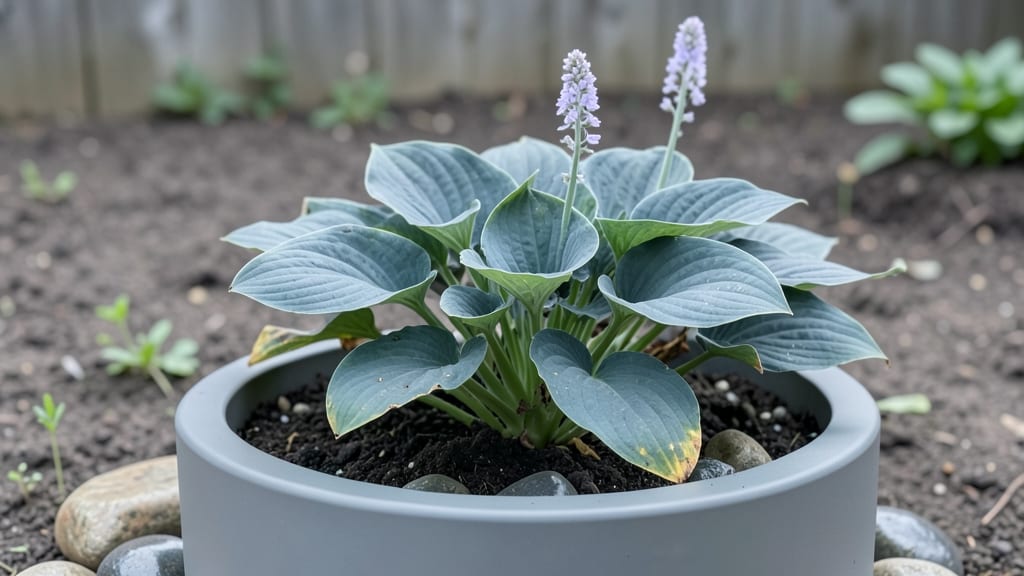
Smart small garden landscaping begins with layering—where every inch counts and every plant plays a role in crafting your lush, functional retreat. I turned my 6x8-foot urban backyard into a serene escape by stacking vertical gardens, tucking seating into corners, and choosing plants that thrive in tight spaces.
The key isn’t sacrificing beauty for size—it’s working with the space, not against it.
Think of your garden in three dimensions: up (trellises, hanging baskets), out (raised beds, container gardens), and ground level (pathways, mulch). I used a mix of dwarf shrubs, climbing vines, and compact perennials to create depth without overwhelming the area.
Even a tiny patio can become a lush retreat with the right materials—lightweight pavers for paths, weather-resistant containers, and drought-tolerant plants that need minimal fuss.
By the end, you’ll have a space that feels spacious, productive, and personalized—whether that’s a vertical herb garden for cooking, a cozy nook for morning coffee, or a pollinator-friendly oasis.
The best part? You can start small (literally) with just a few containers and build from there. Let’s make that tiny space shine.
This approach works for balconies, courtyard gardens, or even a sunny windowsill—adjust the scale, not the strategy. Urban gardeners and apartment dwellers have been doing it for years, and the results are stunning. Ready to see how your space can transform?
📚 In This Guide
- What you need
- Instructions
- Tips and common mistakes
- Wrapping up and next steps
What you need
- ● Soil & Mulch: 2–3 bags of high-quality garden soil (1–2 cubic feet per bag, depending on garden size)
- ● 1–2 bags of organic mulch (cedar or pine for a clean look, 2–3 cubic feet)
- ● Plants: 3–5 compact shrubs or dwarf trees (e.g., boxwood, Japanese maple)
- ● 6–10 perennial flowers (e.g., lavender, hostas, or ferns for texture)
- ● 1–2 small ornamental grasses (e.g., fountain grass or dwarf bamboo)
- ● Hardscaping: 1–2 raised garden beds (4’x2’ or smaller, with cedar or composite lumber)
- ● 4–6 stepping stones or pavers (12”x12” or smaller, for pathways)
- ● 1–2 small planters or containers (hanging or floor-level, 6–12” diameter)
- ● Essential Tools: 1 garden trowel (for planting)
- ● 1 hand pruners (sharp, bypass-style)
- ● 1 wheelbarrow or small cart (for hauling soil/mulch)
- ● 1 measuring tape (10–25 feet)
- ● 1 level (for even hardscaping)
- ● Lighting: 2–4 solar-powered garden lights (for ambiance)
- ● Seating: 1–2 small bistro chairs or a bench (weather-resistant)
- ● Water Features: 1 mini fountain or bubbler (battery-operated)
- ● Decor: 1–2 ornamental pots or trellises (for climbing plants like ivy)
- ● Tools: 1 garden kneeler (for comfort)
- ● 1 hose with adjustable nozzle (for watering)
- ● Measure twice! Sketch your garden layout first to avoid overbuying materials.
- ● Go vertical. Use trellises or wall planters to maximize space for climbing plants.
- ● Choose drought-tolerant plants if your space gets little sunlight.
- ● Check local regulations before adding hardscaping (e.g., patios or decks).
Instructions for small garden landscaping: smart layering techniques
Transform limited space into a lush, multi-dimensional retreat using these proven layering principles.
Define Your Vertical Framework
Begin by establishing vertical elements that create height and draw the eye upward. Install a 6-foot tall trellis in one corner to support climbing plants like clematis or morning glories. Position it against a fence or wall to maximize vertical real estate without encroaching on floor space. I always anchor trellises with two 12-inch metal stakes at the base for stability—this prevents wobbling when plants grow heavy.
For immediate impact, add a 4-foot tall decorative arbor near the garden entrance. This serves as both a focal point and a support for trailing plants like jasmine or sweet peas. Place it where it frames a pathway or seating area, creating visual depth. The key is balancing function with aesthetics—every vertical element should either support plants or enhance the view.
Install Raised Beds for Layered Planting
Construct two 3-foot by 4-foot raised beds using untreated cedar planks. The elevated design prevents soil compaction and allows for better drainage, which is crucial in small spaces where water can pool. Line the bottom with cardboard to suppress weeds before filling with 12 cubic feet of premium potting mix. This creates a fertile foundation while keeping roots contained.
Divide each bed into three sections: front, middle, and back. The back section (nearest the trellis) gets tall perennials like delphiniums or hollyhocks, while the middle holds medium-height shrubs such as dwarf boxwood or lavender. Reserve the front for low-growing annuals like pansies or ajuga. This vertical stratification makes the garden feel fuller without sprawling outward.
Incorporate Multi-Level Seating and Pathways
Add a 2-foot wide stepping stone pathway that meanders through the garden, guiding visitors through the layers. Use sand and gravel for drainage between stones to prevent erosion. Along the path, place two small stone benches (each 2 feet long) at strategic intervals. Position one bench near the trellis for a cozy seating area, and the other beside the raised beds for easy plant maintenance.
The benches double as planters—bury them slightly in the ground and fill the surrounding soil with 1 cubic foot of potting mix to support trailing plants like creeping thyme or sweet potato vine. This integrates seating into the landscape while adding another layer of greenery. The pathway width ensures comfortable navigation without overwhelming the small footprint.
Add Textural and Seasonal Layers
Incorporate three types of foliage textures to create visual interest: fine (fern fronds), medium (hosta leaves), and bold (elephant ears). Group plants with similar water needs together to simplify care. For seasonal variety, plant spring bulbs like daffodils in the front of the raised beds, summer annuals like geraniums in the middle, and fall foliage such as Japanese maple in the back.
Weave in two small ornamental grasses (each 2 feet tall) near the trellis to add movement and contrast. Their airy forms soften the structure while providing year-round interest. Place a small water feature—like a 12-inch wide ceramic basin—near the benches to introduce the soothing sound of water without taking up valuable space. The basin can also serve as a shallow planter for moisture-loving plants like astilbe.
Final Touches for Cohesion
Unify the design with a cohesive color palette—I recommend three main hues with one accent color. For example, pair soft blues (delphiniums) with whites (shasta daisies) and greens (hostas), then add pops of purple (lavender) for contrast. Use mulch to tie everything together—spread 3 cubic feet of shredded bark over the beds to suppress weeds and retain moisture while adding a natural finish.
Add two small solar-powered garden lights (each 12 inches tall) to highlight key features at night. Place one near the trellis and another beside the water feature. These lights extend the garden’s usability and create a magical ambiance after dark. Finally, install a small bird feeder within sight of the seating area to attract wildlife and add life to the scene.
Tips & tricks for small garden landscaping
Creating a stunning small garden comes down to strategic layering—here are the secrets that transform tight spaces into lush, multi-dimensional retreats.
Vertical Space Optimization: When positioning your 6-foot tall trellis and 4-foot arbor, consider their mature size and growth patterns. I recommend placing the trellis against a north-facing wall to minimize shade on your raised beds while still providing support for climbing plants. For the arbor, position it where it frames your pathway entrance—this creates an inviting focal point while maximizing vertical real estate. Remember, every inch of vertical space counts in small gardens, so prioritize structures that serve dual purposes as both plant support and visual interest.
Raised Bed Construction: For your two 3-foot by 4-foot raised beds, use cedar planks that are at least 2 inches thick to ensure durability. I always reinforce the corners with galvanized screws rather than nails to prevent warping over time. When dividing the beds into three sections, leave at least 6 inches between plant types to allow for proper airflow and maintenance access. This stratification creates visual depth while keeping your garden manageable in a compact footprint.
Pathway and Seating Integration: The 2-foot wide pathway should follow a gentle curve rather than straight lines to create visual interest while maintaining functionality. For your two 2-foot long benches, consider using natural stone that complements your color palette—this extends the cohesive aesthetic beyond just the plants. Bury the benches just 2 inches deep to allow for proper drainage while still supporting the surrounding potting mix for trailing plants.
Seasonal Layering Strategy: When planning your three foliage textures, include at least one evergreen plant like boxwood in the middle section to provide year-round structure. For seasonal variety, plant spring bulbs like daffodils in the front of the beds where they'll bloom early and catch the eye. The 12-inch wide ceramic basin water feature can double as a planter for moisture-loving plants like astilbe, adding another layer of interest without requiring additional space.
Pro Tips for Small Garden Landscaping
- Creating a stunning small garden comes down to strategic layering—here are the secrets that transform tight spaces into lush, multi-dimensional retreats.
- Vertical Space Optimization: When positioning your 6-foot tall trellis and 4-foot arbor, consider their mature size and growth patterns.
- Raised Bed Construction: For your two 3-foot by 4-foot raised beds, use cedar planks that are at least 2 inches thick to ensure durability.
Frequently asked questions
Got questions about transforming your small garden into a stunning oasis? You’re not alone! Here are some of the most common queries—and their practical answers—to help you get started with confidence.
What are the best plants for a small garden with limited sunlight?
Opt for shade-tolerant plants like hostas, heucheras, or ferns to thrive in low-light areas. For containers, try snake plants or peperomias, which need minimal sunlight. If you have dappled shade, consider astilbes or bleeding hearts for color and texture.
How long does it take to see results in a small garden redesign?
Quick wins like mulching, adding containers, or installing pathways show immediate impact. For plants, annuals bloom fast (4–6 weeks), while perennials may take 1–2 seasons to fill out. Structural changes (like raised beds) offer visual payoff right away, but long-term growth depends on plant maturity.
Can I landscape a small garden on a budget?
Start with DIY projects like repurposing old bricks or pallets for borders. Shop for dormant plants (cheaper and hardy) or propagate cuttings. Skip expensive hardscapes—opt for gravel, stepping stones, or even painted rocks for definition. Thrift stores and plant swaps are goldmines for affordable finds!
What’s the best way to layer plants in a tiny space?
Use the “thriller-filler-spiller” rule: Place a tall plant (thriller, like a dwarf bamboo) at the center, surround it with mid-height plants (fillers, such as coleus), and add trailing plants (spillers, like sweet potato vine) to soften edges. This creates depth without clutter.
How do I keep pests away in a small garden without chemicals?
Prevent pests with physical barriers like mesh over containers or copper tape for slugs. Plant marigolds or basil to repel bugs naturally. Encourage beneficial insects (like ladybugs) with nectar-rich flowers. Regularly remove debris and water in the morning to deter fungal issues.
What’s the best time of year to start a small garden project?
Spring and early fall are ideal for planting perennials and annuals, as temperatures are mild and rain is plentiful. For hardscaping projects (like patios or paths), dry weather in late spring or summer works best. Winter is perfect for planning, sketching layouts, or ordering materials ahead of time.
Wrapping up and next steps
Transforming a small garden into a stunning outdoor oasis is all about strategic layering, creativity, and smart planning—not space! By mixing vertical elements, multi-functional plants, and clever storage, you can create a space that feels lush, organized, and full of personality. 🌿✨
Ready to dive in? Start by sketching your vision—even a rough draft—and take it step by step. Your tiny garden deserves the same love as a grand one! Grab your tools, get inspired, and watch your space bloom with potential.