Planting
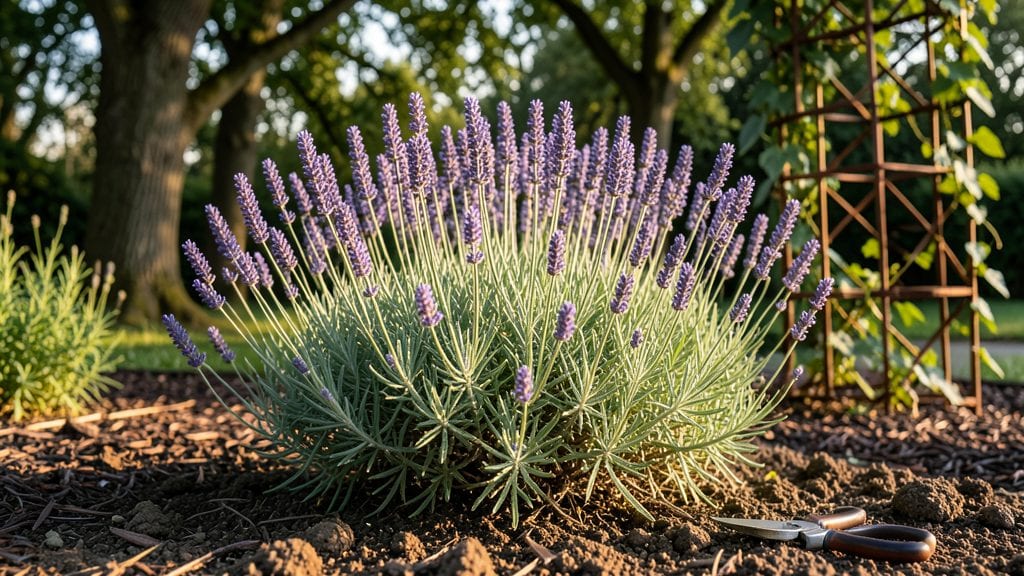
My home-sown gardens have become the heart of my urban space, where every plant tells a story of where it came from. 🌱 The secret isn't just growing from seed—it's weaving those homegrown plants into layers that shift with the seasons, creating a living tapestry that feels alive and intentional.
I've turned my tiny balcony into a cottage-core sanctuary by mixing heirlooms, wildflowers, and edibles in waves of color and texture.
The magic happens in how you arrange them: tall snapdragons anchor the back, mid-height lavender adds fragrance, and trailing nasturtiums spill over edges. You don't need a big yard—just smart combinations that play with height, bloom times, and leaf shapes.
My spring borders burst with home-sown sweet peas and calendula, while autumn brings in seed-grown chrysanthemums and ornamental kale for winter interest.
What makes it special is how the garden evolves with you. The first year you'll have a few standout plants, but by year two, those home-sown seedlings turn into established layers that fill gaps naturally.
The colors deepen, the textures soften, and you'll find yourself reaching for the scissors more often than the store-bought flats.
This works for any space—containers, raised beds, or ground plots—because the principles stay the same. Whether you're going for wildflower meadow vibes or a precise cottage garden, home-sown plants give you that authentic, handcrafted feel that no nursery can match. Let's build your layered garden one seed at a time.
📚 In This Guide
- What you need
- Instructions
- Tips and common mistakes
- Wrapping up and next steps
What you need
- ● Containers or Raised Beds: 1–3 self-watering planters (10–20 gallons, depending on plant size) 🌿
- ● 1–2 wooden or metal raised beds (2’x4’ or smaller for compact spaces)
- ● Window boxes (for herbs or trailing plants, 6–12” deep)
- ● Growing Medium: 5–10 bags of high-quality potting mix (look for "organic" or "peat-free" blends)
- ● 1–2 bags of compost (for nutrient-rich soil)
- ● Perlite or vermiculite (1–2 cups per container for drainage) 💧
- ● Seeds & Plants: Seed packets (choose fast-growing, compact varieties like lettuce, radishes, or dwarf tomatoes)
- ● 3–5 seedlings or starter plants (herbs, peppers, or flowers for instant color)
- ● Tools: 1 hand trowel (for planting and soil prep)
- ● 1 pruners or small shears (for trimming and harvesting)
- ● 1 watering can with a rose attachment (gentle watering = happy plants!)
- ● Gloves (to keep hands clean and protected)
- ● Drip irrigation kit (for hands-off watering in larger setups)
- ● Garden markers (to label plants and track progress)
- ● Decorative stones or mulch (for aesthetics and moisture retention)
- ● Grow lights or LED bulbs (for winter or low-light spaces)
- ● Vertical planters or trellises (to maximize space with climbers like beans or cucumbers)
- ● A sunny spot (at least 4–6 hours of sunlight daily for most veggies/herbs)
- ● Access to water (a hose or water source near your garden)
- ● Basic knowledge of your climate (check frost dates and heat zones for timing)
- ● Patience and joy! (Gardening is a journey—embrace the process!) 🌱
Instructions for designing a year-round home sown garden
Here's how to build a compact, visually stunning garden that thrives in every season.
🪴 Step 1: Plan Your Planting Layers and Seasonal Rotation
Start by sketching your space and dividing it into four distinct layers: tall plants (like ornamental grasses or small shrubs), mid-height perennials (such as lavender or catmint), ground covers (like creeping thyme or ajuga), and seasonal annuals (pansies for winter, marigolds for summer). I always allocate 25% of the space to evergreens—these provide structure and color when deciduous plants fade.
For year-round interest, rotate your annuals by season: spring bulbs (daffodils, tulips), summer bloomers (zinnias, cosmos), fall foliage (mums, asters), and winter greens (kale, hellebores). Use the 4 servings as a guide for spacing—each "serving" represents a cluster of 3-5 plants per layer. This ensures balance without overcrowding.
🌱 Step 2: Prepare the Soil for Long-Term Health
Loosen the soil to a depth of 12 inches using a garden fork or tiller. Remove any weeds or debris—this prevents competition for nutrients and reduces future maintenance. I like to amend the soil with 2 inches of compost mixed into the top 6 inches, ensuring the entire bed benefits from improved drainage and fertility.
For urban spaces with compacted soil, add 1 inch of coarse sand to the bottom of the planting area before mixing in the compost. This creates a loose foundation that encourages root growth. Water the amended soil thoroughly until it’s evenly moist but not soggy—you’ll know it’s right when water drains through in 10-15 minutes without pooling.
☀️ Step 3: Plant Evergreens and Structural Elements First
Place your tallest plants (like dwarf conifers or boxwoods) at the back or center of the bed, ensuring they’re spaced 18-24 inches apart based on their mature size. These act as anchors for the design and provide year-round vertical interest. For the mid-height perennials, dig holes twice as wide as the root ball and just as deep—this encourages roots to spread outward.
Fill the holes with soil, pressing gently to remove air pockets, then water deeply to settle the roots. I always add a 1-inch layer of mulch (like shredded bark) around each plant, keeping it 2 inches away from the stems to prevent rot. This retains moisture and regulates soil temperature, which is especially critical in urban heat islands.
🌿 Step 4: Layer Seasonal Plants for Continuous Color
For spring, plant bulbs like tulips 6 inches deep and 4-6 inches apart—their early blooms will signal the season’s arrival. In summer, fill gaps with annuals like marigolds or nasturtiums, spacing them 12-18 inches apart for full coverage. These fast growers will quickly fill in any bare spots left by early bloomers.
In fall, add mums or asters near the front of the bed, where their vibrant foliage will catch the eye. For winter, tuck in evergreen annuals like pansies or ornamental kale, which thrive in cooler temperatures. Water newly planted seasonal flowers every 2-3 days until they establish roots, then taper to once a week once they’re settled.
✂️ Step 5: Maintain with Seasonal Pruning and Refreshes
After the first spring bloom, deadhead spent flowers (like tulips or daffodils) to redirect energy into foliage and next year’s blooms. In late summer, cut back perennials like lavender by one-third to encourage bushier growth. For fall, remove any diseased or damaged leaves from evergreens to keep them healthy through winter.
Every 3-4 months, top-dress the soil with a ½-inch layer of compost to replenish nutrients. This is especially important in urban gardens where soil can become depleted quickly. Watch for pests like aphids or slugs—address them early with neem oil or diatomaceous earth to avoid larger infestations later.
Tips & tricks for perfect year-round home sown gardens
Creating a garden that thrives through all seasons takes a few key tricks up your sleeve—here's what I've learned after years of trial and error.
Planting Depth and Spacing: In Step 1, when you're planning your seasonal rotation, remember that bulbs like tulips need to be planted 6 inches deep—this ensures they establish strong roots before spring. For perennials like lavender, the twice-as-wide hole in Step 3 is crucial; it gives roots room to spread without competing for space. I've found that sticking to the 18-24 inch spacing for tall plants prevents overcrowding as they mature.
Soil Preparation Secret: The 10-15 minute drainage test in Step 2 is your best friend for urban gardens. If water pools longer than 15 minutes, add more coarse sand to improve drainage. For compacted soil, I swear by the 1-inch sand layer at the bottom—it creates that perfect loose foundation that roots love. Pro tip: Mix in 2 inches of compost to the top 6 inches for that nutrient boost without overwhelming the plants.
Seasonal Layering Strategy: When you're adding your spring bulbs, summer annuals, fall foliage plants, and winter greens in Step 4, think vertically as much as horizontally. Place taller summer bloomers like zinnias toward the back of your bed, while shorter winter pansies can go toward the front. This creates natural layers that keep your garden interesting from every angle. I also like to interplant fast growers like nasturtiums between slower perennials—they fill gaps beautifully while you wait for everything to establish.
Maintenance Made Easy: The 3-4 month compost top-dressing in Step 5 is a game-changer for urban gardens. Set a reminder on your phone so you don't forget—just a ½-inch layer keeps nutrients flowing without smothering your plants. For pest control, I've had great success with a neem oil spray applied every two weeks during growing season. It's organic, effective, and won't harm beneficial insects like bees.
Pro Tips for Home Sown Gardens
- Creating a garden that thrives through all seasons takes a few key tricks up your sleeve—here's what I've learned after years of trial and error.
- Planting Depth and Spacing: In Step 1, when you're planning your seasonal rotation, remember that bulbs like tulips need to be planted 6 inches deep—this ensures they establish strong roots before spring.
- Soil Preparation Secret: The 10-15 minute drainage test in Step 2 is your best friend for urban gardens.
Frequently asked questions
Got questions about creating your own home-sown gardens in compact urban spaces? You’re not alone! Here are some of the most common queries—and straightforward answers—to help you grow with confidence.
What’s the best time to start a home-sown garden in a small space?
For year-round layers, begin with cool-season crops (like lettuce or spinach) in early spring or late summer. Warm-season plants (tomatoes, peppers) thrive after the last frost. In urban areas, containers let you adjust timing—just ensure 6+ hours of sunlight daily. Pro tip: Use succession planting () to keep harvests flowing!
Can I grow edibles in tiny spaces without soil?
Hydroponics, vertical planters, or even soilless mixes (like coconut coir) work great. Herbs, microgreens, and dwarf veggies (e.g., ‘Tiny Tim’ tomatoes) thrive in 5-gallon containers. Just ensure proper drainage and nutrients—urban growers swear by self-watering systems for consistency.
How do I troubleshoot pests in a home-sown garden?
Start with prevention: Use row covers for cabbage moths, companion plants (marigolds deter aphids), or neem oil sprays. For stubborn issues, handpick pests early or introduce ladybugs. Overwatering? Check drainage—root rot is a sneaky culprit in containers. Quick fix: Diatomaceous earth () for soil-dwelling pests.
Are home-sown gardens cost-effective long-term?
Yes! Seeds are 90% cheaper than store-bought plants, and homegrown produce avoids shipping costs. In 1 year, a 4’x4’ raised bed can yield $600+ in veggies (vs. $200 spent on seeds/soil). Bonus: Compost kitchen scraps to slash fertilizer expenses. Urban gardeners often recoup costs in season 1!
What’s the easiest low-maintenance plant for beginners?
Try bush beans or Swiss chard—they’re forgiving, fast-growing, and thrive in partial shade. For herbs, basil or mint (in containers!) need minimal care. Pro tip: Use self-watering pots () to cut chores by 50%. Even balconies can host these!
Wrapping up and next steps
Creating a home-sown garden in compact urban spaces isn’t just possible—it’s a rewarding way to bring nature, color, and life to your doorstep, no matter the season! 🌱 From selecting the right containers to layering plants for year-round beauty, every step builds a thriving oasis that reflects your style and needs.
Whether you’re a beginner or a seasoned green thumb, the key is to start small, stay consistent, and enjoy the process.
Ready to turn your vision into reality? Pick one plant or container this weekend—your future garden will thank you! 🌿