Pests and Diseases
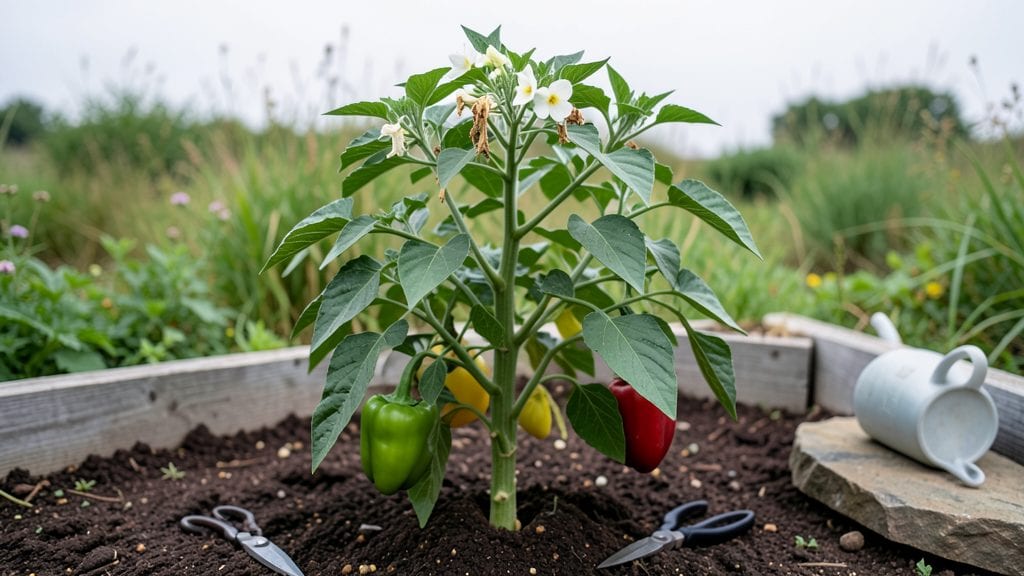
Here are pepper gardening tips you’ll want to bookmark—growing peppers from seed to harvest feels like unlocking a spice cabinet you never knew you had. 🌿 I’ve grown over a dozen varieties—from sweet bell peppers to fiery jalapeños—and the key to success isn’t just sun and water, but... understanding how peppers really thrive.
Most gardeners overwater or crowd their plants, leading to weak stems and bitter fruit. I’ll show you how to avoid those mistakes and get peppers that are plump, flavorful, and productive all season.
The foundation starts with soil that drains well but holds moisture—think crumbly, not soggy. Pepper plants also need full sun (at least 6–8 hours daily) and consistent warmth, so I always plant after the last frost when soil temps hit 60°F. A simple trick I swear by?
Using black plastic mulch to warm the soil faster and keep weeds down. Once planted, water at the base (never overhead) and feed every 2–3 weeks with a balanced fertilizer. This combo turns first-time gardeners into pepper pros.
By midsummer, you’ll be harvesting peppers that outshine store-bought in both flavor and quantity. The plants stay compact, the fruit ripens evenly, and pests like aphids barely stand a chance when you use companion plants like basil or marigolds.
Even in cooler climates, a little row cover or greenhouse extension keeps the harvest going. The best part? No more guessing—just reliable, bold peppers that make every dish pop.
Whether you’re growing in containers or a full garden bed, these tips scale easily. The secret isn’t complicated—it’s about working with the plant’s natural rhythm. Let’s get those seeds in the ground (or pots) and turn your green thumb into a pepper powerhouse.
📚 In This Guide
- What you need
- Instructions
- Tips and common mistakes
- Wrapping up and next steps
What you need
- ● Seeds or Seedlings: Choose disease-resistant varieties (e.g., Capsicum annuum, Capsicum frutescens, or Capsicum chinense). Quantity: 3–6 plants per variety (for a small garden) or 10+ for larger harvests.
- ● Containers or Garden Beds: Containers: 5–10 gallon pots (with drainage holes) for each plant. Garden beds: Well-draining soil, 12–18 inches deep, in full sun (6+ hours/day).
- ● Soil: Potting mix: High-quality, organic blend (e.g., Miracle-Gro or Fox Farm). Garden soil: Amend with compost (50% soil, 50% compost) for nutrient-rich beds.
- ● Fertilizer: Balanced organic fertilizer (e.g., 10-10-10 or fish emulsion). Slow-release granules (e.g., Osmocote) for extended feeding.
- ● Support Structures: Cages or stakes (5–6 feet tall) for tall varieties (e.g., jalapeños, bell peppers).
- ● Watering Supplies: Drip irrigation or watering can (with a rose attachment for gentle watering).
- ● Pest & Disease Prevention: Neem oil or insecticidal soap (for aphids, spider mites). Copper spray (to prevent bacterial spots). Row covers (floating fabric) for early-season protection.
- ● Mulch: Straw or wood chips to retain moisture and suppress weeds.
- ● pH Test Kit: Ensure soil pH is 6.0–7.0 (peppers thrive in slightly acidic soil).
- ● Growth Regulators: Gibberellic acid (for larger peppers) or humic acid (for root health).
- ● Pruning Shears: For trimming excess foliage and shaping plants.
- ● Harvesting Gloves: Protect your hands from spicy oils (especially for habaneros or ghost peppers).
Step-by-Step instructions for growing peppers like a pro
Here’s how to cultivate peppers that thrive all year—with tricks to keep pests at bay.
🌱 Step 1: Start Seeds Indoors for Early Growth
Begin seeds 8-10 weeks before your last frost date. Fill seed trays with the seed-starting mix and moisten it until damp but not soggy. Plant seeds ¼ inch deep—any deeper and they’ll struggle to break through the soil. Cover lightly with more mix, then mist gently with water until the surface looks evenly moist.
Place the trays in a warm spot, ideally on a seedling heat mat set to 75-80°F. Peppers germinate best in warmth, and you’ll see sprouts in 7-14 days. Once they emerge, move them to a sunny window or under grow lights for 14-16 hours daily. Watch for leggy stems—they’re a sign the light isn’t strong enough, so adjust immediately.
☀️ Step 2: Transplant Seedlings When Warmth Arrives
Wait until soil temperatures reach 60°F or warmer—peppers hate cold soil. Harden off seedlings by placing them outside in a sheltered spot for 1-2 hours the first day, gradually increasing time over 7-10 days. Choose a location with full sun (6-8 hours daily) and well-draining soil.
Dig holes slightly larger than the root ball and space plants 18-24 inches apart to allow airflow. Plant deeply, burying stems up to the first set of leaves—this encourages stronger root growth. Water deeply right after transplanting to settle the soil and reduce shock. Mulch around the base with straw mulch to retain moisture and suppress weeds.
💧 Step 3: Water and Feed for Maximum Yield
Peppers need consistent moisture—water deeply 1-2 times per week, aiming for 1 inch of water per week. Let the top inch of soil dry out between waterings to prevent root rot. Water at the base in the morning to avoid fungal issues, and avoid wetting leaves, which attracts pests.
Fertilize every 2-3 weeks with balanced fertilizer (10-10-10) once flowers appear. Peppers are heavy feeders, so don’t skimp—you’ll see bigger, sweeter peppers. Yellowing leaves? You’re overwatering. Drooping plants? They need water. Adjust based on what you see, not a rigid schedule.
✂️ Step 4: Prune and Protect for Pest-Free Peppers
Pinch off the first few flowers to encourage bushier growth and stronger stems. Once plants are established, prune suckers (small shoots growing between the main stem and branches) to focus energy on fruit production. Remove any diseased or yellowing leaves immediately to prevent spread.
Pests like aphids and spider mites love peppers. Spray plants with neem oil weekly as a preventative measure. For existing infestations, mix 1 tablespoon of neem oil per quart of water and apply thoroughly. Repeat every 5-7 days until pests are gone. A strong blast of water also works for aphids—just do it early in the day so leaves dry quickly.
🌿 Step 5: Harvest and Extend the Season
Harvest peppers when they reach full color and size—this encourages more production. Use pruning shears to cut stems cleanly, leaving a small portion attached to the plant. Store harvested peppers in a cool, dry place or preserve them by pickling, drying, or freezing.
To extend the season, cover plants with frost cloth when temperatures drop below 50°F. You can also bring potted peppers indoors near a sunny window or under grow lights for a winter harvest. With the right care, your peppers will keep producing well into fall—and maybe even winter!
Tips & tricks for perfect pepper gardening
Here's what nobody tells you about growing peppers that'll make all the difference between a decent harvest and a bountiful one.
Seed-Starting Secret: The 8-10 week indoor starting window might seem strict, but trust me on this—peppers need that time to develop strong roots before facing outdoor conditions. I've learned the hard way that rushing this step leads to weak seedlings that struggle in the garden. Use clear plastic domes or plastic wrap over your seed trays to create a greenhouse effect, which helps maintain that crucial 75-80°F warmth without extra equipment. This little trick can cut your germination time by 2-3 days!
Transplanting Technique: When hardening off seedlings in Step 2, I always start with just 1-2 hours on day one—no matter what the instructions say. The key is gradual acclimation. I've seen seedlings go into shock when moved too quickly to full sun. After that first day, I increase exposure by 1 hour each day until they're ready for full sun. Also, transplant on an overcast day or in late afternoon to avoid stress from intense sunlight.
Pest Prevention: That weekly neem oil spray in Step 4 is your best defense, but here's the thing—timing matters. Apply it in the early morning when pests are least active and the solution has time to dry before evening dew forms. I've noticed that applying neem oil too late in the day can actually encourage fungal growth. For extra protection, sprinkle diatomaceous earth around plant bases—it's non-toxic and creates a barrier that deters crawling pests.
Lighting Hack: If you're using grow lights for that 14-16 hour daily requirement in Step 1, don't just set them on a timer. I've found that using a combination of fluorescent and LED grow lights gives better results—fluorescents for broad spectrum light and LEDs for intensity. Position lights 6 inches above seedlings and adjust as they grow. The goal is to mimic natural sunlight intensity, not just duration.
Pro Tips for Pepper Gardening Tips
- Here's what nobody tells you about growing peppers that'll make all the difference between a decent harvest and a bountiful one.
- Seed-Starting Secret: The 8-10 week indoor starting window might seem strict, but trust me on this—peppers need that time to develop strong roots before facing outdoor conditions.
- Transplanting Technique: When hardening off seedlings in Step 2, I always start with just 1-2 hours on day one—no matter what the instructions say.
Frequently asked questions
Got questions about growing peppers like a pro? Here are some of the most common concerns—and their answers—to help you cultivate a thriving garden all year round.
How do I prevent pests from destroying my pepper plants?
Use a mix of physical barriers (like row covers or netting) and natural repellents such as neem oil or garlic spray. Introduce beneficial insects like ladybugs or lacewings to keep aphids and spider mites at bay. Regularly inspect plants for early signs of trouble—act fast!
When is the best time to harvest peppers?
Most peppers are ready to pick when they’re firm, glossy, and reach their mature color (e.g., red, green, or yellow). For bell peppers, harvest when fully colored but still crisp. For hot peppers like jalapeños, pick when they’re firm and vibrant—the longer they stay on the plant, the hotter they get! Use sharp scissors or pruners to avoid damaging the plant.
Can I grow peppers in containers, and what’s the best setup?
Peppers thrive in containers as long as the pot is at least 5 gallons with drainage holes. Use a well-draining potting mix and place the container in a spot that gets 6–8 hours of sunlight daily. Dwarf varieties like ‘Shishito’ or ‘Pepperoncini’ work best in tight spaces. Just keep an eye on watering—containers dry out faster!
Why are my pepper plants wilting, even with plenty of water?
Wilting can signal overwatering (root rot), underwatering, or heat stress. Check the soil moisture—it should feel damp but not soggy. If roots are mushy, your plant may have root rot. For heat stress, provide afternoon shade and mulch to retain moisture. Yellow leaves? Could also mean nutrient deficiency—try a balanced fertilizer.
Can I grow peppers year-round, or do they need a break?
Peppers are warm-weather lovers and thrive in temperatures between 70–90°F. In cooler climates, grow them indoors near a sunny window or under grow lights during winter. If you’re in a mild zone, use row covers or a greenhouse to extend the season. They’ll reward you with peppers even in fall or early spring!
Wrapping up and next steps
Growing your own peppers is a rewarding journey—packed with flavor, freshness, and the satisfaction of beating pests naturally! 🌱 With the right soil prep, organic defenses, and consistent care, your garden can thrive year-round.
Remember, even small steps like companion planting or neem oil sprays make a big difference.
Ready to take the next step? Start by planting a single pepper variety this season and experiment with the tips you’ve learned. Soon, you’ll be harvesting vibrant, pest-free peppers like a pro—and maybe even sharing your secrets with fellow gardening enthusiasts! 🌶️✨