
Advice
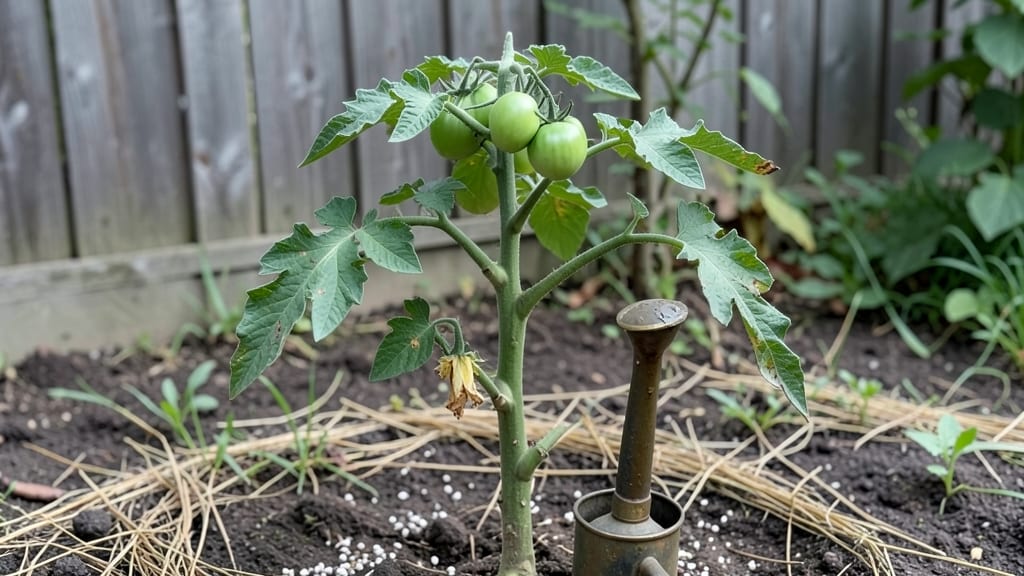
My best home gardening tips come down to three simple principles that cut the learning curve in half. The first year I gardened, I spent hours researching soil mixes and watering schedules—only to watch my plants struggle anyway.
Now I focus on consistent moisture, sunlight matching, and seasonal prep, and my garden thrives with half the effort.
Start with soil that drains well but holds moisture—mix in compost if your yard soil is heavy clay or sandy. Plant in the morning so roots settle before heat stress, and water deeply once a week (not daily shallow sips) to encourage strong roots.
Mulch with straw or leaves to lock in moisture and keep weeds at bay. These small tweaks make all the difference between wilting plants and a garden that practically grows itself.
📚 In This Guide
- What you need
- Instructions
- Tips and common mistakes
- Wrapping up and next steps
What you need
- ● Garden gloves (1 pair) – Choose breathable, durable fabric to protect your hands.
- ● Hand trowel (1) – A 6-8 inch stainless steel or ergonomic model works best for digging and transplanting.
- ● Pruning shears (1) – Bypass pruners (8-inch blades) for clean cuts on stems and branches.
- ● Garden fork (1) – A 12-inch heavy-duty fork for aerating soil and loosening roots.
- ● Watering can or hose – A 1-2 gallon can with a rose attachment for gentle watering, or a lightweight hose with adjustable nozzles.
- ● Rake (1) – A 12-inch bow rake for leveling soil and removing debris.
- ● Wheelbarrow or bucket – A 2-3 cubic foot wheelbarrow or a 5-gallon bucket for hauling soil, compost, or plants.
- ● Potting soil or garden soil – 1-2 cubic yards (for in-ground gardens) or 10-20 bags (for containers). Use a high-quality, well-draining mix with compost.
- ● Compost – 1-2 bags or a homemade bin (homemade saves money and reduces waste!). Aim for a mix of browns (leaves, cardboard) and greens (grass clippings, veggie scraps).
- ● Mulch – 2-3 bags (straw, wood chips, or shredded leaves) to retain moisture and suppress weeds.
- ● Seeds or seedlings – Choose disease-resistant varieties suited to your climate. Start with 5-10 plants/seeds per type (e.g., tomatoes, herbs, lettuce).
- ○ Containers (optional) – 5-gallon pots or raised beds (at least 12 inches deep) for herbs, veggies, or flowers if you lack yard space.
- ● Fertilizer – Organic options like compost tea, fish emulsion, or a balanced 10-10-10 granular fertilizer (follow package instructions).
- ● Plant markers – Small stakes or labels (10-20) to track what you’ve planted.
- ● A sunny spot – At least 6 hours of sunlight daily for most veggies and herbs (check plant tags for specifics!).
- ● Access to water – A nearby hose or water source for consistent hydration.
- ● Basic knowledge of your climate zone – Use the USDA Plant Hardiness Zone Map to pick the right plants for your area.
- ● Time commitment – Even "minimal effort" gardens need 10-15 minutes daily for watering and occasional checks.
Instructions: simple year-round gardening strategies for busy growers
Here’s how to keep your garden thriving with smart planning and low-maintenance techniques.
Plan for Seasonal Layers to Extend Your Growing Window
Start by dividing your garden into three zones: cool-season crops, warm-season crops, and evergreen plants like herbs or leafy greens. Cool-season plants like lettuce and spinach thrive in spring and fall, while warm-season tomatoes and peppers need summer heat. Evergreens like thyme or oregano stay productive year-round. I always sketch a simple layout, marking where each group will go—this prevents overcrowding and makes rotations easier next year.
Use row covers or cold frames in early spring or late fall to protect tender plants from frost. These lightweight fabrics trap heat and create a microclimate, letting you plant lettuce or radishes 4-6 weeks before your last frost date. Watch for condensation on the covers—if it drips onto leaves, remove the cover for a few hours to prevent fungal diseases. This small adjustment can add 3-4 weeks of growing time without extra effort.
Mulch Heavily to Save Time and Water
Spread 3-4 inches of organic mulch—like shredded leaves, straw, or wood chips—around all plants after they’re established. Mulch keeps soil temperatures stable, suppresses weeds, and locks in moisture so you water half as often. I apply mulch in early spring and again after midsummer to maintain its thickness. Avoid piling mulch directly against stems, as this can trap moisture and cause rot—keep a 2-inch gap around plant bases.
For perennials like asparagus or rhubarb, mulch even more generously (4-6 inches) to protect roots during winter. Over time, the mulch breaks down, adding nutrients to the soil naturally. You’ll notice fewer weeds popping up and less time spent watering—this is the single biggest time-saver in my garden.
Automate Watering with Simple Systems
Set up a drip irrigation system or soaker hoses to deliver water directly to roots, reducing evaporation and runoff. These systems water slowly and evenly, which encourages deeper root growth. I run mine on a timer for 15-20 minutes every morning, adjusting based on weather. During heatwaves, I extend the runtime to 30 minutes but check soil moisture—if the top 1-2 inches feel dry, add an extra cycle.
For containers, use self-watering pots or place a 5-gallon bucket filled with water near the plants. Bury a wick (like a length of rope) in the soil and dip the other end into the bucket—capillary action keeps roots moist without you lifting a finger. This works especially well for herbs or small veggies that dry out fast. The key is consistency: overwatering is just as harmful as underwatering, so always check soil moisture before adjusting.
Prune and Harvest Regularly to Encourage Productivity
Prune plants like tomatoes, peppers, and basil by pinching off the tips of new growth when they reach 3-4 inches tall. This redirects energy into fruit production instead of leafy growth. For tomatoes, also remove suckers—those little shoots that form in the joint between the stem and a branch—unless you’re growing a heirloom variety that benefits from them. You’ll see more flowers and fruit within weeks of consistent pruning.
Harvest frequently to keep plants producing. Pick beans, peas, or lettuce before they get too large, and harvest herbs like cilantro or mint by cutting just above a set of leaves. This encourages bushier growth and prevents bolting (when plants flower prematurely and go to seed). I harvest herbs every 5-7 days in summer, and my plants stay lush and productive all season long.
Rotate Crops and Refresh Soil Annually
Move plant families to new spots each year to prevent soil-borne diseases and depletion of nutrients. For example, if you grew tomatoes in a bed last year, plant beans or peas there this year—they fix nitrogen in the soil, which tomatoes love. Keep a simple garden journal to track where you planted what, even if it’s just a few notes on your phone. This prevents confusion and helps you avoid repeating mistakes.
Refresh soil health by top-dressing with 1-2 inches of compost in early spring and again in early fall. Work it lightly into the top 2-3 inches of soil—no need to dig deeply. You’ll notice stronger plants, fewer pests, and better yields with this small annual investment. Healthy soil is the foundation of low-maintenance gardening, and it pays off every season.
Tips & tricks for perfect year-round gardening
Here's how to make your low-maintenance gardening even more efficient and productive with these practical strategies.
Seasonal Timing Matters: When using row covers in Step 1 to extend your growing window, pay close attention to your specific last frost date. I always check my local weather service for this date, then mark my calendar 4-6 weeks before to start planting cool-season crops. This timing lets you take full advantage of the extended growing window without risking frost damage. For extra protection, add a layer of straw mulch around the base of plants—it helps insulate roots and keeps soil temperatures stable.
Mulch Application Technique: In Step 2, when applying your 3-4 inches of organic mulch, focus on spreading it evenly but not touching plant stems. I use a rake to create a slight depression around each plant, then fill it with mulch while keeping the 2-inch gap around stems. This prevents moisture buildup that can cause rot while still protecting roots. For perennials, I double-check that the mulch layer reaches at least 4-6 inches—this extra thickness makes a noticeable difference in winter protection.
Watering Consistency is Key: The 15-20 minute morning watering in Step 3 works perfectly for most gardens, but I've learned to adjust based on soil type. Sandy soils may need watering twice daily during heatwaves, while clay soils can go longer between waterings. Always check soil moisture by pushing your finger 1-2 inches deep—if it feels dry, that's your cue to water. For containers, I find the wick system especially helpful for herbs, as it maintains consistent moisture without the risk of overwatering that comes with manual watering.
Pruning and Harvesting Strategy: When pruning in Step 4, I make it a habit to harvest at the same time. After pinching off those 3-4 inch tips, I immediately check for ripe produce. This two-step process prevents overgrowth and bolting while giving me fresh ingredients. For tomatoes, I remove suckers every 5-7 days throughout the growing season—this consistent maintenance leads to bushier plants with more fruit. The key is to stay consistent with both pruning and harvesting to keep plants productive all season.
Pro Tips for Home Gardening Tips
- Here's how to make your low-maintenance gardening even more efficient and productive with these practical strategies.
- Seasonal Timing Matters: When using row covers in Step 1 to extend your growing window, pay close attention to your specific last frost date.
- Mulch Application Technique: In Step 2, when applying your 3-4 inches of organic mulch, focus on spreading it evenly but not touching plant stems.
Frequently asked questions
Got questions about home gardening? You’re not alone! Whether you're a beginner or a seasoned green thumb, these will help you navigate the basics—from timing to troubleshooting—so you can enjoy a thriving garden with ease.
How do I start a home garden with limited space?
No yard? No problem! Use containers, vertical planters, or even a sunny windowsill for herbs and leafy greens. Opt for compact varieties like cherry tomatoes, dwarf peppers, or lettuce. Just ensure your containers have drainage holes and get at least 6–8 hours of sunlight daily. Pro tip: Rotate pots weekly to ensure even growth!
When is the best time to plant vegetables and herbs?
Timing depends on your climate, but a general rule is to plant cool-season crops (like spinach or kale) in early spring or fall, while warm-season veggies (tomatoes, peppers) thrive in late spring or summer. Check your frost dates—plant after the last frost for warm crops and 4–6 weeks before the first frost for cool ones. Pro tip: Use a soil thermometer for precision!
What should I do if my plants look wilted or diseased?
First, check the soil moisture—wilting often means thirsty roots! For pests or disease, isolate the plant and inspect the undersides of leaves for bugs or spots. Remove affected foliage and treat with neem oil or insecticidal soap. Overwatering can also cause issues, so ensure pots have drainage. Pro tip: Prevent problems by spacing plants properly for airflow!
Can I grow vegetables indoors year-round?
Herbs like basil and parsley, plus leafy greens (spinach, arugula), thrive indoors with grow lights (12–16 hours/day). Use well-draining pots and a balanced fertilizer every 4–6 weeks. For tomatoes or peppers, a sunny window or supplemental lighting works, but expect smaller yields than outdoors. Pro tip: Mist leaves regularly to boost humidity!
What’s the cheapest way to start a home garden?
Skip store-bought seedlings—start with seeds! Dollar stores often carry seed packets, and saved seeds from grocery-store produce (like tomatoes or peppers) work too. Repurpose containers (clean yogurt cups, old buckets) and use compost from kitchen scraps. Swap cuttings or seeds with fellow gardeners to save even more. Pro tip: Check local "free" sections on Facebook Marketplace for free plants!
Wrapping up and next steps
Home gardening doesn’t have to be overwhelming—just start small, stay consistent, and let nature do the rest! 🌱 Whether you’re growing herbs on a windowsill or tending a full backyard plot, the key is observation, patience, and a little creativity.
With the right tools, seasonal adjustments, and a dash of enthusiasm, you’ll soon be harvesting fresh, homegrown goodness year-round.
Ready to take the next step? Pick one plant or tip from this guide and try it this week! Share your progress, ask questions, and watch your green thumb grow—your future meals (and your neighbors) will thank you. 🌿