Tools
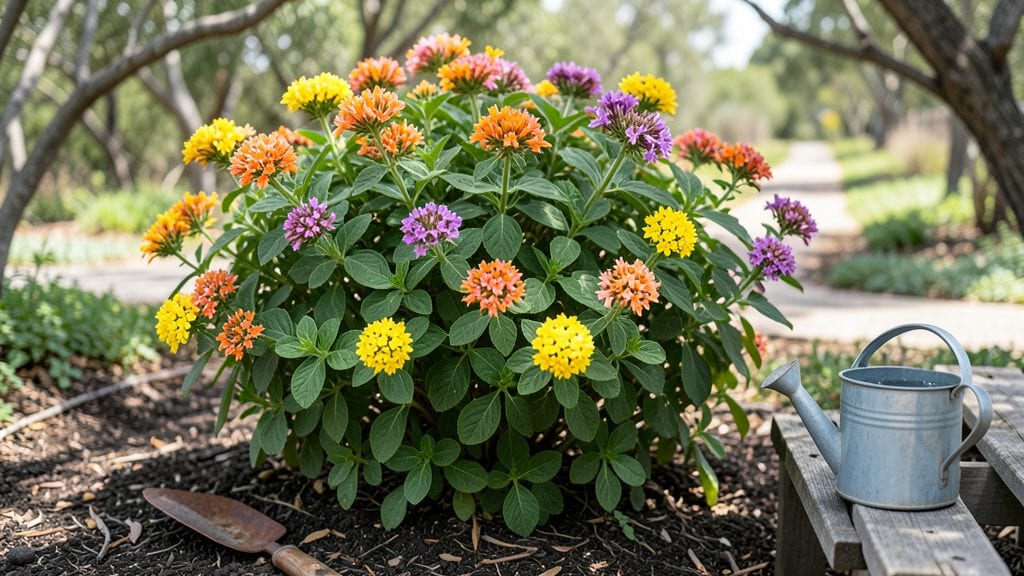
A backyard summer garden that thrives through heat and blooms well beyond the season is entirely possible—it’s all about stacking plants that love the sun while planning for the cooler months ahead. 🌿 I designed my first one after burning out my shade-loving plants in July, and now I’ve got a space that stays lush even when temperatures climb.
The trick is layering heat-tolerant perennials, annuals, and vegetables so every inch of sunlight works for something.
Start with a sun-loving foundation: drought-resistant succulents like sedum or agave at the front, mid-height shrubs like lavender or rosemary for structure, and towering sunflowers or hollyhocks for drama. Mix in edibles like cherry tomatoes, peppers, and basil—they’ll reward you with harvests while adding color.
For seating or pathways, add shade with a pergola or umbrella, then tuck in heat-sensitive plants like coleus or impatiens underneath.
By late summer, you’ll have a garden that’s still bursting with blooms and greens, even when others are wilting. The key is watering deeply but less often—once a week with mulch keeps roots cool—and rotating plants as seasons shift.
My zucchini vines now climb a trellis where they used to sprawl, and the morning sun keeps the slugs at bay.
This approach works for any yard size, from a small urban plot to a sprawling suburban backyard. The beauty? You’ll spend less time fighting the heat and more time enjoying the garden’s layered charm all year. Let’s get planting—your summer (and beyond) garden is waiting.
📚 In This Guide
- What you need
- Instructions
- Tips and common mistakes
- Wrapping up and next steps
What you need
- ● Soil & Fertilizer: 2–3 bags of high-quality potting mix (20–30 lbs each, depending on garden size)
- ● 1 bag of slow-release organic fertilizer (e.g., 10-10-10 or compost-based)
- ● 1–2 bags of mulch (shredded bark or straw for moisture retention)
- ● Plants & Seeds: 5–10 sun-loving annuals (e.g., marigolds, zinnias, or sunflowers)
- ● 3–5 perennial shrubs (e.g., lavender, rosemary, or butterfly bush)
- ● Seed packets for fast-growing veggies (e.g., tomatoes, peppers, or basil)
- ● Containers & Structures: 3–5 large pots or raised beds (12–18 inches deep, with drainage holes)
- ● 1–2 trellises or obelisks (for climbing plants like cucumbers or beans)
- ○ Optional: garden arches or pergolas (for vertical interest)
- ● Hand Tools: 1 trowel (for transplanting)
- ● 1 pruners (bypass for clean cuts)
- ● 1 hand fork (for aerating soil)
- ● Watering & Care: 1 hose with adjustable nozzle or drip irrigation kit
- ● 1–2 watering cans (for containers)
- ○ Optional: soaker hoses (to reduce evaporation)
- ● Safety & Extras: 1 pair gardening gloves (nitrile or leather)
- ● 1 sun hat or wide-brimmed hat (for those hot days!)
- ○ Optional: knee pads or ergonomic tools (for comfort)
- ● Sunlight: At least 6–8 hours of direct sun per day (check your yard’s light exposure!)
- ● Drainage: Ensure containers or beds have proper drainage (no soggy roots!)
- ● Access to Water: A nearby water source (hose or spigot)
- ● Time Commitment: Plan for 10–15 minutes daily for watering and maintenance
Instructions for designing a sun-filled backyard summer garden
Let’s build a layered garden that thrives in summer heat while offering year-round interest.
🌱 Step 1: Plan Your Sun Exposure Zones
Start by mapping your yard’s sunlight patterns. Walk through your space at different times of day—morning, noon, and evening—to identify areas with full sun (6+ hours), partial sun (3-6 hours), and shade (less than 3 hours). I sketch a rough outline on paper, marking where the sun hits hardest and where it lingers.
Full sun zones are ideal for bold annuals like sunflowers or black-eyed Susans, while partial sun works for perennials like coneflowers or daylilies. Shady spots can still shine with ferns, hostas, or impatiens. Don’t overlook vertical space—trellises or obelisks add layers without taking up ground room.
🪴 Step 2: Layer Plants by Height and Seasonal Interest
Begin with the tallest plants at the back or center of your beds, then work downward. I like to use 3-4 foot tall plants like hollyhocks or tall grasses as the backbone, followed by 2-3 foot shrubs or perennials like lavender or salvia. Fill the middle layer with 1-2 foot plants like coreopsis or black-eyed Susans, and finish with ground covers or low-spreading plants like creeping thyme or ajuga.
Mix evergreens for winter structure—think boxwoods or hemlocks—alongside seasonal bloomers. This ensures your garden stays dynamic year-round. For example, a late-summer bloomer like Russian sage pairs well with early spring bulbs like daffodils for continuous color.
☀️ Step 3: Amend Soil and Mulch for Summer Resilience
Loosen the top 6-8 inches of soil with a garden fork or tiller to improve drainage and aeration. Amend with 2-3 inches of compost to replenish nutrients lost in summer heat. I like to work in a handful of organic matter per square foot—this boosts microbial activity and helps plants absorb water more efficiently.
Top with 2-3 inches of mulch (like shredded bark or straw) to retain moisture and regulate soil temperature. Keep mulch 2 inches away from plant stems to prevent rot. Water deeply after planting to settle the soil and encourage root growth. You’ll see healthier foliage within weeks as roots access nutrients more easily.
✂️ Step 4: Water Deeply and Establish a Routine
Water newly planted beds deeply 2-3 times per week until roots establish, which usually takes 4-6 weeks. I set a timer for 15-20 minutes per zone to ensure thorough saturation—surface watering encourages shallow roots that struggle in summer heat. Early morning is best to reduce evaporation and fungal risks.
Once established, most summer plants tolerate 1 inch of water per week, including rainfall. Check soil moisture by sticking your finger 1-2 inches deep—if it’s dry, it’s time to water. Group plants with similar needs together to simplify care. For example, drought-tolerant succulents and lavender go in one area, while thirsty impatiens get their own spot.
🌿 Step 5: Maintain and Refresh Through the Seasons
Deadhead spent blooms regularly to encourage continuous flowering and prevent seed formation. I snip back leggy stems to promote bushier growth—this keeps plants compact and healthy. Fertilize lightly every 6-8 weeks with a balanced, slow-release fertilizer to avoid burning roots in hot weather.
Monitor for pests like aphids or powdery mildew, especially in humid summers. A strong spray of water often dislodges soft-bodied insects, while neem oil treats fungal issues preemptively. Rotate plants seasonally—swap out summer annuals for fall mums or winter pansies to keep the garden vibrant year-round.
Tips & tricks for perfect sun-filled backyard summer gardens
Creating a thriving summer garden that stays beautiful year-round takes a few strategic moves—here's what I've learned from years of trial and error.
Sunlight Mapping Hack: Use a simple app or even a notebook to track sunlight patterns over a week. I mark my yard with chalk to visualize the sun's path—this helps me place sun-loving plants like black-eyed Susans exactly where they'll thrive for those crucial 6+ hours of full sun. Don't guess where the sun hits hardest; measure it! This prevents underperforming plants that struggle with too much shade.
Layering Secret: When arranging your 3-4 foot tall backbone plants like hollyhocks, leave at least 12 inches of space between them. This creates airflow that prevents fungal diseases while still maintaining that dramatic vertical impact. I like to stagger plants in odd numbers—three hollyhocks spaced irregularly looks more natural than four in a straight line.
Soil Prep Shortcut: Rent a rototiller for just a few hours if you're working with heavy clay soil—it makes amending that 6-8 inch layer so much easier. For smaller gardens, a broadfork works perfectly and won't compact the soil like a shovel. After tilling, I always do a quick soil test with a DIY kit (just mix soil with water and observe the bubbles)—this tells me if I need more compost before planting.
Watering Wisdom: That 15-20 minute timer session might feel excessive at first, but it's the key to deep root establishment. I set my timer for 10 minutes on, 5 minutes off to let water soak in properly. For newly planted beds, I also water in the evening during the first 4-6 weeks to reduce evaporation—this gives young roots a better chance to establish before summer heat kicks in.
Pro Tips for Backyard Summer Garden
- Creating a thriving summer garden that stays beautiful year-round takes a few strategic moves—here's what I've learned from years of trial and error.
- Sunlight Mapping Hack: Use a simple app or even a notebook to track sunlight patterns over a week.
- Layering Secret: When arranging your 3-4 foot tall backbone plants like hollyhocks, leave at least 12 inches of space between them.
Frequently asked questions
Got questions about creating your dream backyard summer garden?
Here are answers to the most common ones to help you get started with confidence!
What’s the best time to plant a summer garden?
For most summer crops like tomatoes, peppers, and cucumbers, plant after the last frost date in your area—typically late spring (May or early June). Warm-season veggies thrive in soil temperatures above 60°F. Check your local frost dates or use a soil thermometer to time it perfectly!
How often should I water my summer garden?
Water deeply 1-2 times per week, depending on heat and rainfall. Early morning is best to reduce evaporation. Mulch (straw or wood chips) helps retain moisture. Drip irrigation or soaker hoses are great for consistent hydration without waste!
What are the easiest low-maintenance plants for beginners?
Start with resilient picks like bush beans, zucchini, lettuce, or marigolds—they’re forgiving and prolific. Herbs like basil and mint also thrive with minimal fuss. Avoid fussy plants like okra or eggplant if you’re new!
How do I keep pests away naturally?
Try these tricks: Handpick pests (like tomato hornworms) early in the day, use neem oil or soapy water sprays, and plant companion crops (e.g., basil with tomatoes). Row covers or diatomaceous earth also work well for stubborn critters.
Can I grow a summer garden in containers or small spaces?
Use 5-gallon buckets, raised beds, or vertical planters for compact crops like peppers, herbs, or dwarf tomatoes. Ensure containers have drainage holes and use lightweight potting mix. Even a balcony can yield a bountiful harvest with the right setup!
How do I extend my garden’s season into fall?
Start by choosing cool-season crops (kale, spinach, carrots) in late summer. Use row covers or cold frames to protect plants from early frosts. Succession planting—sowing new seeds every 2-3 weeks—keeps harvests coming until frost!
Wrapping up and next steps
Creating a backyard summer garden isn’t just about adding beauty—it’s about crafting a thriving, year-round oasis that brings joy, freshness, and even homegrown goodness to your doorstep. 🌿 From sun-loving perennials to layered greenery, every plant you choose plays a role in turning your outdoor space into a vibrant, functional retreat.
Whether you’re a seasoned gardener or just starting, the key is to start small, stay consistent, and let nature do the rest!
Ready to roll up your sleeves? Pick one section of your yard this weekend—sketch a quick design, gather your tools, and dive in! Even small steps will yield big rewards as your garden grows into a sun-drenched sanctuary. Happy planting! 🌞