Container Gardens
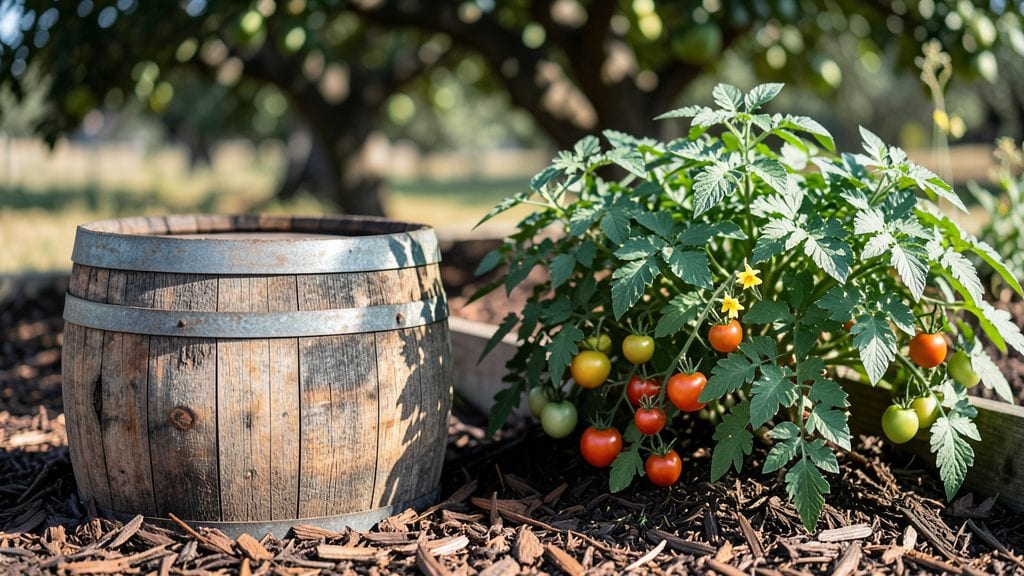
Transforming a wine barrel garden into your backyard's standout feature starts with that first rustic planter. 🌿 I stumbled upon this idea after seeing how a single barrel could hold both soil and style—no fancy tools or deep pockets required.
The charm lies in its raw, repurposed look, turning something old into something thriving.
You'll need just a few basics: a clean, dry barrel (or two), some potting mix, and plants that love containers. Succulents, herbs, and trailing flowers like petunias take to them beautifully.
The key is drilling drainage holes—skip this, and you're asking for root rot. A coat of non-toxic sealant keeps the wood sturdy without blocking airflow.
Imagine a vertical garden of herbs along your fence or a single barrel bursting with petunias at your patio's center. The results are instant curb appeal, plus you get a functional planter that doubles as decor.
Even small spaces benefit—stack barrels for a tiered look or line them up for a rustic border.
Here's the best part: these planters age gracefully, developing a patina over time that only adds character. Start with one barrel, experiment with plants, and let your space tell its own story. The possibilities are as endless as your garden dreams.
📚 In This Guide
- What you need
- Instructions
- Tips and common mistakes
- Wrapping up and next steps
What you need
- ● 1-2 wine barrels (food-grade, clean, and free of labels/stickers—bonus if they’re oak!)
- ● Drill or power saw (to cut drainage holes—¼" to ½" diameter)
- ● Sandpaper or electric sander (120-grit for smoothing rough edges)
- ● Drill bits (¼"–½" for drainage + 1"–1½" for overflow holes)
- ● Garden soil mix (well-draining potting soil, 10–20 lbs per barrel)
- ● Drainage layer (gravel, pebbles, or broken pottery—2–3 inches)
- ● Plants! 🌱 (Container-friendly options like herbs, succulents, or trailing flowers)
- ● Staple gun or heavy-duty zip ties (to secure fabric liners, if used)
- ● Landscape fabric (to line the barrel and prevent soil loss)
- ● Barrel feet or cinder blocks (for elevation and stability)
- ● Paint or stain (weather-resistant, non-toxic—think rustic black, sage green, or natural wood tones!)
- ● Barrel tap or spigot (for easy watering—DIY with a hose bibb adapter)
- ● Decorative accents (twine, moss, or metal tags for a cozy vibe)
- ● Barrel topper or lid (if storing indoors or keeping critters out)
Step-by-Step instructions for creating a wine barrel garden
Turn that old barrel into a stunning, functional garden with these simple yet stylish steps.
🪴 Step 1: Clean and Prepare the Barrel
Start by thoroughly cleaning the barrel with a mixture of 1 part vinegar to 3 parts water. Scrub away any residual wine stains or grime using a stiff brush—this ensures a fresh base for your plants. Rinse it completely and let it dry in the sun for 24-48 hours. If the barrel has a lingering odor, sprinkle baking soda inside, let it sit for a few hours, then rinse again.
Once dry, inspect the barrel for any cracks or holes. Seal them with waterproof wood sealant or silicone caulk to prevent soil from leaking out and pests from getting in. This step is critical—skipping it can turn your barrel into a soggy mess within weeks. Let the sealant cure fully before moving on.
🌱 Step 2: Add Drainage and Soil
Drill 2-4 drainage holes near the bottom of the barrel if they don’t already exist. These holes are non-negotiable—without them, roots will suffocate and your plants will rot. Place a plastic nursery pot or landscape fabric over the holes to keep soil from washing out while still allowing water to escape.
Fill the barrel with 4-6 inches of gravel or broken pottery at the bottom for extra drainage. Then, add 2-3 inches of coarse perlite or pumice on top of the gravel. This layer prevents soil from clogging the drainage holes and keeps roots aerated. Finally, fill the barrel with high-quality potting mix up to 2 inches below the rim—this leaves room for watering without spillage.
☀️ Step 3: Plant Your Garden
Choose plants that thrive in containers, like herbs, succulents, or shallow-rooted vegetables. Dig a hole in the soil twice as wide as the root ball but no deeper than the plant’s current depth. Gently remove the plant from its nursery pot, loosen the roots if they’re tightly bound, and place it in the hole. Fill around the roots with soil, pressing lightly to remove air pockets.
For a 4-barrel garden, space plants 6-12 inches apart depending on their mature size. Group plants with similar water needs together—this makes maintenance a breeze. Water deeply right after planting to help the soil settle and eliminate air gaps. You’ll know you’ve done it right when the soil looks evenly moist but not soggy.
💧 Step 4: Water and Maintain
Water the barrel garden deeply once a week, or more often in hot, dry weather. Check the soil 1 inch below the surface—if it feels dry, it’s time to water. Avoid letting the barrel sit in standing water, as this can lead to root rot. A self-watering system or drip irrigation can help maintain consistent moisture without overwatering.
Fertilize every 4-6 weeks with a balanced, slow-release fertilizer to keep plants healthy. Mulch the top of the soil with 2-3 inches of organic mulch to retain moisture and suppress weeds. This also adds to the rustic charm of your barrel garden. Watch for pests like aphids or spider mites—spray with neem oil if you spot any early signs of trouble.
✂️ Step 5: Style and Enjoy
Let your creativity shine by styling the barrel garden to match your outdoor space. Paint the barrel with weather-resistant outdoor paint or leave it natural for a rustic look. Add solar-powered string lights or weatherproof cushions for extra coziness. Place the barrels on a patio, deck, or garden bed where they’ll get at least 6 hours of sunlight daily—most plants will thrive with this exposure.
Rotate the barrels every few weeks so all sides get equal sun. This ensures even growth and prevents plants from leaning toward the light. With proper care, your wine barrel garden will stay vibrant and stylish for years to come. Plus, you’ll love the conversation starter it adds to your outdoor space!
Tips & tricks for perfect wine barrel garden
Here's what I learned the hard way after transforming my own barrels into thriving gardens.
Drying Time Matters: That 24-48 hour drying period in Step 1 is non-negotiable. I tried skipping it once and ended up with moldy barrels—don't make my mistake! Place them in direct sunlight for best results, but if you're in a rainy climate, extend drying to 72 hours. A fully dry barrel prevents all future moisture problems.
Drainage Hack: If you don't have a drill, use a hammer and nail to create those 2-4 drainage holes in Step 2. Just be careful not to make them too large—you want to keep soil in while allowing water out. I've seen people use broken terracotta pots as drainage layers when they can't get gravel, and it works surprisingly well.
Plant Selection Strategy: For your 4-barrel garden, I recommend grouping plants by height—tall plants like rosemary in the center barrels, medium herbs like thyme around them, and low-growing plants like oregano in the outer barrels. This creates natural tiers that look stunning and makes harvesting easier. The 6-12 inch spacing in Step 3 gives each plant room to grow without competing for nutrients.
Sunlight Rotation Reminder: That "every few weeks" rotation in Step 5 is crucial for even growth. Set a calendar reminder every 3 weeks so you don't forget—uneven sunlight causes lopsided plants. I mark my barrels with paint dots to track which side gets sun each time. This simple trick keeps your garden looking balanced and healthy year-round.
Pro Tips for Wine Barrel Garden
- Here's what I learned the hard way after transforming my own barrels into thriving gardens.
- Drying Time Matters: That 24-48 hour drying period in Step 1 is non-negotiable.
- Drainage Hack: If you don't have a drill, use a hammer and nail to create those 2-4 drainage holes in Step 2.
Frequently asked questions
Got questions about turning wine barrels into stunning garden planters? Here are some of the most common ones—and their answers!
Can I use any type of wine barrel for a garden?
Not all barrels work! Look for food-grade barrels (often labeled "Bordeaux" or "Burgundy") made from oak or chestnut. Avoid barrels that held industrial chemicals or wine with high acidity, as they may leach harmful residues. If unsure, clean thoroughly with a vinegar solution before use.
How long does it take for a wine barrel garden to establish?
Patience is key! Most plants (like herbs, succulents, or shallow-rooted veggies) show noticeable growth in 4–6 weeks, while deeper-rooted plants (e.g., tomatoes) may take 8–12 weeks to thrive. Drainage holes and proper soil prep speed up the process—aim for well-draining, nutrient-rich soil mixed with compost.
Are there cheaper alternatives to wine barrels?
Repurpose whiskey barrels (also food-safe), half wine barrels (cut in half for smaller spaces), or even large plastic barrels (drill drainage holes). Check local wineries, breweries, or Facebook Marketplace for donations. DIY pallet wood planters or stacked cinder blocks can mimic the rustic look too!
How do I keep pests out of my wine barrel garden?
Pests love cozy barrels! Prevent them with copper tape around the rim, neem oil sprays, or companion planting (e.g., marigolds). For troubleshooting, handpick bugs early or introduce beneficial nematodes for soil-dwelling pests. Elevate barrels slightly off the ground to deter slugs and rodents.
Can wine barrel gardens survive winter?
With prep, yes! Drain excess water before frost, wrap the barrel in burlap or insulation, and empty tender plants (or move them indoors). Evergreens, herbs like rosemary, and cold-hardy veggies (kale, spinach) can often overwinter. In extreme climates, store barrels upside-down in a shed.
Wrapping up and next steps
A wine barrel garden isn’t just a creative way to grow plants—it’s a charming, functional piece of decor that breathes personality into your outdoor space. 🌿 Whether you’re a seasoned gardener or a beginner, these rustic planters prove that sustainability and style can go hand in hand.
The best part? You’ve got everything you need to start small or go bold!
Ready to take the next step? Grab a barrel, pick your plants, and let your green thumb shine! Share your progress with us—we’d love to see your unique creations! 📸