Picking
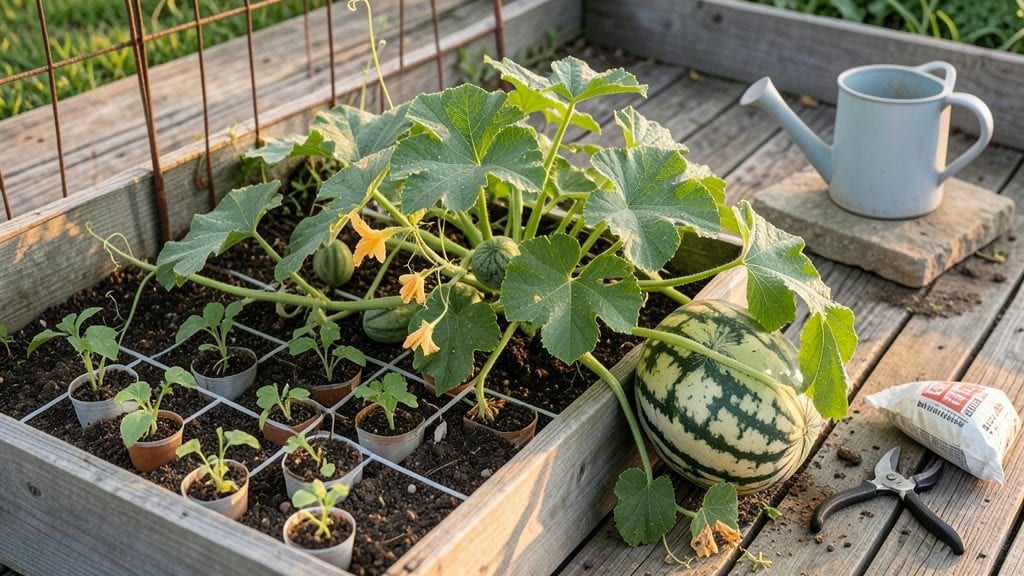
Growing watermelons in square foot gardening turns tiny patches into sweet harvests. ✨ I thought big vines meant big space—until I squeezed two healthy plants into a 4x4-foot plot and still got fruit. The secret isn't shrinking the melons; it's training the vines to work with you.
Start with 1-2 plants per square foot (yes, really) and use sturdy trellises or cages to lift vines off the ground. Your soil needs to be rich, warm, and well-draining—think compost-heavy mix with a side of aged manure.
Plant seeds in mounds (not rows) to improve drainage and reduce rot risks.
By mid-summer, you'll watch those vines climb while melons stay off the damp soil, cutting disease risks. The real magic happens when you prune side shoots to focus energy on one main vine—this keeps fruit size manageable while maximizing yield.
Even in small spaces, you'll end up with 6-8 melons per plant that taste sweeter than store-bought.
Works for patios, rooftops, or backyard corners—just ensure 6+ hours of direct sun daily. The only trade-off is smaller melons, but the flavor? Worth every inch. Let's make your space work harder than you thought possible.
📚 In This Guide
- What you need
- Instructions
- Tips and common mistakes
- Wrapping up and next steps
What you need
- ● Garden bed (4’x4’ raised or in-ground) – Ensure it’s at least 12 inches deep for watermelon roots.
- ● Watermelon seeds – 1 seed per square foot (3-4 seeds total for a 4’x4’ bed). Choose compact varieties like 'Sugar Baby' or 'Tiny Tim'.
- ● High-quality potting mix or compost – 1 cubic yard (or pre-mixed soil with 50% compost). Watermelons love nutrient-rich, well-draining soil!
- ● Organic fertilizer – Balanced 10-10-10 or compost tea (follow package instructions for application).
- ● Drip irrigation or soaker hoses – Watermelons need 1-2 inches of water weekly; avoid overhead watering to prevent disease.
- ○ Black plastic mulch (optional but recommended) – 4’x4’ sheet to retain moisture and warmth.
- ○ Trellis or small stakes (optional) – Helps support vines if space is tight.
- ● Epsom salt (1 tbsp per plant) – Boosts magnesium for sweeter melons.
- ● Mulch (straw or grass clippings) – 2-3 inches thick to suppress weeds.
- ● Row covers (early season) – Protects seedlings from pests and cold snaps.
- ● Garden gloves & kneeling pad – For comfy planting and maintenance!
Step-by-Step instructions for growing watermelons in square foot gardens
Perfect for small spaces, this method delivers sweet, compact harvests without sacrificing yield.
🌱 Step 1: Prepare the Square Foot Bed and Soil
Square foot gardening thrives on loose, nutrient-rich soil. Start by filling your 1-foot square with a mix of 50% high-quality potting soil, 30% compost, and 20% perlite or vermiculite for drainage. Fluff the mix with a garden fork to create air pockets—watermelon roots need room to spread.
Add a handful of balanced organic fertilizer (10-10-10) to the top layer, then rake lightly to distribute. The goal is a crumbly texture that holds moisture but doesn’t compact. Press down gently to remove air pockets, then water thoroughly until the soil is evenly damp to a depth of 2 inches.
🌿 Step 2: Plant Watermelon Seeds or Transplants
For a 1-foot square, plant 1 seed or transplant in the center. If using seeds, sow 1 inch deep and cover lightly with soil. Watermelons need warmth to germinate—wait until soil temperatures reach 70°F or higher before planting. I like to use a soil thermometer to confirm.
If starting with transplants, dig a hole slightly larger than the root ball and place the plant so the top of the root ball sits ½ inch below soil level. This encourages strong root growth. Water immediately after planting to settle the soil around the roots and remove any air gaps.
☀️ Step 3: Provide Support and Optimal Growing Conditions
Watermelons are vining plants, so install a 5-foot tall trellis or cage in the center of the square foot bed. As vines grow, gently weave them through the support to keep the fruit off the ground and improve air circulation. This also saves space—your vines will sprawl vertically instead of horizontally.
Ensure the bed receives 6-8 hours of direct sunlight daily. Watermelons wilt quickly in heat, so water deeply every 2-3 days during dry spells, aiming for 1-2 gallons per square foot. Mulch with 2 inches of straw to retain moisture and suppress weeds. You’ll know your plant is thriving when leaves stay deep green and vines grow 6-12 inches per week.
💧 Step 4: Monitor Growth and Fertilize Strategically
When vines reach 3 feet long, begin fertilizing every 3-4 weeks with a low-nitrogen, high-potassium fertilizer (5-10-10) to encourage flowering and fruit development. Apply fertilizer to the soil around the base, not the leaves, to avoid burns. Water immediately after to distribute nutrients.
Watch for male and female flowers—female flowers have a tiny watermelon at their base. Once you spot a female flower, hand-pollinate it by gently transferring pollen from male flowers with a small brush. This ensures better fruit set, especially in containers or small spaces where bees may not visit as frequently.
⏰ Step 5: Harvest at Peak Ripeness
Watermelons are ready to harvest 75-90 days after planting, when the tendril near the stem turns brown and the fruit sounds hollow when tapped. For a 1-foot square, expect 1-2 small watermelons (6-8 inches in diameter). Use pruning shears to cut the stem, leaving 1 inch of stem attached to preserve freshness.
Store harvested watermelons in a cool, dry place (50-55°F) for up to 2 weeks. If your plant produces more fruit than the square can support, harvest the smallest melons first—they’ll ripen faster and leave room for larger ones to develop.
Tips & tricks for perfect watermelon square foot gardening
These space-saving strategies will help you maximize your small garden while ensuring sweet, healthy watermelons every season.
Soil Preparation Secret: The 50-30-20 soil mix in Step 1 is non-negotiable for watermelons—this combination prevents compaction while providing the perfect balance of nutrients and drainage. I've found that adding a thin layer of coarse sand (about ½ cup per square foot) to the perlite/vermiculite portion helps create even better air pockets for those sprawling roots. After watering to 2 inches depth, let the soil settle for 10 minutes before planting—this prevents seed displacement when you add your single seed or transplant.
Germination Temperature Tip: That 70°F soil temperature requirement in Step 2 is critical—any cooler and germination slows dramatically. I've used a clear plastic dome over the square foot bed to create a mini greenhouse effect, raising soil temps by 5-10°F. Just remove it once you see sprouts emerging. For transplants, the ½-inch below soil level placement is key—it encourages root expansion without burying the stem, which can cause rot.
Vertical Growth Strategy: The 5-foot trellis in Step 3 isn't just for aesthetics—it's about physics. Watermelon vines can grow up to 20 feet in ideal conditions, but in a 1-foot square, vertical training prevents fruit from touching wet soil (which causes rot) and improves air circulation. I like to use a spiral trellis design that lets vines grow upward in a compact coil, saving even more space. When training vines, avoid wrapping them tightly—they need room to breathe and photosynthesize.
Fertilizer Timing: The 3-4 week fertilization schedule in Step 4 works because watermelons have two distinct growth phases: vegetative (leaf/vine growth) and reproductive (flower/fruit development). The switch to low-nitrogen, high-potassium (5-10-10) fertilizer at 3 feet vine length signals the plant it's time to focus on fruiting. I've found that applying fertilizer in the late afternoon prevents leaf burn from afternoon sun exposure, and always watering immediately after helps distribute nutrients directly to the roots.
Pro Tips for Watermelon Square Foot Gardening
- These space-saving strategies will help you maximize your small garden while ensuring sweet, healthy watermelons every season.
- Soil Preparation Secret: The 50-30-20 soil mix in Step 1 is non-negotiable for watermelons—this combination prevents compaction while providing the perfect balance of nutrients and drainage.
- Germination Temperature Tip: That 70°F soil temperature requirement in Step 2 is critical—any cooler and germination slows dramatically.
Frequently asked questions
Can watermelons really thrive in just 1 square foot?
Yes! With the right variety (like 'Sugar Baby' or 'Tiny Tim') and proper care, watermelons can flourish in a 1 sq ft space. These compact varieties focus on smaller fruits while still delivering sweet, juicy rewards. Just ensure they get full sun (6+ hours daily) and support, like a trellis or cage.
When is the best time to plant watermelon seeds in a square foot garden?
Plant seeds after the last frost when soil is at least 70°F (21°C). In most regions, this means late spring to early summer. For cooler climates, start seeds indoors 4-6 weeks before transplanting. Watermelons are warm-weather lovers—rush them, and they’ll sulk!
How often should I water watermelons in a square foot garden?
Watermelons need consistent moisture—about 1-2 inches of water per week, especially during flowering and fruiting. In square foot gardens, mulch heavily (straw or grass clippings) to retain moisture and prevent soil-borne diseases. Avoid overhead watering to reduce fungal risks.
What pests or diseases should I watch for in a small-space watermelon garden?
Common threats include aphids, cucumber beetles, and powdery mildew. Prevent pests with row covers early on, and handpick beetles. For mildew, improve airflow and spray neem oil. Monitor leaves daily—early action keeps your melons thriving!
What if I don’t have a square foot garden? Can I grow watermelons in containers?
Use a 5-gallon bucket or large pot (at least 12" deep) with drainage holes. Fill with high-quality potting mix, and choose a bush variety. Containers dry out faster, so water daily and add compost for nutrients. Just ensure the pot gets full sun!
Wrapping up and next steps
Growing watermelons in a square foot garden proves that big flavors don’t need big spaces! 🍉 With the right soil mix, compact varieties, and a little patience, you can enjoy homegrown melons—even in urban balconies or tiny backyards.
Start small, experiment with trellises or containers, and watch your confidence (and harvest) grow.
Ready to dive in? Sketch your garden layout today—whether it’s a 4x4-foot plot or a hanging basket—and let the sweet rewards begin! 🌱