Landscaping
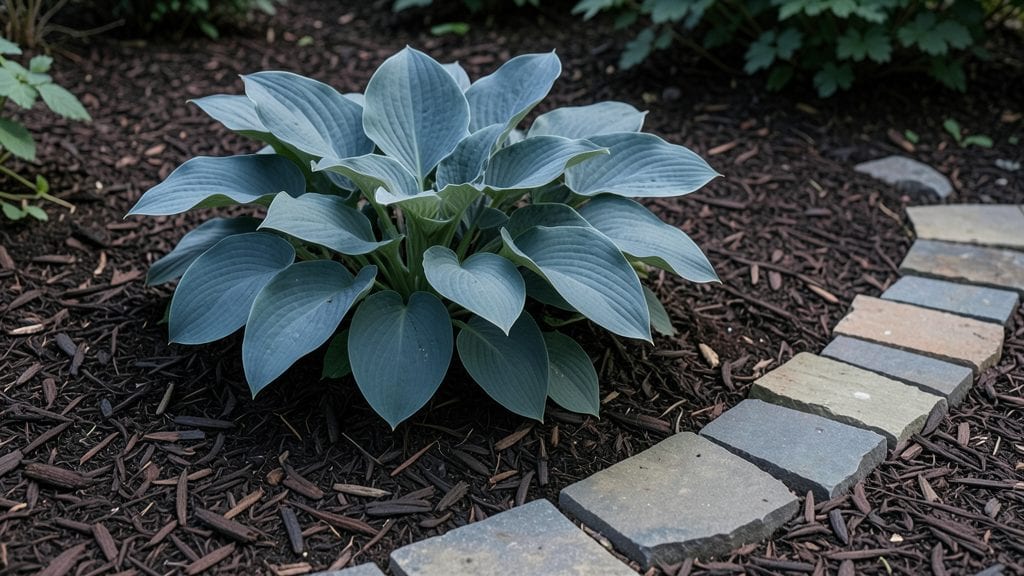
A circle garden layout turns even the smallest yard into a lush, symmetrical oasis where every plant has its perfect spot. 🌿 I stumbled upon this design after struggling with awkward rectangular beds that wasted space and looked unbalanced.
The magic happens when you arrange plants in concentric rings—each layer building on the last to create depth and movement.
The beauty of circular layouts is their adaptability: a 3-foot urban plot can hold herbs and succulents, while a 10-foot backyard becomes a pollinator paradise with perennials and shrubs.
Start with a simple 5-gallon container as your centerpiece (think ornamental grass or a small tree), then work outward with annuals, perennials, and edibles. Irrigation gets easier too—drip lines spiral naturally along the curves.
By the time you're done, you'll have a garden that feels intentional, not cramped. The symmetry makes maintenance simpler, and the layered planting creates visual drama that lasts all season.
Plus, circular beds reduce weeds near the center where foot traffic is lightest. Here's how to plan yours without overcomplicating it.
This works for any space—balconies, courtyards, or backyard corners—because the shape itself solves so many design problems. The key is starting small: sketch your circle first, then let the plants guide the layers. You'll wonder why you didn't try this sooner.
📚 In This Guide
- What you need
- Instructions
- Tips and common mistakes
- Wrapping up and next steps
What you need
- ● Garden bed fabric or landscape fabric – 1 roll (10 ft. x 25 ft.) to suppress weeds.
- ● Mulch (shredded bark, pine straw, or gravel) – 2–3 cubic yards (depends on bed size).
- ● Soil amendments – Compost (1–2 bags) or slow-release fertilizer (e.g., 10-10-10) for nutrient boost.
- ● Edging material – Flexible metal, plastic, or stone edging (50–100 ft. length).
- ● Measuring tape & string – For precise circle markings (50+ ft. tape recommended).
- ● Stakes & mallet – 6–10 stakes to mark the circle’s perimeter.
- ● Garden gloves & knee pads – Comfort is key for long projects!
- ● Wheelbarrow or bucket – For hauling soil/mulch.
- ● Shovel & rake – 1 each (for digging and leveling).
- ● Perennial plants (for structure) – 9–12 plants (e.g., hostas, daylilies, or ornamental grasses).
- ● Annuals (for color bursts) – 6–9 plants (e.g., petunias, marigolds, or pansies).
- ○ Shrubs or small trees (optional centerpiece) – 1–2 dwarf varieties (e.g., boxwood or Japanese maple).
- ○ Ground cover (optional) – Creeping thyme or clover for gaps.
- ● Decorative stones or pebbles – For a polished look (e.g., 50 lbs. of river rocks).
- ● Garden lights or solar stakes – 4–6 for evening ambiance.
- ● Trellis or arbor (if vertical plants are included) – 1 small unit for climbing roses or vines.
- ● Drip irrigation system – 50–100 ft. tubing + emitters for low-maintenance watering.
How to design a circle garden layout for small spaces
Here's the foolproof method I use to create stunning, symmetrical circle gardens that maximize beauty in limited areas.
🪴 Step 1: Mark Your Circle and Choose the Centerpiece
Start by staking out your circle using a 5-foot diameter (adjustable based on space). I use a 10-foot length of twine tied to a central stake, then loop it around to trace the perfect circle with a garden hose or spray paint. The center should feature a focal plant—something tall like a small tree, ornamental grass, or a striking shrub that draws the eye immediately.
For a 4-foot circle, scale everything down proportionally. The centerpiece should occupy about 1/3 of the circle's radius—this creates balance without overwhelming the design. I like to use a small ornamental tree or a clumping bamboo for height contrast, then work outward with mid-height plants and finally trailing flowers at the edges.
☀️ Step 2: Layer Plants by Height and Function
Divide your circle into three concentric rings—inner, middle, and outer—each with a distinct plant type. In the inner ring, place medium-height perennials like lavender, catmint, or Russian sage at 12-inch spacing. These should reach 18-24 inches tall at maturity to frame the centerpiece without blocking it.
The middle ring is where you add blooming annuals or shrubs like daisies, black-eyed Susans, or hydrangeas. Space these 18-24 inches apart and choose varieties that flower at different times for continuous color. I always include one fragrant plant in this ring—like jasmine or sweet alyssum—to engage the senses.
🌿 Step 3: Add Trailing Plants and Ground Cover
For the outer ring, select sprawling plants that cascade over the edge, such as creeping thyme, ajuga, or variegated sweet potato vine. These should be placed 12-18 inches apart and allowed to trail naturally. The goal is to create a soft, flowing edge that blends the garden into its surroundings while keeping the design contained.
Fill any remaining gaps with low-growing ground cover like creeping phlox or moss. This ties the entire design together and prevents weeds from taking over. I always add a mulch ring around the outer edge using 3 inches of shredded bark to retain moisture and suppress weeds—this is non-negotiable in tight spaces.
💧 Step 4: Install Irrigation and Maintenance Plan
Install a drip irrigation system along the outer edge of your circle, spacing emitters 12 inches apart. This ensures even watering without disturbing the plants. I use a soaker hose buried 1 inch deep along the perimeter, connected to a timer set for 15 minutes every other day during dry spells.
Add 3-4 inches of organic mulch over the entire surface (excluding the centerpiece's base) to lock in moisture and regulate soil temperature. This step saves time and keeps your circle garden looking pristine with minimal upkeep. Label each plant group with small stakes to track varieties and rotate them every 3-4 years for long-term health.
Tips & tricks for perfect circle garden layouts
Creating a stunning circle garden takes more than just staking out a circle—it's about the details that make it thrive. Here are my go-to tricks to elevate your design from good to showstopping.
Precision in the Center: When choosing your centerpiece in Step 1, avoid plants that grow too wide—stick to varieties that stay within that 1/3 radius rule. I've learned this the hard way with overzealous ornamental grasses that ended up crowding the inner ring. For a 5-foot circle, a 3-foot-tall centerpiece works perfectly, leaving room for the inner ring to breathe.
Plant Spacing Secrets: The 12-inch spacing in the inner ring might seem tight, but it's intentional. Plants will fill in over time, creating that lush, cohesive look. For the middle ring, I always space my blooming annuals 18 inches apart—this gives them room to mature without competing for sunlight. Pro tip: Use a stake with string to mark your spacing before planting for perfect symmetry.
Trailing Edge Magic: The outer ring's trailing plants are where many designs fall apart. Instead of letting them sprawl chaotically, I tuck them neatly along the edge, creating a defined border that frames the garden. For a 5-foot circle, I plant trailing varieties like creeping thyme 12 inches from the outer edge—this keeps them contained while still allowing them to cascade beautifully.
Irrigation Insight: That 15-minute irrigation timer in Step 4 is your secret weapon for low-maintenance beauty. I always bury the soaker hose 1 inch deep along the outer edge to water the trailing plants first—they're most vulnerable to drying out. For extra insurance, I add a second timer cycle at night during heatwaves to prevent evaporation.
Pro Tips for Circle Garden Layout
- Creating a stunning circle garden takes more than just staking out a circle—it's about the details that make it thrive.
- Precision in the Center: When choosing your centerpiece in Step 1, avoid plants that grow too wide—stick to varieties that stay within that 1/3 radius rule.
- Plant Spacing Secrets: The 12-inch spacing in the inner ring might seem tight, but it's intentional.
Frequently asked questions
Got questions about creating a stunning circle garden layout? You’re not alone! Here are some of the most common inquiries—and their practical solutions—to help you design with confidence.
What’s the best size for a circle garden?
A circle garden typically ranges from 3 to 8 feet in diameter, depending on your space and plants. Smaller circles (3–4 ft) work well for herbs or succulents, while larger ones (6–8 ft) can accommodate shrubs, perennials, or even small trees. Pro tip: Measure your area first—circle layouts thrive in tight spots but need room to breathe!
When is the ideal time to plant a circle garden?
Plant in early spring or fall when soil is workable and temperatures are mild. Avoid extreme heat or frost, which can stress plants. If planting perennials, give them 6–8 weeks before the first frost to establish roots. Bonus: Mulch after planting to retain moisture and regulate soil temp!
Can I use a circle garden in a shady area?
Opt for shade-tolerant plants like hostas, ferns, heuchera (coral bells), or astilbe. Arrange them in layers—tall plants in the center, medium-height around the edges, and ground covers (like sweet woodruff) at the base. Design hack: Add reflective mulch or light-colored stones to brighten dark spaces!
What if my circle garden looks uneven after planting?
Uneven edges happen! Use a flexible hose or string to trace your circle before digging, or mark the center with a stake and measure outward. For quick fixes, trim excess soil with a spade or use a gravel border to define the shape. Troubleshoot tip: Step back often—your eye might spot imbalances before they’re obvious!
Are there alternatives to a traditional dirt circle garden?
Yes! Try a raised circle bed (elevated for drainage), a container circle (using large pots or troughs), or even a rock garden circle with succulents. For urban spaces, consider a vertical circle trellis with climbing plants. Each option offers unique benefits—choose based on your space and maintenance preferences!
Wrapping up and next steps
A circle garden layout isn’t just a space-saving trick—it’s a showstopper that brings harmony, beauty, and functionality to even the smallest yards.
Whether you’re drawn to its symmetrical elegance or its practicality for herbs, flowers, or veggies, this design proves that great gardens thrive in tight spots with a little creativity. 🌿
Ready to transform your outdoor space? Start by sketching your dream circle—then grab your tools and let the planting begin! For extra inspiration, browse circle garden templates or join gardening forums to share your progress. Your future blooms will thank you!