Vegetables
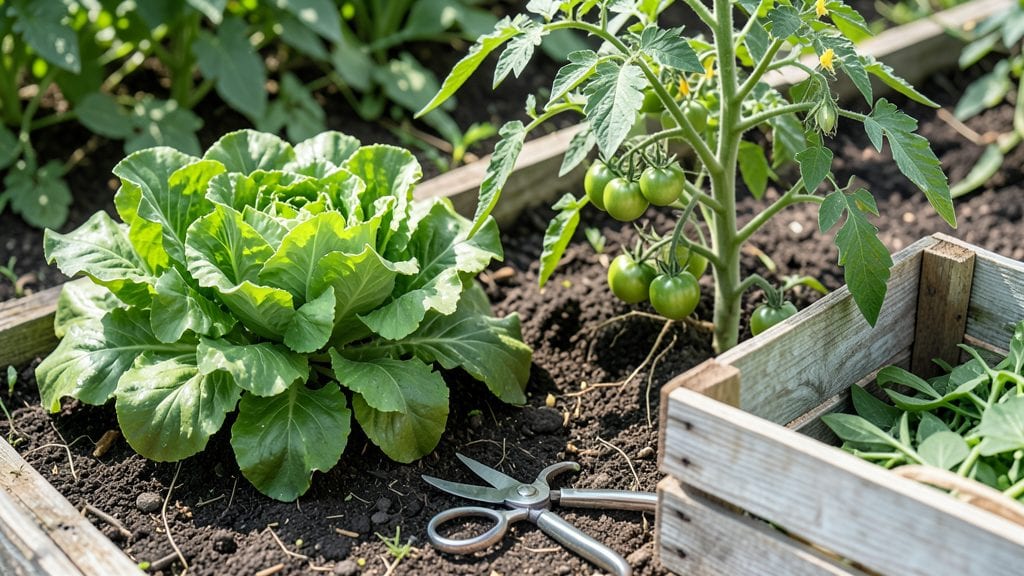
The victory gardens of WWI weren’t just patches of dirt—they were lifelines that turned backyards into battlefields for food security. 🌱 I’ve studied their layouts, and the genius was in how they packed every square foot with high-yield crops like potatoes, carrots, and cabbage, often in tight rows or even raised beds over sidewalks.
These gardens weren’t about beauty; they were about survival, proving that even small plots could feed families when grocery shelves emptied.
Modern adaptations focus on the same principles: space efficiency and productivity. Urban gardeners can mimic WWI layouts with vertical planters for greens, container potatoes in 5-gallon buckets, and succession planting to stretch harvests.
The original gardens used simple tools—shovels, hoes, and hand watering—and prioritized crops that stored well, like onions and beets, to carry families through lean months. Today, we’ve got drip irrigation and heirloom seeds, but the core idea remains: grow what you eat, and grow it close.
What you’ll get isn’t just a garden—it’s a connection to a time when communities rallied around soil instead of soldiers. Picture rows of vibrant green kale, earthy potatoes, and crisp radishes all within arm’s reach, knowing every bite was homegrown.
The satisfaction of filling your own larder, just like those WWI families did, is unmatched. And the best part? You don’t need a farm—just a patch of ground, a few seeds, and the will to grow.
Whether you’re in a suburban yard or a city balcony, these principles work. Start small with 10 square feet of high-calorie crops like peas or beans, then expand as you master the basics.
The original victory gardens proved that determination beats scarcity—and today, that lesson is more relevant than ever. Let’s dig in.
📚 In This Guide
- What you need
- Instructions
- Tips and common mistakes
- Wrapping up and next steps
What you need
- ● Garden Space: Minimum 100–400 sq. ft. (adjust based on family size and crops).
- ● Full sun exposure (6+ hours/day) for most vegetables.
- ● Soil: 2–3 cubic yards of high-quality garden soil or compost.
- ○ Optional: Balanced fertilizer (10-10-10) (1 lb per 100 sq. ft.).
- ● Seeds or Seedlings: Prioritize WWI-era crops: potatoes, carrots, cabbage, beets, turnips, kale, peas, and tomatoes.
- ● Quantity: 1–2 lbs of seeds (or 12–24 seedlings per crop type).
- ● Tools: Hand trowel (1–2).
- ● Garden fork (1).
- ● Pruners (1).
- ● Watering can or hose with spray nozzle (1).
- ● Gloves (1–2 pairs).
- ○ Optional: Wheelbarrow (1) for heavy soil/manure.
- ● Row Covers: Lightweight fabric to protect young plants from pests (enough to cover 50% of beds).
- ● Trellis or Stakes: For climbing plants like peas or beans (4–6 stakes per plant type).
- ● Compost Bin: To recycle kitchen scraps into nutrient-rich soil.
- ● Journal: To track planting dates, weather, and harvests (like a real WWI gardener!).
- ● Patriotic Touches: Painted signs or flags to mark your garden’s historical theme. 🇺🇸
How to design a WWI-style victory garden for modern growers
Here's how to recreate the patriotic, space-efficient growing methods that fed families during the Great War.
🌱 Step 1: Choose a Sunlit, High-Visibility Location
Select a 6×8-foot rectangular plot in your yard's sunniest spot—6+ hours of direct sunlight daily. WWI gardens prioritized visibility to inspire pride; place yours near walkways or windows. Avoid shady corners where vegetables like tomatoes and beans won't thrive. I always test soil moisture at midday—if it's dry, that's your ideal spot.
Clear all weeds and debris first. The original victory gardens used every inch, so remove grass by laying down cardboard or thick newspaper, then top with 4-6 inches of compost. This mimics the no-till methods used during wartime when labor was scarce. Press the edges down firmly to prevent shifting.
🌿 Step 2: Plant High-Yield, Fast-Maturing Crops
Focus on 20-30% of your plot for potatoes—they were the WWI staple. Plant seed potatoes 4 inches deep and 12 inches apart in rows. Add 1 cup wood ash per 100 square feet to raise soil pH slightly, as victory gardens often used alkaline amendments to boost yields.
Fill the remaining space with radishes (30%), carrots (20%), and leafy greens (20%). Radishes mature in 25 days—perfect for quick harvests. Sow seeds in staggered rows every 2 weeks to ensure continuous production. I always mark planting dates on a small wooden stake at each corner to track succession plantings.
💧 Step 3: Implement WWI Water Conservation Techniques
Use the cloche method for early spring planting: cover seedlings with glass jars or plastic domes to trap heat and moisture. This mimics the greenhouse effect used in wartime gardens to extend growing seasons. Remove cloches once plants show first true leaves to harden them off.
Water deeply once every 3-4 days at dawn, using a soaker hose along rows. Avoid overhead watering—it wastes moisture and spreads disease. Check soil moisture by pressing your finger 1 inch deep; if it feels dry, it's time to water. WWI gardens often used rain barrels, so collect water in a 5-gallon bucket for emergencies.
✂️ Step 4: Maintain Through Strategic Harvesting
Harvest outer leaves of greens first to encourage regrowth—this was a key victory garden tactic. Pick radishes when they reach 1 inch diameter; leaving them longer reduces yields. I always harvest in the morning when vegetables are crispest and most flavorful.
Rotate crops annually to prevent soil depletion. Keep detailed records of what you planted where—this was another wartime practice to maximize limited space. Save seeds from your best producers (like heirloom tomatoes) to replant next season. Store extra produce in a cool, dark place or preserve through canning—just as families did during the war effort.
🪴 Step 5: Extend the Season with Cold Frames
Build a simple cold frame using 2×4 lumber and a clear plastic lid to grow greens through winter. Place it over your most productive bed and fill with straw or leaves for insulation. This extends harvests by 2-3 months—critical during food shortages.
Start cold-hardy crops like kale and spinach in late summer for fall/winter harvests. I always plant garlic in October—it overwinters and produces 2-3 times more bulbs than spring planting. The original victory gardens relied on these techniques to feed families year-round with minimal resources.
Tips & tricks for perfect WWI-style victory gardens
These battle-tested strategies will help you maximize your harvest just like the resourceful gardeners of World War I.
Soil Preparation Secret: Before adding your 4-6 inches of compost in Step 1, mix in 1 cup of wood ash per 100 square feet with the top 6 inches of soil. This wasn't just about raising pH—it also provided potassium that WWI gardens desperately needed. I've found that adding a handful of crushed eggshells to each planting hole further strengthens plant stems, making them more resistant to the harsh winds that often plagued wartime gardens. The key is to work this in during your initial soil prep rather than as an afterthought.
Succession Planting Strategy: When you're establishing your 2-week staggered rows in Step 2, consider planting fast-maturing crops like radishes in three separate batches: one immediately after your initial planting, one at the 2-week mark, and a final batch at the 4-week mark. This creates a continuous harvest window that was absolutely critical during food shortages. I've had success with this method even in cooler climates—just be prepared to use those cloches for your earliest plantings to extend the season.
Watering Wisdom: The 3-4 day watering schedule in Step 3 works best when you combine it with a simple mulching technique. After your initial watering, apply a 2-inch layer of straw mulch around your plants. This mimics the wartime practice of using available materials to conserve moisture while suppressing weeds. The mulch will also help moderate soil temperatures, which is particularly important when you're growing heat-sensitive crops like carrots in your 20% allocation. I always water immediately after mulching to help the moisture penetrate.
Cold Frame Construction: For your Step 5 cold frame, consider using clear corrugated plastic sheeting instead of glass jars for the lid. It's lighter, less expensive, and just as effective at trapping heat. When building your frame, make sure the sides are at least 12 inches high—this gives you enough space to add that insulating layer of straw or leaves. I've found that adding a small vent on the south-facing side prevents overheating during sunny winter days while still maintaining nighttime warmth. The original victory gardens used whatever materials were available, but this modern adaptation gives you better control over temperature fluctuations.
Pro Tips for Victory Gardens Wwi
- These battle-tested strategies will help you maximize your harvest just like the resourceful gardeners of World War I.
- Soil Preparation Secret: Before adding your 4-6 inches of compost in Step 1, mix in 1 cup of wood ash per 100 square feet with the top 6 inches of soil.
- This creates a continuous harvest window that was absolutely critical during food shortages.
Frequently asked questions
Got questions about Victory Gardens from WWI? You’re not alone! Here are answers to the most common queries—whether you’re inspired to plant your own or just curious about history’s green revolution.
What exactly was a WWI Victory Garden, and why were they so important?
Victory Gardens were small-scale vegetable plots planted by civilians during WWI (and later WWII) to supplement food supplies. With rationing and shipping disruptions, these gardens helped families and the war effort—producing 40% of U.S. vegetables by 1918! They symbolized patriotism and self-sufficiency.
When was the best time to plant a Victory Garden in 1917–1918?
Timing depended on your climate, but most WWI gardens followed these rules:
- Cool climates (e.g., Northeast): Start seeds indoors in March, transplant outdoors after last frost (late April–May).
- Warm climates (e.g., South): Direct-sow in February–March for early crops like peas and lettuce.
- Successive planting:** Sow fast growers (radishes, beans) every 2–3 weeks for continuous harvests.
How much did Victory Gardens cost to start in 1917, and what’s a budget-friendly modern equivalent?
In 1917, a basic garden cost $1–$5 (about $30–$150 today), using repurposed materials like scrap wood for frames or compost from household scraps. Today, you can start for $20–$50 with:
- Seeds ($1–$3 per packet) over seedlings ($2–$5 each).
- Free compost (check local programs) or cheap soil mixes.
- DIY trellises from old fencing or pallets.
What were the most common WWI Victory Garden vegetables, and can I grow them today?
Top WWI crops were easy, high-yield, and nutrient-dense:
Vegetable
Why It Was Planted
Modern Growability
Potatoes
Staple carb, stored well, and thrived in small spaces.
Easy! Plant in spring, harvest in fall.
Cabbage
Versatile (soup, sauerkraut), cold-hardy, and pest-resistant.
Grows well in cool climates; watch for cabbage worms.
Carrots
Sweet, long-lasting, and space-efficient in rows.
Perfect for beginners; loosen soil to avoid forking.
Beans (dry & snap)
Nitrogen-fixing (boosts soil), protein-rich, and fast-growing.
Plant after frost; trellis for vertical space!
What pests or diseases did WWI gardeners face, and how did they handle them?
Common WWI pests included cabbage worms, potato beetles, and aphids. Gardeners used:
- Manual removal: Handpick bugs (especially at dawn when they’re sluggish).
- Natural barriers: Wood ash around plants (repels pests) or row covers for tender crops.
- Crop rotation: Swap plant families yearly to starve soil-borne diseases.
- Homemade sprays: Soap water (1 tbsp mild soap + 1L water) or garlic/chili pepper sprays.
Wrapping up and next steps
Victory Gardens of WWI proved that community, resilience, and teamwork could turn small plots into lifelines for a nation. These gardens weren’t just about growing food—they were a symbol of patriotism, self-sufficiency, and hope during challenging times.
Whether you’re inspired to start your own garden or simply appreciate the history, take this as a reminder that even small actions can create big change.
Ready to plant your own legacy? Start small—research local growing conditions, gather a few essential tools, and begin with easy-to-grow veggies like lettuce or radishes. Every seed you sow is a step toward empowerment, sustainability, and connection to a proud tradition! 🌱