
Tools
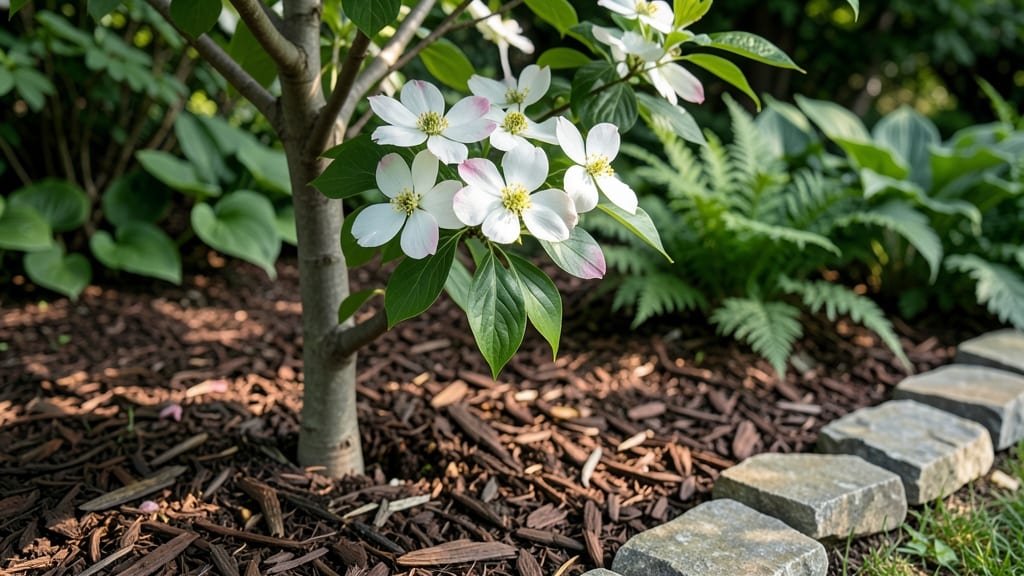
Creating a tree garden bed turns small spaces into lush vertical canvases where roots and foliage dance together. 🌿 I designed mine after realizing my tiny backyard could never fit a full-sized oak—but it could cradle a dwarf variety surrounded by shade-loving perennials.
The result? A living sculpture that adds height, texture, and seasonal drama without sacrificing square footage.
Start with the right tree: dwarf fruit trees, ornamental cherries, or columnar maples thrive in beds just 3-4 feet wide, while their roots stay contained. Pair them with low-growing companions like ferns, hostas, or creeping thyme that spill over the edges.
The key is balancing root zones—mulch heavily to keep moisture in and weeds out, then let the tree’s dappled shade guide what grows beneath it.
What you’ll end up with is a year-round showpiece that changes with every season. Spring brings delicate blossoms, summer offers lush canopies, and fall delivers fiery foliage—all while keeping your space cooler and more private.
My neighbors now stop to ask which "magic tree" I planted; the answer is simple design, not witchcraft.
This works for patios, courtyard edges, or even large containers—just scale the tree size to your bed dimensions. The only rule? Start small and let nature do the heavy lifting. Ready to transform flat ground into vertical magic?
📚 In This Guide
- What you need
- Instructions
- Tips and common mistakes
- Wrapping up and next steps
What you need
- ● Tree or shrub: Choose a compact, slow-growing variety (e.g., Dwarf Japanese Maple, Dwarf Ficus, or Boxwood). Size: 1-3 gallons (depending on maturity).
- ● High-quality potting soil: 5-10 gallons (well-draining, organic mix with perlite or vermiculite).
- ● Tree bed structure: Wooden planter box: 12"–18" deep, 12"–24" wide (custom-built or pre-made).
- ● Fabric grow bag: 10–20 gallons (with drainage holes).
- ● Wall-mounted planter: For vertical installations (ensure it’s sturdy and weatherproof).
- ● Drainage layer: 2–3 inches of gravel, pebbles, or broken pottery shards.
- ● Slow-release fertilizer: Granular or spike form (e.g., Osmocote or Espoma).
- ● Mulch: 1–2 inches of bark, straw, or coconut coir (to retain moisture).
- ● Garden trowel or spade: For digging and soil prep.
- ● Drill or screwdriver: If assembling a wooden planter.
- ● Measuring tape: To ensure proper spacing and depth.
- ● Watering can or hose with nozzle: For gentle watering (avoid over-saturating roots).
- ● Pruners: For trimming roots or shaping the tree (if needed).
- ● Level: To keep your planter or wall-mounted bed even.
- ● Self-watering system: A drip irrigation kit or wicking wick for low-maintenance hydration.
- ● Decorative stones or mosaic tiles: To enhance aesthetics (place on top of mulch).
- ● Eco-friendly paint: For staining or sealing wooden planters.
- ● Compost tea or liquid fertilizer: For a nutrient boost during the growing season.
- ● Support stakes or trellis: If your tree needs extra stability (e.g., for windy areas).
Step-by-step instructions for designing a tree garden bed
Creating a layered tree garden bed transforms small spaces into lush vertical ecosystems—here’s how to build it right.
🪴 Step 1: Plan and Prepare the Base Layer
Start with a 12-inch deep hole for each tree, spaced 6-8 feet apart to allow root expansion. I always dig the hole twice as wide as the root ball—this prevents root binding later. The base layer is critical: mix 3 gallons of potting mix with 1 gallon of compost to create a nutrient-rich foundation. This blend supports strong root development while preventing compaction.
For urban settings, consider adding 1 cup of mycorrhizal fungi to the mix—it boosts root health and drought resistance. Tap the amended soil gently to remove air pockets, then water deeply until the hole is saturated. This ensures the roots will find moisture immediately when planted.
🌱 Step 2: Add Mid-Layer Plants for Structure
Now, fill the space between trees with shrubs or perennials that thrive in partial shade. I select 3-4 plants per bed, spacing them 18-24 inches apart to create a natural understory. Use 2 gallons of potting mix per plant, blending it with ½ gallon of perlite for drainage. This layer prevents erosion and provides habitat for pollinators.
Here’s the thing—avoid fast-spreading ground covers like mint or creeping Charlie. Instead, opt for orchard grass or clover to suppress weeds without crowding your trees. Mulch the mid-layer with 1 inch of shredded bark, keeping it 6 inches away from tree trunks to prevent rot.
☀️ Step 3: Incorporate Vertical Elements for Height
To maximize vertical space, install 3-4 trellises or obelisks around the perimeter, positioning them 12-18 inches from the tree trunks. Use climbing roses or clematis to soften the structure—these plants add seasonal color while training upward. Secure the base of each trellis with 4-inch metal stakes for stability.
For instant height, I tuck 1-2 small evergreens (like dwarf boxwood) into the bed’s edges. These act as living dividers and frame the vertical layers beautifully. Water the entire bed once weekly during the first growing season, focusing on the root zones of all plants.
✂️ Step 4: Maintain and Prune for Long-Term Health
After the first year, prune trees in late winter to remove dead or crossing branches. I always sterilize my pruners with rubbing alcohol between cuts to prevent disease spread. For shrubs, trim back by ⅓ of their height in early spring to encourage bushier growth. This keeps the layered effect tidy and functional.
Monitor the bed’s moisture—drought-tolerant layers (like lavender or sedum) reduce watering needs, but trees still require deep watering every 10-14 days once established. Mulch annually with 1 inch of fresh bark to retain moisture and suppress weeds. The goal is a self-sustaining system that thrives with minimal effort.
Tips & tricks for perfect tree garden bed design
These professional insights will help you create a thriving vertical garden that maximizes space and beauty in your urban landscape.
The Hole Depth Factor: That 12-inch depth for tree holes isn't arbitrary—it matches the root ball depth for most young trees. For larger trees, increase depth by 25% to accommodate their root systems. I've found that using a post-hole digger makes this precise depth much easier to achieve, especially in compacted urban soil. The wider hole (twice the root ball width) prevents roots from circling, which is a common issue that stunts growth.
Soil Blend Strategy: The 3:1 ratio of potting mix to compost creates the perfect balance—enough organic matter for nutrients without compacting too much. For urban settings, I recommend adding that 1 cup of mycorrhizal fungi to every tree hole. These beneficial fungi form symbiotic relationships with roots, enhancing nutrient uptake by up to 80%. Just mix it thoroughly with the potting mix before planting.
Vertical Layering Secret: When positioning those 3-4 trellises, place them at the corners of your bed rather than along the edges. This creates a more balanced visual effect and prevents the vertical elements from competing with your trees for sunlight. For climbing plants, I always train them to spiral upward rather than grow straight up—this creates more surface area for foliage and flowers.
Pruning Precision: That late winter timing for tree pruning is crucial because it allows wounds to heal before spring sap flow begins. When trimming back shrubs by ⅓, cut just above a leaf node or bud—this encourages new growth from the right spot. I keep rubbing alcohol handy for sterilizing pruners between cuts, especially when dealing with multiple plants. This simple step prevents disease spread that can ruin your entire garden bed.
Pro Tips for Tree Garden Bed
- These professional insights will help you create a thriving vertical garden that maximizes space and beauty in your urban landscape.
- The Hole Depth Factor: That 12-inch depth for tree holes isn't arbitrary—it matches the root ball depth for most young trees.
- Soil Blend Strategy: The 3:1 ratio of potting mix to compost creates the perfect balance—enough organic matter for nutrients without compacting too much.
Frequently asked questions
Got questions about creating a tree garden bed?
You’re not alone! Here are answers to the most common queries to help you get started with confidence.
When is the best time to plant a tree garden bed?
The ideal time depends on your climate, but early spring or fall are the best choices. These seasons offer cooler temperatures and adequate rainfall, giving roots time to establish before extreme heat or frost. In warmer climates, winter planting can also work—just avoid freezing conditions. Local nurseries can provide region-specific advice!
How much does a tree garden bed cost to set up?
Costs vary based on materials and size, but a basic setup typically ranges from $50–$300. Breakdown:
- Soil & compost: $20–$50
- Container or raised bed: $30–$150 (DIY options cut costs!)
- Tree/sapling: $15–$100+ (native species are budget-friendly)
- Tools & mulch: $10–$30
Can I use a tree garden bed for edible plants?
Many fruit trees, berry bushes, and dwarf citrus thrive in layered garden beds. Just ensure:
- Your tree has shallow, wide roots (avoid deep-rooted species like oak).
- You use well-draining, nutrient-rich soil (mix compost and coconut coir).
- You prune regularly to maintain airflow and sunlight for understory plants.
What if my tree isn’t growing well in the bed?
Troubleshoot with these steps:
- Check drainage: Compacted soil or poor drainage can suffocate roots. Amend with perlite or sand.
- Monitor sunlight: Most trees need 6+ hours of sun daily—relocate if shaded.
- Test soil pH: Use a DIY kit ($10) to adjust acidity/alkalinity.
- Fertilize lightly: Over-fertilizing burns roots; opt for slow-release organic options.
Are tree garden beds suitable for small apartments?
Yes! Vertical and container-friendly designs make them perfect for patios or balconies. Choose:
- Dwarf or bonsai varieties (e.g., Japanese maple or dwarf citrus).
- Fabric grow bags or stackable pots for mobility.
- Self-watering systems to conserve space and water.
Wrapping up and next steps
Creating a tree garden bed is a game-changer for urban spaces—it’s eco-friendly, space-efficient, and bursting with life! 🌿 By layering plants vertically, you transform even the smallest area into a thriving, low-maintenance oasis.
Whether you’re a green thumb or just starting, this method proves that big beauty doesn’t need big space.
Ready to take the next step? Start small—pick one corner of your balcony, patio, or yard, gather your supplies, and let your creativity grow. Your future garden (and the bees!) will thank you. 🌱