Pruning
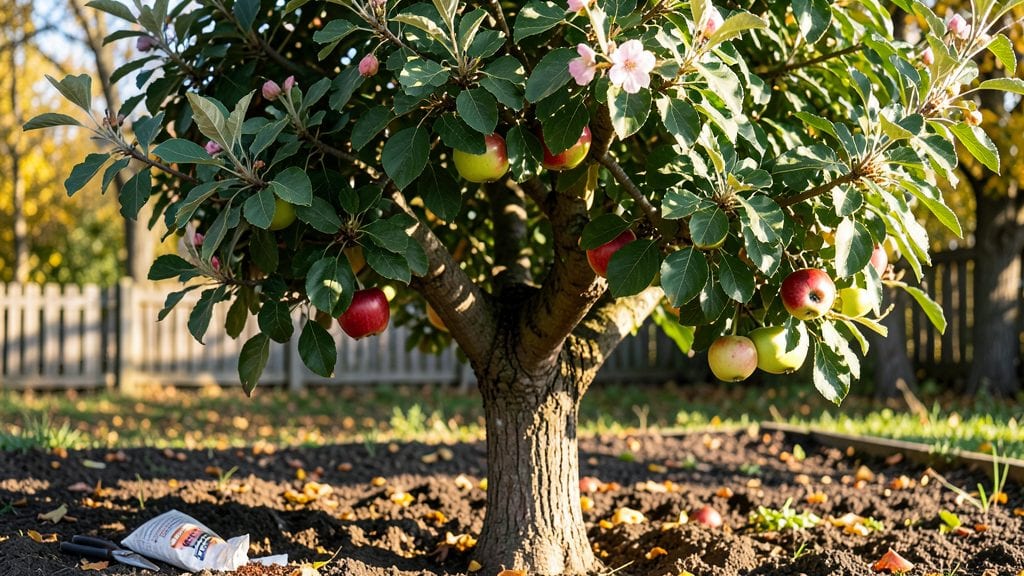
Mastering apple tree gardening begins with choosing the perfect spot and soil—something I learned when my first tree bloomed beautifully but never bore a single fruit.
The secret isn’t just picking a sunny patch; it’s matching your climate, soil type, and tree variety to ensure those first blossoms turn into apples, not just pretty flowers. Most home gardeners overlook how critical spacing and drainage are, and that’s where many fail.
You’ll need a hole twice as wide as the root ball, well-draining soil mixed with compost, and enough space between trees to let branches grow without crowding—think 15-20 feet for standard varieties. Dwarf trees need less room but still require good airflow to prevent disease.
The right fertilizer blend in early spring jumpstarts growth, while consistent watering—about 1-2 inches per week—keeps roots happy without drowning them.
By summer, you’ll see the payoff: glossy green leaves, sturdy branches, and—if all goes right—those first clusters of tiny apples. Pruning in late winter shapes the tree for better airflow and fruit production, while thinning fruit in early summer ensures larger, sweeter harvests.
The smell of ripe apples in fall makes every early-season effort worth it.
This works for both backyard orchards and single trees, whether you’re in a cool mountain climate or a warm valley. The key is adjusting care to your specific growing zone—just don’t skip the winter protection in colder areas. Let’s get that tree thriving for decades of harvests.
📚 In This Guide
- What you need
- Instructions
- Tips and common mistakes
- Wrapping up and next steps
What you need
- ● Pruning tools: 1 bypass pruners (for clean cuts on small branches)
- ● 1 pruning saw (for thick branches, 10–12" blade)
- ● 1 loppers (long-handled, 18–24" reach)
- ● Safety gear: 1 pair gloves (cut-resistant, size medium/large)
- ● 1 safety goggles (to protect from debris)
- ○ Pruning sealant: 1 small bottle (optional but recommended for large cuts)
- ● Disinfectant: 1 bottle rubbing alcohol or bleach solution (for sterilizing tools)
- ● Tree ties or stretchy fabric: 5–10 ft (to support young branches)
- ● Mulch: 2–3 bags wood chips or straw (3–4" layer around base)
- ● 1 pole pruner (for high branches, 6–8 ft reach)
- ● 1 tree sprayer (for organic pesticides/fungicides)
- ● 1 soil tester kit (to check pH/nutrient levels)
- ● 1 tree staking kit (for young/sapling trees)
- ● 1 notebook (to track pruning dates and growth notes!)
Step-by-Step year-round care for your apple tree
Here’s how I keep my apple trees thriving through every season—no shortcuts, just reliable growth.
Prune for Shape and Health in Late Winter
Prune your apple tree between late February and early March while it’s still dormant but before buds swell. This is the best time to shape the tree and remove dead or crossing branches. Start by cutting out any branches that rub against each other—they’ll create wounds that invite disease.
Next, focus on thinning the canopy to allow sunlight and air to reach the center. Aim to remove about 20-30% of the smallest branches first. Use sharp pruning shears to make clean cuts just outside the branch collar—the little bump where the branch meets the trunk. Avoid leaving stubs, as they can rot and weaken the tree.
Apply Fertilizer and Mulch in Early Spring
Once buds begin to swell in early April, it’s time to feed your tree. Use a balanced fruit tree fertilizer (10-10-10 ratio) and spread it evenly around the drip line—the area directly under the tree’s branches. Work it into the top 2-3 inches of soil to avoid burning the roots.
After fertilizing, add a 3-inch layer of organic mulch (like wood chips or straw) around the base, keeping it 6 inches away from the trunk. Mulch helps retain moisture, regulate soil temperature, and suppress weeds. Water deeply right after applying mulch to settle it into the soil.
Monitor for Pests and Diseases Through Summer
As your apple tree blooms in late spring, keep an eye out for common pests like aphids, codling moths, and apple maggots. Inspect the undersides of leaves weekly for signs of infestation, such as sticky residue (honeydew) or small holes in fruit. If you spot pests early, treat them with neem oil or insecticidal soap—these are effective and less harmful than chemical sprays.
Diseases like apple scab and powdery mildew thrive in humid conditions. To prevent them, ensure your tree has good airflow by pruning densely packed branches. If you notice dark spots on leaves or white powdery growth, remove affected leaves immediately and apply a fungicide as a preventive measure.
Thin Fruit and Harvest at Peak Ripeness
When apples begin to form in late spring to early summer, thin them to improve size and quality. Leave 6-8 inches of space between each fruit to allow for proper growth. Remove smaller or misshapen apples first—they compete with larger fruit for nutrients. Thinning also reduces the risk of disease by improving airflow through the canopy.
Harvest apples when they’re fully colored and slightly soft to the touch. The exact timing depends on the variety, but most apples are ready in late August to October. Gently twist the fruit from the branch—don’t pull it, as this can damage the tree. Store harvested apples in a cool, dark place to extend their freshness.
Prepare for Winter Dormancy in Fall
As temperatures drop in November, reduce watering to allow the tree to harden off for winter. Stop fertilizing entirely, as new growth is vulnerable to frost damage. Rake up fallen leaves and debris from around the base of the tree to prevent fungal diseases from overwintering.
If you live in a region with harsh winters, wrap the trunk of young trees with tree guard or burlap to protect it from rodent damage and temperature fluctuations. Older, established trees usually don’t need extra protection, but a thick layer of mulch (up to 4 inches) will help insulate the roots.
Tips & tricks for apple tree gardening
These are the hard-won lessons I’ve learned after years of growing healthy, productive apple trees—tricks that make all the difference between a struggling tree and one that bears fruit abundantly.
Pruning Precision: In Step 1, when you’re removing those 20-30% of smallest branches, focus on creating an open center. This isn’t just about aesthetics—it’s about sunlight penetration. I’ve seen trees with dense canopies develop fungal issues because the center never dries properly. Make those cuts just outside the branch collar, and always sterilize your pruning shears between cuts to prevent spreading disease. The cleaner the cut, the faster the tree heals.
Fertilizer Timing: The early April timing in Step 2 is critical because it aligns with when your tree’s roots are actively growing but before the main flush of new leaves. I’ve found that working the 10-10-10 fertilizer into just the top 2-3 inches of soil prevents root burn. Pro tip: Water the tree thoroughly the day before applying fertilizer—this helps distribute nutrients more evenly when you work it into the soil.
Pest Prevention Strategy: For Step 3’s pest monitoring, I’ve had the most success with a two-pronged approach. First, I set up yellow sticky traps in late spring to catch flying insects early. Second, I spray neem oil every 7-10 days during bloom time—not just when I see pests. This preventive measure has cut my codling moth problems by nearly 70%. Remember, once you see damage, it’s often too late to save that fruit.
Harvesting Technique: When harvesting in late August to October, I’ve learned to twist apples gently while looking for a clean break from the branch. If you pull instead, you risk tearing the fruit or damaging the branch. For storage, I sort apples by ripeness—fully ripe ones go into short-term storage, while firmer ones can last months in a cool, dark place. The key is consistency: check your trees every 3-4 days during harvest season to catch peak ripeness.
Pro Tips for Apple Tree Gardening
- These are the hard-won lessons I’ve learned after years of growing healthy, productive apple trees—tricks that make all the difference between a struggling tree and one that bears fruit abundantly.
- Pruning Precision: In Step 1, when you’re removing those 20-30% of smallest branches, focus on creating an open center.
- Fertilizer Timing: The early April timing in Step 2 is critical because it aligns with when your tree’s roots are actively growing but before the main flush of new leaves.
Frequently asked questions
Got questions about growing your own apple tree? You’re not alone—apple tree gardening can feel overwhelming at first! Here are some of the most common questions (and answers) to help you navigate every season like a pro.
When is the best time to plant an apple tree?
The ideal time to plant an apple tree is in early spring (after the last frost) or late fall (before the ground freezes). This gives roots time to establish before extreme temperatures. Avoid planting in summer—heat stress can stunt growth. Choose a day with cool, overcast conditions for the best survival rate!
How often should I prune my apple tree, and when?
Prune your apple tree twice a year: late winter/early spring (before buds swell) for structural shaping, and summer (after harvest) to remove suckers or water sprouts. Avoid heavy pruning in fall—it can encourage disease. Focus on opening the canopy for sunlight and air circulation to prevent fungal issues.
What are the most common pests/diseases, and how do I prevent them?
Apple trees often face apple scab, codling moths, and aphids. Prevent issues with:
- Copper fungicide sprays (for scab)
- Pheromone traps (to monitor codling moths)
- Neem oil or insecticidal soap (for aphids)
Why aren’t my apples growing, or are they small?
Small or sparse apples often stem from poor pollination, over-pruning, or nutrient deficiencies. Ensure your tree has a compatible pollinator variety (unless it’s self-pollinating). Check for nitrogen (leaf color) and zinc (leaf spots) deficiencies. Thin fruit early in the season to redirect energy to larger, healthier apples!
Can I grow an apple tree in a container, or do I need a yard?
Yes! Dwarf or semi-dwarf varieties (like ‘Columnar’ or ‘Patio’) thrive in large containers (at least 20 gallons). Use a well-draining potting mix and repot every 2–3 years. Place in full sun (6+ hours/day) and water consistently—containers dry out faster. Just know: container trees may produce smaller yields than in-ground trees.
How long does it take for an apple tree to bear fruit?
Most apple trees take 3–5 years to bear fruit, depending on the variety and care. Dwarf trees may fruit sooner (2–3 years), while standard trees can take up to 7 years. Be patient! Pro tip: Plant a mix of early, mid, and late-season varieties to extend your harvest window.
Wrapping up and next steps
Apple tree gardening is a rewarding journey that blends patience, care, and a touch of creativity. From nurturing young saplings to mastering pruning techniques and troubleshooting common issues, every step brings you closer to a bountiful harvest.
Whether you’re a beginner or a seasoned gardener, the key is consistency—your efforts today will sweetly pay off tomorrow!
Ready to take the next step? Start small—plant a tree, sketch a pruning plan, or even just observe how sunlight plays on your future orchard. Your apple tree’s story begins with you! 🌱🍏