
Landscaping
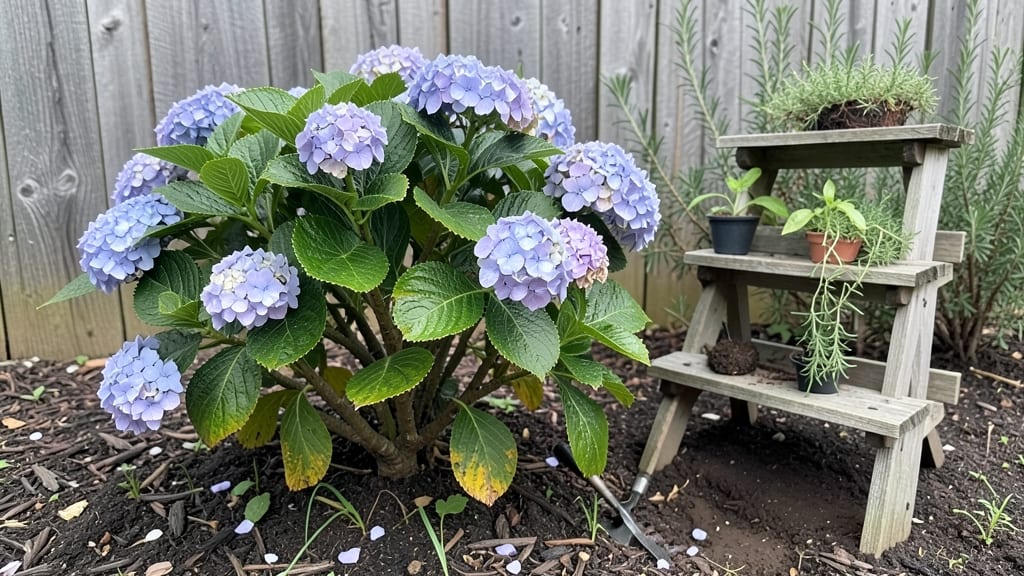
Creating a tiered garden design transforms flat spaces into lush vertical wonderlands where gravity works for you instead of against you. 🌿 I've filled my tiny backyard with cascading layers that produce more food and flowers than my old single-level beds ever did—all while keeping the footprint small.
The magic comes down to three smart choices: sturdy materials that won't sag (I use cedar and galvanized steel), plants that thrive at different heights (dwarf fruit trees on top, trailing nasturtiums on the edges), and a drainage system that prevents soggy roots.
Most people overlook how critical the base structure is—skimp here, and your tiers become wobbly disaster zones within a year.
By summer's end, you'll have a garden that feels like a living sculpture, with each level bursting with its own character—herbs within arm's reach, flowers spilling over edges, and vegetables growing where they'd never survive flat on the ground.
The best part? You can customize the look to match your style, whether that's rustic wood and cottage charm or sleek metal and modern minimalism.
Works equally well on patios, balconies, or sloped yards—just adjust the height and materials to your space. Let's build something that turns heads and grows bountifully, no matter how small your yard might be.
📚 In This Guide
- What you need
- Instructions
- Tips and common mistakes
- Wrapping up and next steps
What you need
- ● Tiered planters or shelves: 3–5 units (adjust based on desired height; 12"–24" deep, weather-resistant materials like cedar, resin, or galvanized metal).
- ● Potting soil: 2–3 bags (high-quality, well-draining mix with added compost for nutrients).
- ● Drainage materials: Small gravel or perlite (1–2 cups per planter to prevent root rot).
- ● Plants: 10–15 plants (mix of herbs, flowers, or veggies; choose varieties suited to your climate and sunlight).
- ● Mulch: 1 bag (organic options like bark or straw to retain moisture).
- ● Trowel or small shovel (for planting).
- ● Gloves (to protect your hands from soil and thorns).
- ● Measuring tape (to ensure even spacing between tiers).
- ● Watering can or hose with a gentle spray nozzle.
- ○ Optional: Level (to keep tiers stable), drill (for customizing planters), and decorative pebbles (for aesthetics).
- ● Sunlight assessment (note which tiers get full sun, partial shade, or full shade).
- ● Sturdy surface (ensure your patio or balcony can support the weight of soil and plants).
- ● Basic DIY skills (or a friend with a green thumb!).
Step-by-Step instructions for tiered garden design
Let's build a vertical garden that maximizes space while keeping maintenance simple and stylish.
🪴 Step 1: Choose and Prepare Your Tiered Planters
Start with 4 tiered planters—I like wooden or metal ones with built-in drainage holes. If yours don’t have them, drill ¼-inch holes along the bottom edge using a drill bit. Place a piece of landscape fabric over each hole to keep soil from washing out while allowing water to drain freely.
Clean each tier thoroughly with soapy water and rinse well. This prevents mold and ensures your plants start with a fresh foundation. If your planters are new, skip this step—but if they’ve been stored or used before, a good scrub removes old soil residue that can harbor pests.
🌱 Step 2: Layer Soil and Add Drainage Materials
Fill the bottom tier with 2 inches of small gravel or lava rocks as drainage. This prevents waterlogging, which is especially critical in tiered designs where excess moisture can pool between layers. Next, add 1 inch of perlite or coarse sand to improve aeration and prevent soil compaction.
Now, layer in 2 gallons of premium potting mix per tier, pressing lightly to settle but not compact. Leave about 1 inch of space below the rim to avoid spillage when watering. For the top tier, use the same mix but reduce the gravel layer to ½ inch—it drains faster and needs less depth.
☀️ Step 3: Select and Plant Your Plants Strategically
Choose plants with varying heights and care needs to create visual interest. I recommend 4-6 plants per tier, starting with taller varieties like lavender or ornamental grasses in the bottom tier. Mid-height plants like salvia or heuchera go in the second tier, while trailing plants like petunias or sweet potato vine thrive in the top tiers.
Dig holes just deep enough to cover the root balls, then place each plant gently into the soil. Water immediately after planting to help settle the roots. Space plants 6-8 inches apart in the bottom tiers and 4-6 inches apart in the top tiers to allow for trailing growth without overcrowding.
💧 Step 4: Water and Establish a Maintenance Routine
Water each tier thoroughly until water runs out the drainage holes at the bottom. Start with the top tier and work your way down, allowing 5-10 minutes between waterings so the soil absorbs moisture evenly. This prevents runoff and ensures roots get hydrated at every level.
After watering, check the soil moisture by sticking your finger 1 inch deep—if it feels dry, water again. In the first week, water daily to help plants establish roots. Once established, water every 2-3 days in warm weather, adjusting for rainfall. Fertilize monthly with a balanced, water-soluble fertilizer to keep plants thriving.
✂️ Step 5: Prune and Maintain for Long-Term Success
Deadhead spent blooms regularly to encourage continuous flowering and prevent seed pods from forming. For trailing plants, gently guide vines along the edges of the tiers to create a cascading effect. Trim back leggy growth by ⅓ of the plant’s height to promote bushier, fuller growth.
Every 6 months, refresh the top layer of soil with ½ inch of compost to replenish nutrients. Check drainage holes annually—if they clog, clear them with a wire or replace the landscape fabric. With this routine, your tiered garden will stay lush and vibrant for years.
Tips & tricks for perfect tiered garden design
Here's what I've learned after designing tiered gardens for years—these tricks will help you avoid common pitfalls and create a stunning vertical display.
Drainage is Non-Negotiable: In Step 2, when you're adding that 2-inch gravel layer, don't skimp! I've seen tiered gardens fail completely because the bottom tier became a swamp. If your planters don't have drainage holes, drill them—this is your first line of defense against root rot. Pro tip: Use a level to ensure all tiers sit perfectly horizontal so water flows properly between levels.
Soil Matters More Than You Think: That 2 gallons of premium potting mix per tier makes all the difference. Cheap garden soil compacts and drains poorly in tiered designs. I always mix in a slow-release fertilizer right when planting—this gives your plants a head start and reduces monthly maintenance. For the top tier, consider adding a bit more perlite to prevent soil from washing down during watering.
Plant Placement Strategy: In Step 3, when arranging your 4-6 plants per tier, think about sunlight exposure. Place sun-loving plants like lavender in the top tiers where they get maximum light, while shade-tolerant varieties can go in lower tiers. I also recommend placing heavier plants in the bottom tiers to prevent top-heavy tipping—this is especially important for outdoor installations.
Watering Wisdom: Those 5-10 minutes between waterings in Step 4 are crucial. I've learned this the hard way—rushing watering causes runoff and leaves lower tiers bone dry. Start with the top tier and let the water work its way down naturally. For large tiered setups, consider using a watering wand with a gentle spray setting to distribute moisture evenly without disturbing the soil.
Pro Tips for Tiered Garden Design
- Here's what I've learned after designing tiered gardens for years—these tricks will help you avoid common pitfalls and create a stunning vertical display.
- Drainage is Non-Negotiable: In Step 2, when you're adding that 2-inch gravel layer, don't skimp!
- Soil Matters More Than You Think: That 2 gallons of premium potting mix per tier makes all the difference.
Frequently asked questions
Got questions about creating your own tiered garden oasis?
Here are some of the most common concerns—and their solutions—to help you design with confidence!
What’s the best height for each tier in a tiered garden?
Most tiered gardens use 6–12-inch height differences between levels for stability and accessibility. For example, the lowest tier might sit at ground level (12–24 inches tall), with each subsequent tier adding 6–8 inches. Avoid stacking tiers taller than 3–4 feet—they risk toppling in wind or heavy rain. Pro tip: Use a level to ensure each tier is perfectly horizontal before adding soil or plants!
When is the best time to plant in a tiered garden?
Plant perennials and shrubs in early spring or fall when temperatures are mild, giving roots time to establish before extreme heat or cold. For annuals or vegetables, wait until after the last frost (check your USDA zone!). If you’re building the tiers first, start with hardy ground covers or drought-tolerant plants to stabilize soil while you layer in other species.
Can I build a tiered garden on a budget?
Skip expensive pre-made planters and use reclaimed materials like bricks, cinder blocks, or even stacked logs. For containers, try plastic storage bins or wooden pallets lined with landscape fabric. DIY soil mix: Combine 60% topsoil, 30% compost, and 10% perlite to save on premium potting mixes. Bonus: Start small with 2–3 tiers to test what works before expanding!
How do I prevent soil from washing out of my tiers during heavy rain?
Use landscape fabric or hardware cloth at the bottom of each tier to filter soil while allowing water drainage. Add a 1–2 inch layer of gravel or pebbles beneath the fabric to improve airflow. For extra security, plant fast-growing ground covers (like creeping thyme or moss) to hold soil in place. Warning: Avoid overwatering—tiered gardens dry out faster than ground-level beds!
What are the easiest plants for beginners in a tiered garden?
Start with low-maintenance, drought-tolerant plants like:
- Herbs: Rosemary, thyme, or oregano (thrive in well-drained tiers)
- Succulents: Sedum or echeveria (need minimal water)
- Flowers: Lavender, snapdragons, or petunias (add color + pollinators)
- Vegetables: Cherry tomatoes or lettuce (grow in shallower tiers)
Pro tip: Group plants with similar water needs together to simplify care!
Wrapping up and next steps
Transforming a small space into a lush, functional garden is easier than you think with tiered garden design! By leveraging vertical layers, you maximize space while adding visual appeal and practicality. Whether you're a beginner or a seasoned gardener, this approach lets you grow more—without sacrificing style.
Ready to get started? Sketch your design, gather your materials, and let gravity work in your favor! 🌱 Start small, experiment, and watch your compact space bloom into a vibrant oasis.