Landscaping
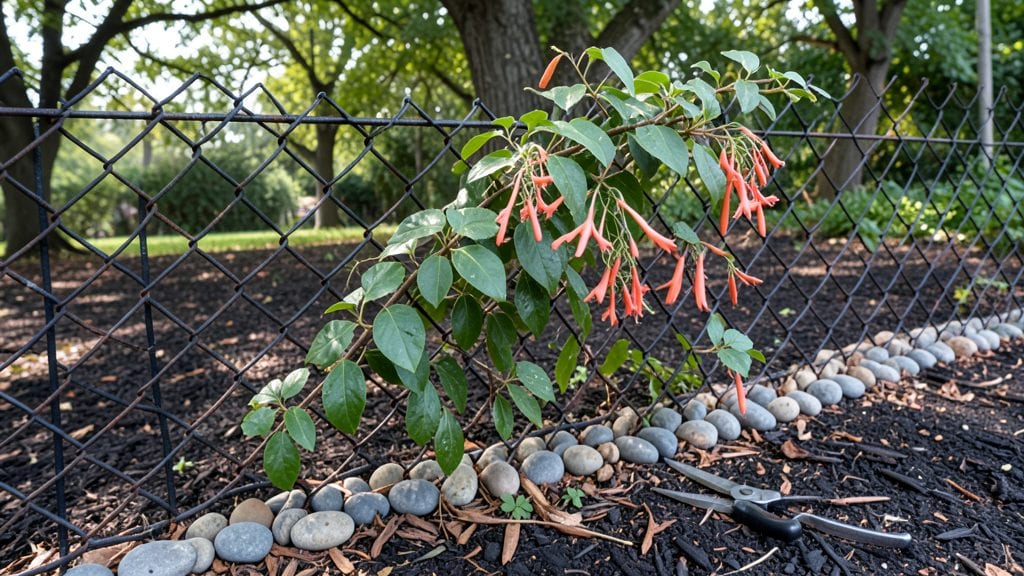
A vertical garden fence transforms your fence line into a lush, living privacy screen that thrives all year long. 🌿 I was skeptical at first—how could plants grow vertically without sprawling—but after my first installation, I never looked back.
The results? A green wall that blocks nosy neighbors, muffles street noise, and brings birds to my yard.
You don’t need a green thumb or a massive budget to pull this off. Most systems use lightweight fabric pockets, wire cages, or modular panels that attach to existing fences.
Hardy climbers like ivy, clematis, or morning glories handle the work for you, while succulents and ferns add texture to drier climates. The key is matching plants to your sunlight and moisture levels—no guesswork needed.
Imagine stepping outside to a wall of vibrant foliage that grows taller each season. The air stays cooler in summer, humidity rises naturally, and your property value gets a subtle boost.
Plus, you’ll save on privacy fencing costs while creating a wildlife magnet. Ready to turn that plain fence into a vertical oasis?
Whether you DIY with trellis panels or invest in pre-made kits, the setup takes just a weekend. Start small with a 4-foot section, then expand as you see how much you love the results. Your fence will never look the same again.
📚 In This Guide
- What you need
- Instructions
- Tips and common mistakes
- Wrapping up and next steps
What you need
- ● Main Structure: Wooden fence panels (6 ft tall × 4 ft wide, pressure-treated pine or cedar) – 2-4 panels (depending on desired height/length).
- ● Galvanized metal brackets or L-brackets – 8-12 pieces (for securing panels to the ground).
- ● Concrete footings or gravel (for stability) – 1 bag per panel or as needed.
- ● Growing Medium: Hydroponic felt or landscape fabric – 1 roll (10 ft × 10 ft) (to prevent soil spillage).
- ● Lightweight potting mix (blend of coconut coir, perlite, and compost) – 10-20 lbs (per panel).
- ● Plants: Succulents, ferns, ivy, or ornamental grasses – 12-24 plants (mix of trailing and upright varieties).
- ○ Optional: Pre-grown vertical garden kits (for convenience).
- ● Tools: Drill/driver with masonry bits.
- ● Level.
- ● Measuring tape.
- ● Screwdriver or impact driver.
- ● Utility knife (for cutting fabric).
- ● Garden gloves and knee pads (for comfort!).
- ● Drip irrigation kit or soaker hoses – for automated watering.
- ● Solar-powered LED lights – to highlight your garden at night.
- ● Weather-resistant sealant – to extend the life of your fence.
- ● Decorative trellis or lattice – for added texture and plant support.
Step-by-Step instructions for building a vertical garden fence
Here's how to transform an ordinary fence into a lush, living privacy screen that thrives all year.
🪴 Step 1: Assemble the Frame and Attach Trellis Panels
Start by constructing your frame using 2x4 lumber cut to your desired height—typically 6-8 feet tall for full privacy. I like to build a rectangular frame first, then attach horizontal slats spaced 12 inches apart vertically. These slats will support your plants and create pockets for soil.
Use galvanized screws to secure everything tightly. The slats should run horizontally, creating 12-inch deep pockets between each one. This spacing gives plants room to grow while providing structural support. For a 4-foot wide fence, you’ll need about 4-5 horizontal slats depending on your design.
🌱 Step 2: Install the Irrigation System and Soil Pockets
Before adding plants, install a drip irrigation system along the bottom of each pocket. Run ¼-inch tubing along the back of the frame, spacing emitters 6 inches apart to ensure even water distribution. This keeps moisture consistent without overwatering, which is critical for vertical gardens.
Fill each pocket with a mix of potting soil and coco coir (I use a 50/50 blend). Press the soil lightly to secure it—you want it firm enough to hold plants but loose enough for roots to penetrate. Leave about 1 inch of space at the top of each pocket for watering.
☀️ Step 3: Select and Plant Fast-Growing Climbers
Choose plants that thrive vertically and tolerate your climate. I recommend ivy, clematis, or climbing roses for year-round coverage. Start with established plants for quicker results, spacing them 12-18 inches apart in each pocket. Dig a hole slightly larger than the root ball, place the plant in, and backfill with soil.
Water deeply right after planting to settle the soil and encourage root growth. Mulch the top of each pocket with ½ inch of bark mulch to retain moisture and suppress weeds. Avoid over-mulching—too much can suffocate roots and attract pests.
💧 Step 4: Water and Maintain for Year-Round Growth
Water the fence 2-3 times weekly during the first month, then adjust based on rainfall. A vertical garden dries out faster than ground-level plants, so check the soil every 3-4 days. You’ll know it’s time to water when the top inch feels dry to the touch.
Fertilize monthly with a balanced liquid fertilizer (10-10-10) during the growing season. Prune leggy growth in early spring to encourage bushier, denser foliage. This keeps your fence looking full and prevents gaps where privacy might slip through.
✂️ Step 5: Prune and Train Vines for Structure
As plants grow, gently train vines along the trellis slats using soft ties or plant clips. This prevents them from sprawling and ensures even coverage. I prune once in late winter to remove dead or weak growth, then again in early summer to shape the fence.
Watch for signs of overgrowth—if vines start crowding out sunlight, thin them out by cutting back one-third of the oldest stems. This rejuvenates the plants and keeps your living fence looking fresh and vibrant all season.
Tips & tricks for building a vertical garden fence
Here's what I learned after building three vertical garden fences—tricks that make all the difference between a functional project and a stunning privacy screen.
Material Selection: Don't skimp on the lumber quality for your frame. Pressure-treated 2x4 lumber resists rot better than untreated wood, especially if your fence will get morning dew or rain. For the horizontal slats, cedar or redwood lasts longer outdoors—both naturally resist decay and insects. I've found that pre-drilling screw holes prevents wood splitting when you attach the slats, saving you from last-minute trips to the hardware store.
Irrigation Strategy: The ¼-inch tubing and 6-inch emitter spacing in Step 2 are perfect, but here's a game-changer: add a small overflow hole at the bottom of each pocket. This prevents waterlogging while ensuring every plant gets moisture. I also recommend using a timer on your irrigation system—set it for 10-15 minutes every other day during dry spells to maintain consistent moisture without overwatering.
Plant Placement: When spacing your ivy, clematis, or climbing roses in Step 3, think about their mature spread. Place faster-growing climbers like ivy on the bottom pockets where they'll get more sunlight, and slower growers like roses on top. This creates a natural gradient of coverage from bottom to top. Pro tip: Use plant clips instead of tying vines—they're gentler on plant stems and easier to adjust as your plants grow.
Long-Term Maintenance: The monthly fertilization in Step 4 works, but I've found that adding a slow-release fertilizer to the soil mix at planting time gives plants a head start. For pruning in late winter and early summer, use sharp bypass pruners—they make cleaner cuts that heal faster. Store your pruners in a dry place to prevent rust, which can spread to your plants.
Pro Tips for Vertical Garden Fence
- Here's what I learned after building three vertical garden fences—tricks that make all the difference between a functional project and a stunning privacy screen.
- Material Selection: Don't skimp on the lumber quality for your frame.
- Irrigation Strategy: The ¼-inch tubing and 6-inch emitter spacing in Step 2 are perfect, but here's a game-changer: add a small overflow hole at the bottom of each pocket.
Frequently asked questions
Got questions about vertical garden fences?
Here are some of the most common ones—plus answers to help you grow your dream living privacy screen with confidence!
How much sunlight does a vertical garden fence need?
A vertical garden fence thrives with at least 4-6 hours of sunlight daily, but many plants (like succulents or ivy) adapt to partial shade. Assess your space: south- or west-facing walls get the most light, while north-facing spots may need shade-tolerant varieties like ferns or hostas. Pro tip: Use a mix of sun-loving and low-light plants for year-round greenery!
How often should I water a vertical garden fence?
Watering depends on your climate, but most vertical gardens need watering every 2-3 days in warm weather. Check the soil moisture—if the top inch feels dry, it’s time to hydrate! Drip irrigation systems (installed behind panels) are ideal for even distribution. Troubleshoot: Yellowing leaves? You might be overwatering—ensure proper drainage!
Can I install a vertical garden fence on a wooden deck or balcony?
Just ensure your deck or balcony can support the weight (most vertical garden systems weigh 5-15 lbs per square foot). Use lightweight materials like fabric pockets or modular panels, and secure them with non-corrosive brackets. For balconies, opt for freestanding or wall-mounted designs to avoid overloading railings.
What’s the easiest DIY vertical garden fence to build?
For beginners, a trellis-and-pocket-panel combo is simplest: Attach a sturdy trellis (like bamboo or metal) to your fence, then hang fabric pockets or pre-planted modular panels. No drilling? Try adhesive hooks or tension rods for lightweight setups. Pre-grown vertical garden kits (with built-in irrigation) also cut setup time!
Will a vertical garden fence survive winter?
Yes! Hardy plants like ivy, boxwood, or winter jasmine stay green year-round, while others (like herbs) may die back but regrow in spring. In freezing climates, use insulated panels or frost-resistant materials. Mulch the base to protect roots, and choose evergreens or drought-tolerant succulents for low-maintenance winter appeal.
Are there affordable alternatives to pre-made vertical garden fences?
DIY on a budget? Try repurposing pallets, PVC pipes, or even old gutters as frames, then fill with fabric pockets or recycled containers. Thrift stores often have cheap planters—stack and secure them vertically with zip ties or wire. Budget hack: Start small with a single panel and expand as you grow!
Wrapping up and next steps
A vertical garden fence isn’t just a stylish upgrade—it’s a game-changer for privacy, sustainability, and curb appeal! 🌿 With year-round greenery, low maintenance, and endless customization, it’s the perfect way to transform your outdoor space into a lush, functional retreat.
Whether you’re a gardening newbie or a green thumb, this project is well within reach.
Ready to take the next step? Start small—pick a section of your fence, gather your supplies, and dive in! Need inspiration? Browse plant varieties or sketch a design first. Your living privacy screen awaits—what will you grow?