Landscaping
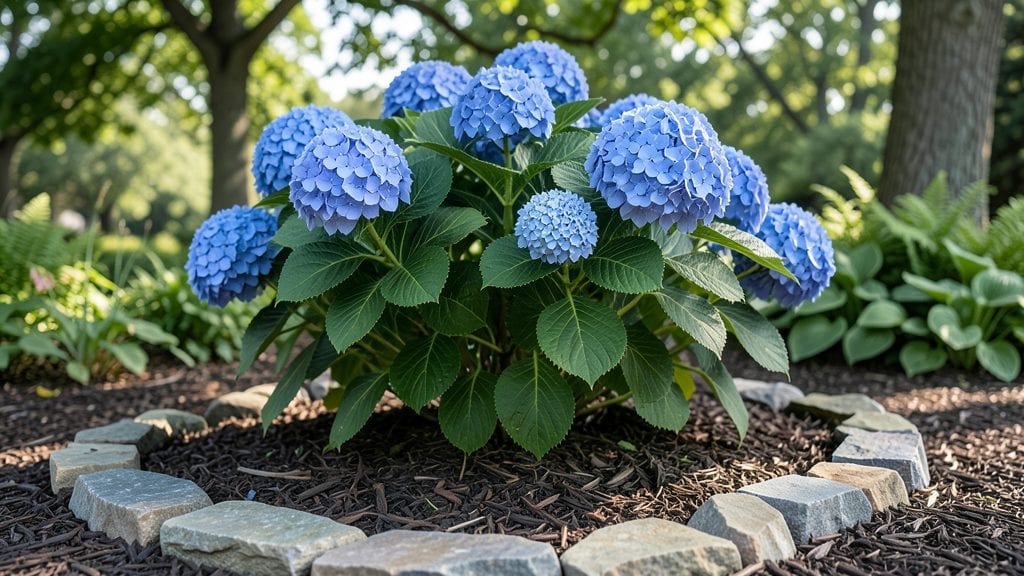
Transforming a narrow side yard into a side garden design that feels lush and intentional starts with thinking vertically and in layers.
I took a 3-foot-wide strip between my fence and sidewalk and turned it into a private retreat—just by stacking plants from sky-high to ground-hugging, each playing its own role in the scene. The key isn’t more space; it’s smarter layering that screens, softens, and keeps the eye moving.
You’ll need three main elements: tall vertical plants (like bamboo or trellised roses) for privacy, mid-height shrubs (such as boxwood or hydrangeas) for structure, and low-growing perennials (like creeping thyme or ajuga) to tie it all together.
Sunlight matters—group plants with similar light needs, and use mulch to keep moisture in and weeds out. Maintenance stays simple if you choose plants that thrive in your zone and don’t need constant pruning. The payoff?
A side garden that feels like a year-round stage—spring bulbs poking through, summer blooms spilling over, fall foliage adding depth, and winter evergreens keeping it cozy. My neighbors now ask how I fit so much in so little space, and the answer is layers, layers, layers.
Let’s sketch out your own.
Here’s the secret weapon: the 3-2-1 rule—three tall plants for height, two medium shrubs for balance, and one low-spreading ground cover to fill gaps. Add a mix of textures (smooth leaves, feathery fronds, velvety blooms) to keep it dynamic, and choose colors that harmonize with your home’s exterior.
For example, deep purple salvia pairs beautifully with silver foliage, while bright red geraniums pop against green. Even in tight spaces, you can create a garden that feels intentional and alive.
📚 In This Guide
- What you need
- Instructions
- Tips and common mistakes
- Wrapping up and next steps
What you need
- ● Plants: 3–5 tall shrubs (e.g., Boxwood, Holly, or Hydrangea) – 3–4 ft tall, spaced 3–4 ft apart.
- ● 5–7 medium-height plants (e.g., Dwarf Lilac, Abelia, or Ornamental Grasses) – 2–3 ft tall, spaced 2–3 ft apart.
- ● 7–10 low-growing perennials/annuals (e.g., Heuchera, Ajuga, or Pansies) – for ground cover, spaced 1–2 ft apart.
- ● 2–3 climbing plants (e.g., Clematis or Jasmine) – if adding a trellis or fence.
- ● Soil & Mulch: 5–10 bags high-quality garden soil (e.g., Miracle-Gro Garden Soil) – 40 lb bags.
- ● 3–5 bags mulch (e.g., Shredded Bark or Pine Straw) – 2–3 cubic feet per bag.
- ● Hardware & Structures: 1–2 trellises or lattice panels (6 ft tall, 2–3 ft wide) – for climbing plants.
- ● 4–6 garden stakes or plant labels – for support and identification.
- ● 1–2 garden edging tools (e.g., Flexible Metal or Plastic Edging) – 10–20 ft length.
- ● Garden trowel – for planting small perennials.
- ● Shovel & spade – for digging and soil prep.
- ● Pruners – sharp, bypass-pruners for trimming.
- ● Wheelbarrow or garden cart – for hauling soil/mulch.
- ● Measuring tape & string – for layout precision.
- ● Gloves & knee pads – because comfort matters!
- ● Slow-release fertilizer (e.g., Osmocote) – for nutrient boost.
- ● Drip irrigation system – for low-maintenance watering.
- ● Solar-powered garden lights – for evening ambiance.
- ● Decorative stones or pebbles – for pathways or borders.
Instructions for creating a functional side garden design
Here's how to build a layered side garden that screens neighbors while providing seasonal beauty.
Mark and Measure Your Space
Start by measuring the length and depth of your side yard area. I like to use wooden stakes and string to outline the space before digging—this keeps the design neat and prevents overstepping boundaries. Measure at least 4 feet deep for a lush, private feel, though narrower designs work for smaller yards. Mark the front edge where the first layer of plants will go, leaving 12-18 inches of walkway space if this borders a path.
Sketch a rough layout on paper first. This helps visualize how tall plants will block views while shorter layers add texture. For example, a 6-foot-tall arborvitae at the back creates instant privacy, while 3-foot shrubs in front soften the look. Always check local property lines before planting—you don’t want to encroach on your neighbor’s space.
Prepare the Soil in Layers
Dig the area to a depth of 12 inches, breaking up any compacted soil with a garden fork. I mix in 3 gallons of compost per 4-foot section to improve drainage and fertility—this is especially important for side gardens where roots compete for space. For heavier clay soil, add 2 inches of coarse sand to the bottom of the trench before backfilling.
Level the soil carefully so water runs toward the center of the garden, not toward the house or driveway. A slight slope of 1 inch per 4 feet encourages drainage without requiring a retaining wall. If your soil is sandy, add 1 inch of peat moss to help retain moisture for shallow-rooted plants.
Plant Tall Back Layers First
Begin with evergreen shrubs or small trees like arborvitae, boxwood, or holly—these provide year-round privacy. Space them 3-4 feet apart to allow for mature growth without overcrowding. For a 6-foot-tall screen, plant at the 4-foot mark from the front edge, ensuring the top branches will reach the desired height within 3-5 years. Water deeply after planting to settle the roots.
If you’re using deciduous plants like ornamental cherry or dogwood, add a 3-foot-tall shrub (such as hydrangea or spirea) in front to fill the gap when leaves drop in winter. Mulch around the base with 2 inches of shredded bark to suppress weeds and retain moisture. Keep mulch 6 inches away from stems to prevent rot.
Add Mid-Height and Filler Plants
Fill the middle layer with 3-4 foot shrubs like dwarf lilac, butterfly bush, or abelia to add color and texture. These should be planted 18-24 inches apart to create a dense, natural look. For seasonal interest, intersperse perennials like coneflowers or black-eyed Susans—their blooms will spill over the edges for a wild, inviting feel.
Here’s the thing—don’t overlook ground covers. Creeping thyme, ajuga, or ivy planted at the front edge will prevent soil erosion and keep weeds at bay. Water the entire layer once a week for the first month to help roots establish, then taper to every 10-14 days once growth appears healthy.
Incorporate Seasonal Accents and Maintenance Plan
Add annuals like impatiens or petunias in front for pops of color, but choose varieties that thrive in partial shade if the area gets afternoon sun. I like to plant these in 6-inch pots first, then transplant after they’ve bloomed for 2-3 weeks—this ensures they’re established before hot weather hits.
Finally, sketch a simple maintenance calendar. Prune evergreens in early spring to shape them, and cut back perennials in late winter before new growth appears. Mulch again in fall to protect roots from freezing temperatures. A side garden like this will mature beautifully in 2-3 seasons with consistent care.
Tips & tricks for perfect side garden design
Creating a functional side garden takes thoughtful planning—here are the key strategies that’ll make all the difference in achieving that lush, private space you envision.
Design with Mature Heights in Mind: When sketching your layout in Step 1, draw your plants to scale using their mature heights, not their current size. A 3-foot shrub now might reach 6 feet in 5 years—this prevents overcrowding later. I always draw a simple vertical scale on my sketch to visualize how each layer will block views over time. This is especially important for the 6-foot arborvitae at the back that should create that instant privacy screen.
Soil Prep Makes All the Difference: The 12-inch depth you dig in Step 2 isn't just about roots—it's about creating the right environment for them. For clay-heavy soil, that 2-inch layer of coarse sand at the bottom can make the difference between soggy roots and thriving plants. I've seen gardens where homeowners skipped this step and struggled with poor drainage for years. If your soil is sandy, the 1-inch peat moss layer will help retain moisture for those shallow-rooted perennials you're adding later.
Plant Placement for Year-Round Interest: In Step 3, when positioning your evergreens, consider how sunlight will change throughout the day. Place taller plants on the north side of deciduous shrubs to prevent shading during winter when leaves are absent. For example, that 3-foot hydrangea you're adding in front of your dogwood will get maximum winter sun exposure if positioned correctly. This simple adjustment ensures all layers contribute to privacy and beauty in every season.
Watering Strategy for New Plants: The first month is critical for establishing roots, so that weekly watering in Step 4 needs to be consistent. I recommend watering deeply in the morning so the soil has time to dry slightly during the day, preventing fungal issues. For newly planted annuals in Step 5, water at the base rather than overhead to avoid damaging delicate petals. A soaker hose makes this easy and ensures even moisture distribution.
Pro Tips for Side Garden Design
- Creating a functional side garden takes thoughtful planning—here are the key strategies that’ll make all the difference in achieving that lush, private space you envision.
- Design with Mature Heights in Mind: When sketching your layout in Step 1, draw your plants to scale using their mature heights, not their current size.
- Soil Prep Makes All the Difference: The 12-inch depth you dig in Step 2 isn't just about roots—it's about creating the right environment for them.
Frequently asked questions
Got questions about maximizing your side garden’s potential? Here are answers to the most common concerns—from planning to upkeep—so you can create a functional, beautiful space without the guesswork.
What are the best plants for a narrow side garden with year-round privacy?
Opt for layered planting with tall evergreens (like Arborvitae or Bamboo), mid-height shrubs (e.g., Boxwood or Hydrangeas), and low ground covers (such as Ivy or Creeping Thyme). Mix deciduous and evergreen varieties to ensure coverage in all seasons. Pro tip: Add climbers like Clematis or Jasmine to trellises for vertical interest!
How long does it take to see noticeable privacy from a side garden?
Most plants take 1–3 years to mature enough for full privacy, depending on the species. Fast-growing options like Leyland Cypress or Bamboo can provide coverage in 1–2 years, while slower growers (e.g., Oak Trees) may take 5+ years. Plan ahead by starting with taller, established plants for immediate impact!
Can I design a side garden on a budget?
Skip expensive materials by using native plants (they’re hardy and low-maintenance), repurposing pallets or bricks for borders, and choosing perennials over annuals. DIY trellises from wood scraps or recycled metal grids can also add structure affordably. Pro tip: Check local "free plant swaps" or nursery clearance sections for deals!
What if my side garden gets too shady? How can I adjust the design?
Shady spots thrive with hostas, ferns, or Heuchera (for color), while Caladiums or Astilbes add texture. For height, try Dwarf Fountain Grass or Japanese Maple. If sunlight improves later in the day, position sun-lovers (like Pansies) on the west side. Troubleshoot: Use reflective surfaces (mirrors or light-colored walls) to brighten the area!
How do I keep pests and weeds from ruining my side garden?
Prevent pests with mulch (suppresses weeds and retains moisture) and neem oil (natural insect repellent). Choose disease-resistant plants (e.g., Ninebark over vulnerable roses). For weeds, hand-pull early or use vinegar-based sprays (spot-treat only!). Pro tip: Plant marigolds or lavender near borders—they deter pests naturally!
Wrapping up and next steps
A side garden is more than just extra space—it’s a chance to craft a serene retreat that enhances your home’s beauty and functionality.
Whether you prioritize privacy, seasonal color, or low-maintenance charm, the right layers of plants, structures, and textures can transform even the smallest yard into a lush, inviting escape. 🌿
Ready to get started? Sketch a rough design on paper or use a free app to visualize your vision. Then, gather inspiration from local nurseries or Pinterest boards—your perfect side garden awaits!