Landscaping
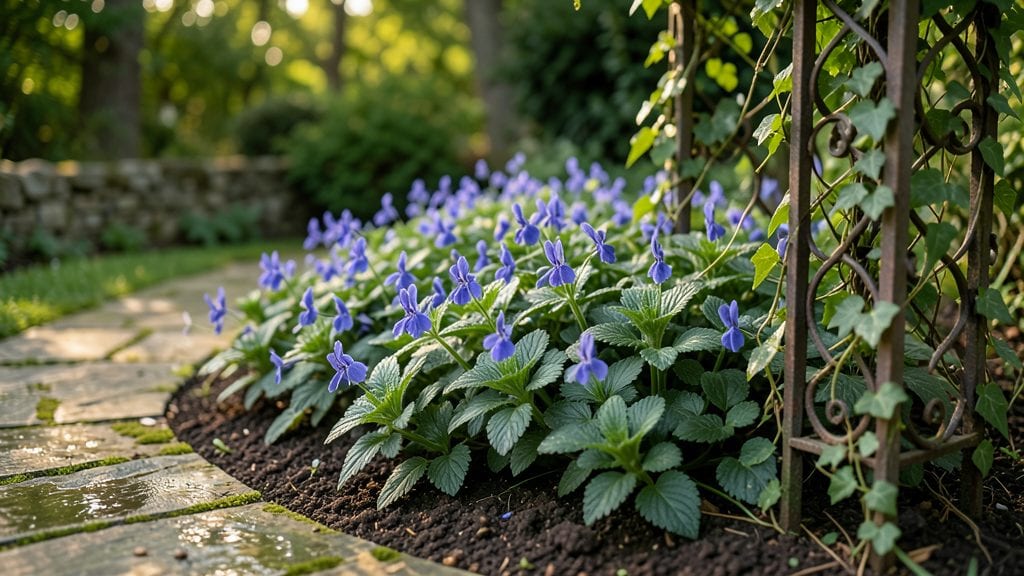
A secret garden landscape isn’t just a backyard—it’s a living storybook where vines climb forgotten stone walls and fragrant blooms hide along winding paths. I stumbled upon this idea after transforming a shady corner of my yard into a layered paradise where sunlight and dappled shade both play their part.
The key? Mixing shade-tolerant plants like ferns and hostas with sun-lovers like clematis and roses, all woven together with arches, trellises, and a few strategic boulders for that "discovered by chance" feel.
You don’t need acres or a green thumb—just a few hours to sketch a simple layout and a shopping list of 10-15 plants that thrive in your light conditions.
Add a meandering path (even a gravel strip works) and a couple of vintage-inspired touches like a weathered bench or a small water feature, and suddenly, you’ve got a space that feels like a secret. The best part?
It’s low-maintenance once established, so you spend more time enjoying it than fussing over it.
Imagine stepping into a world where every turn reveals something new—a burst of purple irises near the path, a hummingbird flitting between hydrangea blooms, or the cool dappled light filtering through a canopy of Japanese maples. This isn’t just a garden; it’s a retreat where the outside world fades away.
By the time you’re done, you’ll have a space that looks like it’s been growing wild for decades, even if you just planted it yesterday.
Works for tiny urban courtyards or sprawling backyards—just scale the elements to fit. The magic is in the layers: tall plants for drama, mid-height shrubs for structure, and ground covers to tie it all together. Let’s bring that enchantment to your yard, one plant at a time.
📚 In This Guide
- What you need
- Instructions
- Tips and common mistakes
- Wrapping up and next steps
What you need
- ● Soil & Mulch: High-quality topsoil (5–10 cubic yards, depending on garden size)
- ● Organic mulch (cedar or hardwood, 2–3 bags)
- ● Compost (1–2 bags, for nutrient-rich soil)
- ● Plants & Greenery: Shade-tolerant plants (e.g., ferns, hostas, or astilbes—3–5 per variety)
- ● Sun-loving perennials (e.g., daylilies, coneflowers—2–4 per type)
- ● Vines (e.g., ivy, clematis—2–3 plants for climbing structures)
- ● Small trees or shrubs (e.g., dogwood, hydrangeas—1–2 for focal points)
- ● Structures & Decor: Arbor or trellis (1–2, for vertical growth)
- ● Garden bench or seating area (1–2, weather-resistant)
- ● Pathway materials (gravel, stepping stones, or pavers—quantity based on layout)
- ● Garden lights (solar-powered or low-voltage, 3–5)
- ● Hand Tools: Garden trowel
- ● Pruners (bypass or anvil)
- ● Hand saw (for cutting branches)
- ● Gloves (heavy-duty, 1–2 pairs)
- ○ Power Tools (Optional but Helpful): Hedge trimmer
- ● Wheelbarrow (for hauling soil/mulch)
- ● String trimmer (for edging paths)
- ● Clear the area of debris or existing vegetation (or plan for gradual removal).
- ● Check local regulations for permits (especially for structures or drainage changes).
- ○ Test your soil’s pH (optional but helpful for plant selection).
- ● Sketch a rough layout (even a simple doodle!) to visualize plant placement and pathways.
How to create a secret garden landscape with mixed light conditions
This layered design brings lushness to any space, blending sun-loving plants with shade-tolerant varieties for year-round beauty.
Design Your Layered Planting Scheme
Start by sketching your space on paper, marking areas receiving full sun (6+ hours), partial shade (3-6 hours), and deep shade (less than 3 hours). I like to divide my design into three vertical layers: tall backdrop plants, mid-height shrubs, and low ground covers. This creates depth and ensures no bare soil shows through.
For sun areas, plan for evergreen trees like holly or boxwood as your tallest layer. In shadier spots, use ferns, hostas, or astilbes for mid-height interest. Fill the lowest layer with creeping thyme, ajuga, or lamium—these stay green year-round and suppress weeds. I always include at least one fragrant plant, like lavender or sweet woodruff, to attract pollinators and add sensory delight.
Prepare the Soil for Diverse Plant Needs
Test your soil's pH and amend it to create the right conditions for both sun and shade plants. Sun-lovers like boxwood and hydrangeas prefer slightly acidic soil (pH 6.0-6.5), while shade plants such as hostas and ferns thrive in neutral to slightly alkaline soil (pH 6.5-7.5). Mix 2-3 inches of compost into the top 12 inches of soil to improve drainage and fertility.
If your soil is heavy clay, incorporate 1 part perlite or coarse sand for every 3 parts soil to loosen it. For sandy soil, blend in 2 parts peat moss or coconut coir to retain moisture. I like to work in 10-15 square feet sections at a time, amending as I go. This prevents exhaustion and keeps the project manageable.
Plant Tall Backdrop Species First
Begin with your tallest plants to establish the framework. Dig holes twice as wide and just as deep as the root ball. For sun areas, plant boxwood, camellia, or dwarf conifers—these provide year-round structure. In shade, opt for ornamental grasses, rhododendrons, or pieris to create a natural, airy backdrop. Space them 3-6 feet apart, depending on their mature size.
Water each plant deeply after placing it in the hole, then firm the soil around the roots with your hands. This removes air pockets and ensures good root-to-soil contact. I always add 1 inch of mulch over the root zone to retain moisture and suppress weeds. Avoid piling mulch against the stems—keep it 2-3 inches away to prevent rot.
Add Mid-Height and Ground Cover Plants
Fill the gaps between your backdrop plants with mid-height shrubs and perennials. In sun areas, try hydrangeas, abelia, or butterfly bush—these bloom prolifically and attract pollinators. For shade, hostas, astilbes, and foamy fleece (tiarella) create lush texture and color. Space these 18-24 inches apart to allow room for growth without overcrowding.
For ground covers, choose plants that thrive in your light conditions. Creeping thyme or ajuga work well in sun, while sweet woodruff or lamium excel in shade. Plant these 12-18 inches apart to ensure they fill in quickly. Water thoroughly after planting to help them establish roots. You’ll see new growth within 2-3 weeks, signaling they’ve taken hold.
Maintain Year-Round Lushness
Water deeply once a week during the first growing season to encourage deep root growth. After that, adjust based on rainfall—sun-loving plants may need water every 5-7 days in dry spells, while shade plants often require less. I check soil moisture by sticking my finger 2 inches deep; if it feels dry, it’s time to water.
Fertilize twice a year: once in early spring with a balanced 10-10-10 fertilizer and again in early fall with a slow-release organic fertilizer. Prune spent blooms regularly to encourage new growth and maintain shape. In late winter, add 2-3 inches of fresh mulch to protect roots and improve soil structure. With this care, your secret garden will stay vibrant and inviting for years.
Tips & tricks for perfect secret garden landscaping
Creating a thriving secret garden requires attention to detail—these tips will help you avoid common pitfalls and elevate your design from ordinary to extraordinary.
Layering is Everything: When planning your three vertical layers (tall backdrop, mid-height shrubs, and ground covers), think about how each layer will mature. I always sketch my design on graph paper, using the spacing guidelines from Step 4 (18-24 inches for mid-height plants, 12-18 inches for ground covers) to visualize the mature plant sizes. This prevents overcrowding and ensures every plant has room to thrive without competing for sunlight or nutrients. In Step 1, I recommend marking sun exposure zones—don't forget to consider how sunlight patterns change throughout the day, especially in areas with partial shade.
Soil Prep Makes All the Difference: The soil preparation in Step 2 is where many gardeners cut corners, but this is the foundation of your secret garden's success. For heavy clay soil, I've found that adding 1 part perlite to 3 parts soil dramatically improves drainage while still retaining enough moisture. For sandy soil, the 2 parts peat moss or coconut coir recommendation works wonders—just make sure to mix it thoroughly into the top 12 inches of soil, not just sprinkle it on top. I like to test my soil's moisture a few days after amending to ensure it's holding water properly without becoming soggy.
Planting Technique Matters: In Step 3, when you're planting your tall backdrop species, pay special attention to the root ball. Gently tease the roots at the edges if they're circling—this encourages outward growth rather than creating a girdled root system that can strangle the plant. After planting, I always do a "water test": give each newly planted specimen a deep watering, then wait 10 minutes and water again. This helps settle the soil around roots and eliminates air pockets. The 1 inch of mulch you add should be spread evenly, leaving that 2-3 inch gap from stems to prevent rot—a common mistake that can kill your plants before they even establish.
Seasonal Maintenance is Key: The care routine in Step 5 works beautifully, but I've learned that timing is everything. When fertilizing in early spring, wait until you see new growth emerging—this prevents burning tender new shoots. For the fall fertilization, I apply the slow-release organic fertilizer after the first frost, which gives roots a nutrient boost as they prepare for winter dormancy. The 2-3 inches of fresh mulch in late winter is crucial, but I always remove any old mulch that's broken down or become compacted first—this prevents suffocating roots and introduces fresh organic matter to the soil.
Pro Tips for Secret Garden Landscape
- Creating a thriving secret garden requires attention to detail—these tips will help you avoid common pitfalls and elevate your design from ordinary to extraordinary.
- Layering is Everything: When planning your three vertical layers (tall backdrop, mid-height shrubs, and ground covers), think about how each layer will mature.
- Soil Prep Makes All the Difference: The soil preparation in Step 2 is where many gardeners cut corners, but this is the foundation of your secret garden's success.
Frequently asked questions
Got questions about creating your own secret garden landscape? You’re not alone! Here are some of the most common queries—and their practical answers—to help you design a thriving, magical space that’s perfect for shade or sun.
What are the best plants for a secret garden that thrives in both shade and sun?
A secret garden landscape thrives with layered plants that adapt to varying light. Start with shade-tolerant stars like hostas, ferns, and astilbes for dappled light, then add sun-lovers such as heucheras, daylilies, or ornamental grasses near brighter spots. Evergreens like boxwood or holly provide year-round structure. Pro tip: Mix perennials with annuals for quick color bursts!
How long does it take to see noticeable results in a secret garden?
Patience is key! Established plants (like shrubs or trees) take 1–3 years to fill out, while fast-growing annuals or perennials (e.g., impatiens or coleus) may show impact in 6–12 weeks. Soil prep and mulching accelerate growth. Layering plants by size (tall in back, low in front) creates instant drama while you wait.
Is a secret garden landscape expensive to maintain?
Not necessarily! Low-maintenance choices like native plants, ground covers (e.g., creeping thyme), and mulch cut costs and water needs. DIY hardscaping (e.g., repurposed stones or driftwood) adds charm without breaking the bank. Invest upfront in quality soil amendments—it pays off in lush, resilient greenery.
How do I protect my secret garden from pests or harsh weather?
Start with pest-resistant plants (e.g., lavender, marigolds, or peonies) and healthy soil to deter critters. Mulch heavily to insulate roots in winter, and use shade cloth in extreme heat. Handpick pests early or introduce beneficial insects like ladybugs. Windbreaks (e.g., bamboo fencing) shield delicate foliage!
Can I create a secret garden in a small space, like a balcony or courtyard?
Vertical gardens
(hanging planters, trellises) maximize space, while container-friendly plants (e.g., fuchsias, sweet potatoes, or dwarf conifers) thrive in tight spots. Mirrors or reflective surfaces amplify light in shady areas. Miniature features like a tiny bench or fairy lights enhance the "secret" vibe—no yard required!
Wrapping up and next steps
A secret garden landscape isn’t just a dream—it’s a doable, magical project that transforms any space into a serene retreat.
Whether you’re working with shade, sun, or a mix of both, the right plants, textures, and layered design can create a lush, thriving oasis that feels like a hidden world. 🌿✨
Ready to bring your vision to life? Start small—pick one corner of your yard or balcony, gather your materials, and dive in! Even tiny steps, like adding a few shade-loving perennials or a cozy seating nook, will make a big difference. Your secret garden awaits—what will you plant first?