Tools
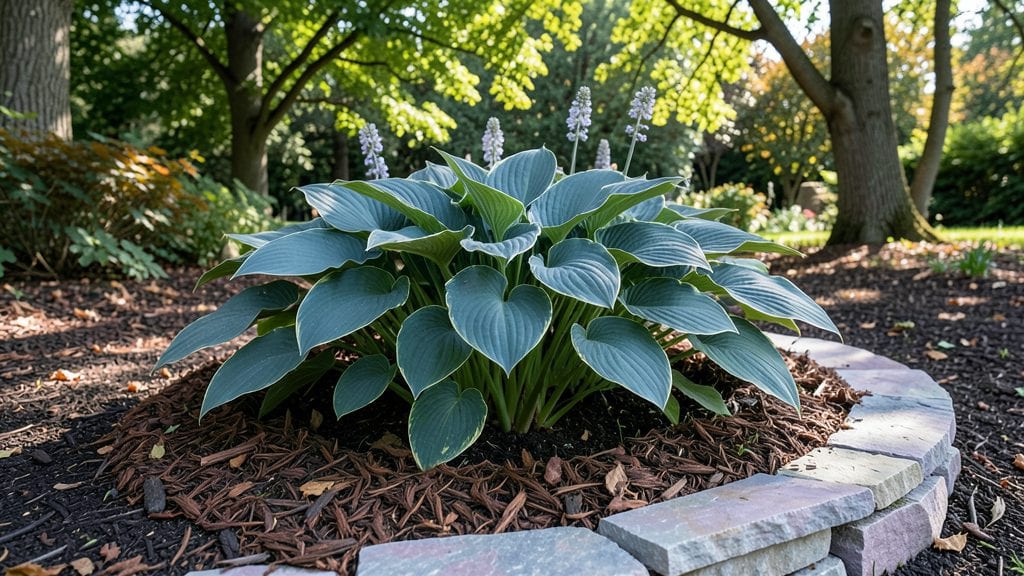
A hosta garden plan transforms shady corners into lush, textured retreats where every leaf feels like a secret. 🌿 I designed mine after struggling with dull, weed-choked spots under my maple tree—until I discovered how hostas turn low-light areas into vibrant focal points with minimal effort.
The key is layering: tall varieties like 'Blue Angel' at the back, medium heights like 'Francee' in the middle, and low-growing types like 'Halcyon' spilling over edges. Pair them with ferns, astilbes, and hellebores for year-round structure, and mulch heavily to keep roots cool and soil moist.
Most hostas thrive in partial shade and consistent moisture, making them shockingly low-maintenance once established.
You’ll end up with a garden that stays green when others fade, blooms with delicate lavender flowers in summer, and develops striking variegation as seasons change.
The texture contrast between broad leaves and delicate foliage creates depth that’s impossible to ignore—neighbors will ask how you did it, and the answer is simpler than it looks.
Works for small shade gardens, woodland edges, or even container displays on patios. The same principles apply whether you’re starting from bare-root plants or dividing established clumps—just adjust spacing for mature size. Let’s make that shady spot the envy of the neighborhood.
📚 In This Guide
- What you need
- Instructions
- Tips and common mistakes
- Wrapping up and next steps
What you need
- ● Hosta plants: 15–25 mature hostas (mix sizes/colors for texture; e.g., 5–7 large, 8–12 medium, 3–5 small).
- ● Soil amendments: 5–10 lbs compost or aged manure (per 10 sq ft).
- ● 2–3 lbs organic mulch (e.g., shredded bark or pine needles).
- ● Garden tools: 1 garden trowel (6–8" blade).
- ● 1 hand pruners (bypass type).
- ● 1 garden fork (for amending soil).
- ● 1 wheelbarrow (for hauling soil/mulch).
- ● Watering supplies: 1 hose with adjustable nozzle (or drip irrigation kit for efficiency).
- ○ 5–10 gallon watering can (optional, for precision).
- ● Decorative elements: Garden stakes or stone markers (to label hosta varieties).
- ● Mulch rings or landscape fabric (to suppress weeds).
- ● Soil tests: pH test kit (hostas thrive in 6.5–7.5; amend with lime/sulfur if needed).
- ● Fertilizer: Slow-release organic fertilizer (e.g., 10-10-10, applied spring/fall).
- ● Pest control: Neem oil spray (for slug/snail prevention).
Step-by-Step instructions for designing a layered hosta garden
Here's how to create a dynamic, textured shade garden that thrives all season long.
🌿 Step 1: Select Hostas for Height and Foliage Variation
Choose 4-6 hosta varieties with contrasting heights and leaf textures to create visual layers. Start with a tall centerpiece (like 'Blue Angel' at 24-30 inches) surrounded by medium-height varieties (such as 'Halcyon' at 18-24 inches). Add low-growing types (like 'Francee' at 6-12 inches) for ground cover. I always group plants by color—silver-blue foliage (e.g., 'Patriot') next to deep green (e.g., 'Guacamole') creates striking contrast.
Dig planting holes twice as wide as the root ball but only as deep as the container level. Space plants 12-18 inches apart depending on mature size—crowding leads to competition and smaller leaves. Amend the planting hole with 1 inch of compost mixed into the native soil to boost fertility without overwhelming roots.
🪴 Step 2: Prepare the Planting Site for Moisture Retention
Hostas thrive in dappled shade to full shade (2-6 hours of morning sun) and consistently moist soil. Test drainage by digging a 6-inch deep hole—if water pools after 30 minutes, amend with 2 inches of coarse sand mixed into the top 12 inches of soil. I avoid heavy clay by adding 3 gallons of peat moss per 100 square feet to improve water retention without compacting.
Mulch immediately after planting with 2-3 inches of shredded bark to suppress weeds and retain moisture. Keep mulch 2 inches away from plant stems to prevent rot. Water deeply right after planting to settle soil around roots—you'll know it's right when the surface looks slightly damp but not soggy and water drains within 15-20 minutes.
☀️ Step 3: Layer with Companion Plants for Texture and Seasonal Interest
Add fern varieties (like 'Osmundastrum cinnamomeum') and carex sedges (such as 'Carex oshimensis Evergold') to fill gaps between hostas. These shade-tolerant plants provide vertical movement and year-round color. I plant 3-4 ferns per 6-foot garden section to create natural drifts—never in straight lines. For winter interest, tuck in Helleborus (Lenten rose) or Epimedium near the front edge where their leathery foliage contrasts with hosta's broad leaves.
Leave 12-18 inches of space between hosta clumps and companion plants to prevent overcrowding. Water newly planted companions every 2-3 days until established—you'll see them bounce back within 2 weeks when they develop new growth. Avoid overhead watering after planting to prevent fungal diseases from splashing soil onto leaves.
✂️ Step 4: Maintain Through Seasons for Peak Performance
Divide hostas every 3-4 years in early spring when new shoots emerge but before foliage unfurls. Dig up the entire clump, separate crowns with 3-5 leaves each, and replant immediately. I always water division sites deeply for the first 7-10 days to encourage root establishment. Remove yellowed or damaged leaves in early spring to redirect energy to new growth—you'll notice fresh green shoots within 2 weeks.
Fertilize lightly in early spring with a balanced 10-10-10 formula at half-strength to avoid leaf burn. Hostas don't need much—too much nitrogen leads to weak stems and floppy leaves. I skip fall fertilization entirely and focus on adding 1-2 inches of compost in early spring instead. Watch for slug damage (irregular holes in leaves) and treat with iron phosphate bait in early evening when slugs are active.
⏰ Step 5: Plan for Year-Round Interest with Seasonal Care
In late summer, deadhead spent flower stalks (if your hosta variety blooms) to redirect energy to foliage. I always prune back any yellowed or browned leaves in fall after the first frost to keep the garden looking tidy. Leave dried foliage on ornamental grasses (like 'Carex') until late winter—it provides winter texture and protects crowns from temperature swings.
Mulch again in early spring with 1-2 inches of fresh mulch to replenish organic matter. Hostas are low-maintenance but reward attention—well-cared-for plants develop broader leaves and deeper colors by their third year. I take photos in late summer to track progress—you'll be amazed how much they fill in over time.
Tips & tricks for perfect hosta garden layers
Creating a stunning hosta garden isn't just about planting—it's about strategic layering that transforms a simple shade garden into a year-round masterpiece. Here's how to elevate your design with professional insights that go beyond the basics.
Color Contrast is Key: In Step 1, when selecting your 4-6 hosta varieties, go beyond just height differences and focus on foliage color contrast. Pair deep burgundy varieties like 'Francee' with chartreuse types such as 'Guacamole' to create visual drama. I've found that grouping plants with three distinct color families (silver, green, and variegated) creates the most dynamic visual impact. This color layering works just as effectively as height variation to draw the eye through your garden.
Soil Prep Secrets: The drainage test in Step 2 is crucial, but here's what I've learned after years of trial and error: if your soil drains too quickly (water disappears in under 15 minutes), add 2 inches of coconut coir instead of sand—it retains moisture better while still preventing compaction. For heavy clay soils that hold water beyond 30 minutes, create raised beds with a 50/50 mix of native soil and composted pine bark to improve structure without overwhelming roots. The goal is to mimic the moist, well-draining conditions hostas love in their native woodland habitats.
Companion Plant Placement: When adding ferns and carex sedges in Step 3, think vertically as well as horizontally. Place taller ferns like 'Osmundastrum cinnamomeum' behind hosta clumps to create natural backdrops, while lower-growing sedges should fill the front edges. I always create three distinct layers of height variation—tall hostas (24-30"), medium ferns (18-24"), and low sedges (6-12")—to maximize visual interest. This layering technique prevents your garden from looking flat, even in full shade.
Seasonal Maintenance Calendar: The care instructions in Steps 4 and 5 work perfectly, but here's my seasonal timing breakdown to keep your hostas thriving year-round: Spring (March-April)—focus on division and early spring fertilization; Summer (June-August)—prioritize deadheading and slug control; Fall (September-November)—prune back brown foliage and add final mulch; Winter (December-February)—monitor for winter burn and plan next year's color combinations. This structured approach ensures you're always one step ahead of seasonal challenges.
Pro Tips for Hosta Garden Plan
- Creating a stunning hosta garden isn't just about planting—it's about strategic layering that transforms a simple shade garden into a year-round masterpiece.
- Color Contrast is Key: In Step 1, when selecting your 4-6 hosta varieties, go beyond just height differences and focus on foliage color contrast.
- For heavy clay soils that hold water beyond 30 minutes, create raised beds with a 50/50 mix of native soil and composted pine bark to improve structure without overwhelming roots.
Frequently asked questions
Got questions about creating a stunning hosta garden? You're not alone!
Here are some of the most common inquiries—plus straightforward answers—to help you plan with confidence.
What’s the best time of year to plant hostas?
Plant hostas in early spring or early fall when soil is workable but not frozen. This gives roots time to establish before extreme heat or cold. Avoid planting in peak summer—drought stress can stunt growth. Pro tip: If you must plant in summer, water deeply 2–3 times weekly and mulch heavily to retain moisture.
How do I keep slugs and snails from destroying my hostas?
Hostas are a slug magnet, but don’t panic! Use copper tape barriers, Beauveria bassiana (a natural fungus), or organic slug baits like iron phosphate. Water in the morning so foliage dries faster, and handpick pests at night with a flashlight. Bonus: Plant slug-resistant companions like heuchera or ferns nearby to distract them.
How long does it take for hostas to mature and fill out?
Most hostas take 3–5 years to reach their full size and density, depending on the variety. Dwarf types (like ‘Blue Mouse Ears’) may mature faster (1–2 years), while giants (like ‘Sum and Substance’) can take longer. Patience pays off! Mulch well and fertilize lightly in spring to speed up growth.
Can I mix hostas with other shade plants for a layered look?
Pair hostas with ferns, astilbes, hellebores, and Japanese painted ferns for texture and color contrast. For height, add carex sedges or foamflower. Avoid competing with aggressive spreaders like mint or lamium. Design tip: Group hostas by color and size—dark leaves (like ‘Halcyon’) beside silver or gold varieties creates drama!
Do hostas survive winter, and how do I protect them?
Most hostas are hardy to USDA Zones 3–9, but young plants or tender varieties (like ‘Francee’) may need protection. In cold climates, mulch heavily (4–6 inches) with straw or shredded leaves after the ground freezes. Avoid mulching too early—it can trap moisture and rot stems. Winter hack: Evergreen hostas (like ‘Patriot’) add year-round interest!
What’s the easiest way to propagate hostas?
Divide mature hostas in early spring or fall when they’re dormant. Dig up the plant, separate crowns with 3–5 leaves each, and replant immediately. For faster results, try leaf cuttings in water (place a leaf in a jar until roots form, then plant the pups). Warning: Avoid dividing every year—let plants mature for 3–4 years before splitting!
Wrapping up and next steps
Creating a stunning hosta garden plan is all about embracing patience, creativity, and a love for lush, layered beauty. With the right variety of hostas, strategic placement, and a touch of mulch or companion plants, you’ve got everything you need to transform your shady spots into thriving, year-round havens. 🌿
Now that you’re armed with tips and inspiration, roll up your sleeves and start planting! Whether you’re a seasoned gardener or just beginning, every hosta you add brings you one step closer to a serene, vibrant outdoor space. Happy gardening! 🌱