Advice
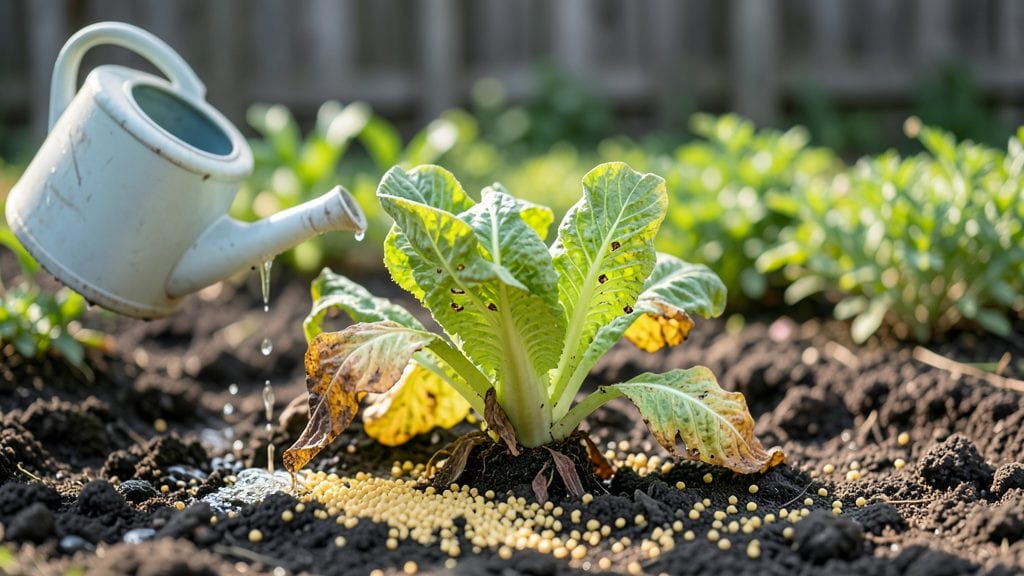
I’ve killed more plants than I’d like to admit, and honestly, it always came down to the same bad gardening habits—ones I see repeated in gardens everywhere.
The good news? Fixing them is easier than you think, and once you spot these mistakes, your plants will thank you with stronger roots and bigger blooms.
Overwatering tops the list—drowning roots chokes growth, while underwatering stresses plants into early decline. Then there’s skipping soil prep: planting straight into compacted or nutrient-poor dirt sets up failure before the first seedling emerges.
Even seasoned gardeners overlook pests until it’s too late, letting aphids or slugs turn lush leaves into skeleton frames.
By the end of this, you’ll recognize these habits in your own garden and know exactly how to reverse them. Think vibrant green leaves instead of yellowing edges, steady growth instead of stunted stems. The fixes are simple, but they’ll transform your garden’s health—permanently.
Whether you’re a beginner or a gardener who’s just hit a slump, these adjustments will make all the difference. Let’s turn those “almost” plants into thriving ones—starting with the first step.
📚 In This Guide
- What you need
- Instructions
- Tips and common mistakes
- Wrapping up and next steps
What you need
- ● Gloves – A pair of durable, breathable gardening gloves (e.g., nitrile-coated for grip and protection).
- ● Trowel – A sturdy, stainless-steel hand trowel (6-8 inches long) for digging and transplanting.
- ● Pruners – Bypass pruners (sharp and clean-cut) for trimming dead or overgrown plants.
- ● Watering can or hose – A lightweight watering can (2-3 gallons) with a rose attachment for gentle watering.
- ● pH test kit – Digital or liquid test strips to check soil acidity/alkalinity (aim for 6.0–7.0 for most plants).
- ● Soil moisture meter – A simple probe-style meter to avoid over- or under-watering.
- ● Organic mulch – Shredded bark or straw (2–4 inches thick) to retain moisture and regulate temperature.
- ● Knee pad or stool – For comfort during long gardening sessions.
- ● Compost – Finished compost (not fresh manure) to amend poor soil.
- ● Slow-release fertilizer – Balanced NPK (10-10-10) for gradual nutrient boosts.
- ● Plant support stakes – Bamboo or metal stakes for tall or floppy plants.
- ● Notebook & pen – To track watering schedules, soil changes, and plant responses.
How to identify and correct common plant-killing gardening mistakes
Even experienced gardeners fall into these traps—here’s how to spot them early and fix the damage.
Overwatering and Recognizing the Signs
Yellowing leaves, mushy stems, and a foul smell from the soil are classic overwatering symptoms. I’ve seen gardeners drown plants by watering on a strict schedule without checking soil moisture. Instead, stick your finger 1 inch deep—if it feels damp, wait another day. Most plants prefer slightly dry soil between waterings, especially in pots where roots can’t spread.
Here’s the thing—overwatering suffocates roots by cutting off oxygen. You’ll notice leaves turning yellow first, then wilting even when the soil is wet. If you suspect overwatering, let the soil dry out completely before watering again. For container plants, lift the pot—if it’s heavy with moisture, hold off. This habit saves more plants than any other fix I’ve used.
Ignoring Proper Drainage and Its Hidden Consequences
Poor drainage is the silent killer of container plants and garden beds alike. I’ve seen gardeners reuse pots without drainage holes or plant in heavy clay soil where water pools. Roots need air as much as water, and soggy conditions invite rot. Always check for drainage holes in pots, and amend garden soil with 10-20% perlite or sand to improve airflow.
If your plant’s leaves yellow and drop even with proper watering, the roots may be drowning. Gently remove the plant from its pot and inspect the roots—if they’re brown and mushy, repot in fresh, well-draining mix immediately. For garden beds, raise planting areas with a mound of soil or use raised beds to prevent waterlogging during heavy rains.
Using the Wrong Soil Mix for Your Plants
Not all plants thrive in the same soil. I’ve watched gardeners use generic potting mix for everything—from moisture-loving ferns to drought-tolerant succulents. Succulents need fast-draining cactus mix, while ferns require peat-heavy, moisture-retentive blends. Always match the soil to the plant’s natural habitat. For example, tomatoes need rich, well-aerated soil, while orchids prefer bark-based mixes.
If your plant struggles to grow despite proper watering, the soil might be the issue. Amending soil with compost or specialized mixes often revives struggling plants. For container plants, refresh the soil every 1-2 years—old mix compacts and loses nutrients. A quick soil test (available at garden centers) can reveal if your mix is too heavy, too sandy, or lacking essential nutrients.
Neglecting Light Requirements and the Resulting Leggy Growth
Leggy, stretched-out plants are a sure sign of insufficient light. I’ve seen gardeners place shade-loving plants in full sun or keep houseplants too far from windows. Most plants need 4-6 hours of direct sunlight (more for sun-lovers like tomatoes or peppers). If your plants grow tall and spindly with small leaves, they’re reaching for light. Move them closer to a bright window or supplement with a grow light.
For indoor plants, rotate them quarter-turn weekly so they grow evenly toward the light. Outdoor plants should be placed where they’ll receive their required sunlight—no guesswork. If you’re unsure, observe the plant’s natural behavior: if it leans toward a window or stretches toward the sun, it’s not getting enough light. Adjust placement immediately to prevent permanent damage.
Skipping Regular Pruning and Maintenance
Deadheading spent blooms and pruning overgrown branches isn’t just about aesthetics—it’s essential for plant health. I’ve seen gardeners let plants grow wild, only to watch them become stressed, diseased, or overcrowded. Prune dead or yellowing leaves immediately to redirect energy to new growth. For flowering plants, deadhead regularly to encourage more blooms and prevent seed production, which can weaken the plant.
If your plant looks crowded or has too many leaves competing for sunlight, it’s time to thin out. Use clean, sharp pruners to make cuts just above a leaf node or bud. This encourages bushier growth and improves airflow, reducing the risk of fungal diseases. For woody plants like shrubs, prune in late winter or early spring before new growth begins. Regular maintenance keeps plants strong and productive.
Tips & tricks for avoiding plant-killing gardening mistakes
Even the most well-intentioned gardeners make these common errors—here’s how to catch them before they become disasters.
Soil Test First: Before planting, grab a small sample of your garden soil and take it to your local extension office for a free or low-cost test. I’ve seen gardeners skip this step and plant directly into soil that’s too acidic, alkaline, or nutrient-poor. The test will tell you exactly what amendments you need—whether it’s lime to raise pH, sulfur to lower it, or compost to boost organic matter. This simple step can save you from months of frustration with plants that refuse to thrive.
Watering Technique: In Step 1, when checking soil moisture, I recommend using a moisture meter for container plants—it’s more accurate than your finger test. For garden beds, water deeply but infrequently. Instead of light sprinkles every day, give your plants 1-2 inches of water per week (more during hot spells). This encourages roots to grow deeper in search of moisture, making plants more drought-resistant over time. Early morning is the best time to water, as it reduces evaporation and fungal growth.
Light Observation: When troubleshooting leggy growth in Step 4, pay attention to the plant’s natural behavior. If you notice leaves stretching toward a window or the plant leaning away from sunlight, it’s definitely not getting enough light. For indoor plants, rotate them quarter-turn weekly to prevent them from growing lopsided. If you’re using grow lights, place them 6-12 inches above the plant and keep them on for 12-16 hours per day to mimic natural daylight cycles.
Pruning Precision: In Step 5, when pruning, always use clean, sharp pruners to make cuts just above a leaf node or bud. Dull tools crush stems and invite disease. For flowering plants, deadhead regularly by pinching off spent blooms just above the next set of leaves. This redirects the plant’s energy into producing more flowers rather than seeds. I’ve seen gardeners skip this step and end up with plants that put all their energy into seed production instead of blooming.
Pro Tips for Bad Gardening Habits
- Even the most well-intentioned gardeners make these common errors—here’s how to catch them before they become disasters.
- Soil Test First: Before planting, grab a small sample of your garden soil and take it to your local extension office for a free or low-cost test.
- Watering Technique: In Step 1, when checking soil moisture, I recommend using a moisture meter for container plants—it’s more accurate than your finger test.
Frequently asked questions
Got questions about common gardening blunders? Here’s what you need to know to keep your green thumbs happy and your plants thriving!
Why do my plants look wilted even when I water them regularly?
Overwatering is a sneaky villain! Too much moisture suffocates roots by cutting off oxygen. Fix: Let the top inch of soil dry out before watering again. Use well-draining soil and pots with drainage holes. Pro tip: Stick your finger in the soil—if it’s damp, wait!
Is it better to water plants in the morning or evening?
Morning wins! Watering early (5–9 AM) gives plants time to absorb moisture before heat evaporates it. Evening watering can invite fungal diseases by keeping foliage damp overnight. Exception: In extreme heat, a light evening watering can help, but avoid soaking the leaves.
Can I reuse old potting soil? What’s the best way to refresh it?
Old soil loses nutrients and compacts over time. Fix: Mix in 25–30% fresh potting soil or compost. For heavy reuse, sterilize it by baking at 200°F (93°C) for 30 minutes to kill pests/diseases. Bonus: Add worm castings for a nutrient boost!
How often should I prune my plants, and what’s the right way to do it?
Prune when necessary, not on a schedule! Remove dead/diseased leaves immediately. For shaping, trim in early spring (before new growth). Use clean, sharp shears to avoid tearing. Rule of thumb: Never cut more than ⅓ of the plant at once—this stresses it out!
Why do pests keep coming back even after I treat them?
Pests return if their favorite conditions persist (e.g., dry soil, crowded plants, or weak immunity). Fix: Improve airflow, rotate crops, and use neem oil or insecticidal soap regularly. Prevention tip: Healthy plants repel pests—fertilize and water consistently!
Wrapping up and next steps
Breaking free from bad gardening habits starts with awareness and small, intentional changes.
Whether it’s overwatering, ignoring soil health, or skipping pest checks, every fix you apply today will reward you with stronger, happier plants tomorrow! 🌱 Start by picking one habit to improve—maybe testing your soil or adjusting your watering schedule—and watch your garden thrive.
🌟 Your Next Step:
Grab a notebook, jot down your garden’s current struggles, and create a simple action plan. Even tiny tweaks—like mulching or pruning—can turn your green thumb struggles into victories. You’ve got this! 🌿