
Landscaping
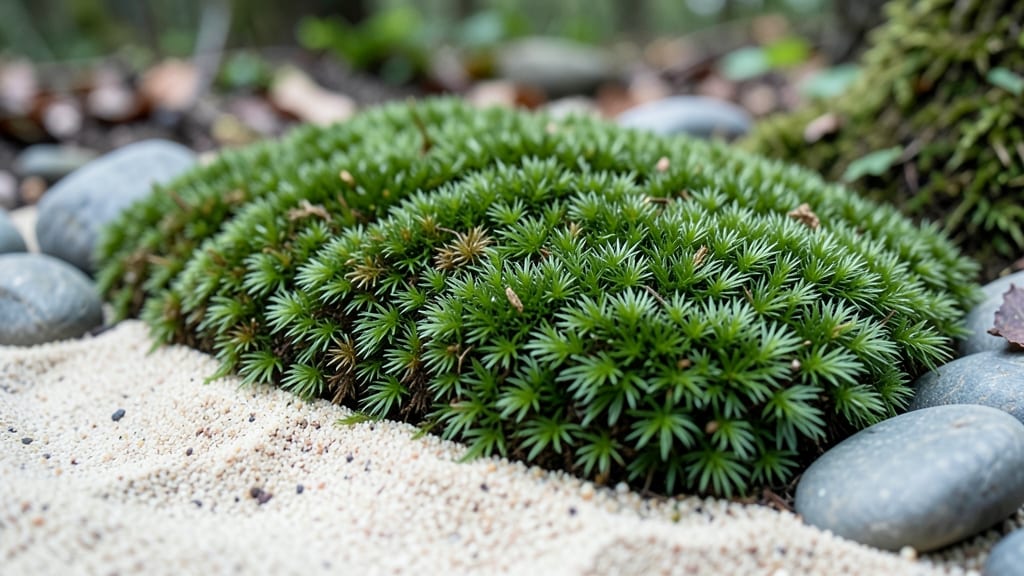
The art of zen garden designs lies in creating serene spaces where every rock, grain of sand, and sweep of rake tells a story of calm. 🌿 I stumbled upon this philosophy after a chaotic year, and it transformed my backyard into a quiet sanctuary—one where the mind finally settles.
The key isn’t perfection but intention: asymmetrical rocks, deliberate gravel patterns, and the quiet hum of nature working together.
You don’t need a sprawling yard—just a small patch of ground, smooth river stones, fine gravel, and a bamboo rake. Bamboo adds organic texture, moss softens edges, and water features (even a tiny bubbling stone) amplify tranquility.
The Japanese influence is subtle but powerful: think of each element as a brushstroke in a living painting, where empty space breathes as much as the details.
What you’ll end up with is a space that feels like stepping into a moment of stillness—where the mind wanders less and the soul lingers longer. The gravel stays cool underfoot, the rocks age beautifully over time, and the act of raking becomes a moving meditation.
Even a 5x5-foot patch can hold this magic if you commit to the simplicity.
Works in urban courtyards, suburban backyards, or even container gardens on patios. The beauty is in the doing, not the doing-over. Let’s bring that peace to your space—one deliberate stroke at a time.
📚 In This Guide
- What you need
- Instructions
- Tips and common mistakes
- Wrapping up and next steps
What you need
- ● Sand: 1–2 cubic yards of coarse, dry sand (avoid fine sand—it clumps!). Pro tip: 💡 Rinse and dry it first for a cleaner look.
- ● Rocks: 10–50 medium-to-large rocks (flat, smooth, and varied in size for texture). Granite or slate works beautifully.
- ● Rake: A long-handled, metal rake (6–8 inches wide) for shaping sand patterns.
- ● Hoe or spade: For leveling the ground and marking designs.
- ○ Gravel or pebbles: 1–2 bags of decorative gravel (optional, for borders or pathways).
- ● String line & stakes: To outline your garden’s shape before digging.
- ● Wheelbarrow: For hauling sand and rocks.
- ○ Water sprayer: To dampen sand for easier raking (optional but helpful!).
- ○ Moss or ground cover: A small bag of sheet moss (optional, for a lush, natural touch).
- ○ Wooden edging or stones: To define the garden’s border (optional but recommended).
- ● A flat, sunny, or partially shaded outdoor space (6’x6’ minimum for a classic design).
- ● Access to water for rinsing sand (if needed).
- ● Basic landscaping knowledge—or a willingness to experiment! 🌟
Step-by-Step instructions for crafting your zen garden design
Here’s how to create a tranquil retreat using simple, intentional elements that bring balance to any outdoor space.
🪴 Step 1: Define Your Space and Gather Materials
Start by selecting a flat, shaded area—even a small patio or balcony works. Clear away debris and smooth the ground with a rake. I like to outline the space with a 2-inch-deep wooden frame (like a mini planter box) to contain the sand and rocks neatly. This keeps everything contained and prevents spills.
For 4 designs, you’ll need 2 cubic feet of fine sand (like play sand) and 10-15 medium-sized rocks (smooth river stones or flat slate work best). Arrange the rocks first—place larger ones as focal points and smaller ones to create pathways or borders. Step back often to check the flow; asymmetry is key in zen gardens, so don’t overthink the placement.
☀️ Step 2: Spread and Smooth the Sand
Pour the 2 cubic feet of sand evenly over the outlined area. Use a wooden rake to spread it into a ¼-inch-thick layer, creating gentle mounds and valleys. The goal is to mimic natural dunes—no need for perfection. I like to rake in S-shaped patterns (a classic zen technique) to add movement and rhythm.
Once the sand feels even, dampen it lightly with a spray bottle until it’s just moist enough to hold your fingerprints. This prevents dust from flying when you rake later. Avoid oversaturating—wet sand clumps and loses its fine texture. Let it dry slightly before adding rocks, so they don’t sink into the surface.
✂️ Step 3: Position Rocks with Purpose
Place your 10-15 rocks intentionally—some clustered, some solitary. In zen gardens, rocks symbolize mountains or islands, so arrange them to create a sense of journey. I often place one large rock as a centerpiece, surrounded by smaller stones in a loose circle. Leave space between rocks for sand to "flow" naturally around them.
Use a small hand trowel to dig shallow depressions for any rocks that feel unstable. Press them lightly into the sand so they stay put, but don’t force them—zen gardens thrive on organic imperfection. Step back and adjust until the arrangement feels balanced, like a quiet conversation between earth and stone.
💧 Step 4: Refine with Raking Patterns
Now comes the meditative part: rake the sand again. Use the wooden rake to create straight lines, curves, or abstract shapes—whatever feels calming to you. I like to rake radiating lines from the center outward to mimic ripples in water. The key is to rake gently but firmly, pressing just enough to leave a visible impression without disturbing the rocks.
If the sand gets uneven, smooth it out with the back of the rake. The texture should feel soft underfoot, like a beach at low tide. Avoid overworking it—zen gardens are meant to feel natural, not meticulously groomed. A little imperfection invites mindfulness.
⏰ Step 5: Maintain with Mindful Care
Once your zen garden is complete, tend to it weekly. Sweep or rake the sand lightly to restore its shape, especially after rain or wind. Use a soft-bristled broom to smooth out footprints or leaf debris. I also add 1-2 new rocks annually to keep the design evolving—it’s a slow, intentional process.
To enhance the serene atmosphere, add small bamboo plants or moss (if your climate allows) along the edges. A small water feature—like a tiny bamboo fountain—can amplify the tranquility. The goal isn’t perfection; it’s creating a space that invites stillness and reflection.
Tips & tricks for perfect zen garden designs
Creating a zen garden is more about intention than precision—here’s how to elevate your design with thoughtful touches that bring harmony to every detail.
The Sand Texture Secret: For that signature zen garden feel, sift your 2 cubic feet of fine sand before spreading it. This removes clumps and creates a silky texture that’s easier to rake into smooth patterns. I like to use a window screen for this—it’s quick and gives you that ultra-fine consistency that looks like a beach at low tide.
Rock Placement Philosophy: When arranging your 10-15 medium-sized rocks, think about creating a "journey" through your garden. Place the largest rock as your focal point (like a mountain peak), then scatter smaller rocks along an invisible path. The key is to leave space—about 2-3 inches between rocks—so the sand can "flow" naturally around them, creating those organic, imperfect lines that define zen gardens.
Raking Technique That Makes a Difference: In Step 4, when you’re creating those radiating lines, use the wooden rake at a slight angle to create depth. Press just enough to leave a visible impression, then lift gently to avoid disturbing the sand. I find that working in small sections—about 12x12 inches at a time—helps maintain consistency. And remember, less is more: a few deliberate strokes create more impact than frantic raking.
Maintenance Made Mindful: Your weekly upkeep doesn’t have to be tedious. Keep a soft-bristled broom handy for quick touch-ups after rain or wind. For deeper maintenance, I like to use a damp sponge to gently smooth the sand—it removes footprints without disturbing the rake patterns. And here’s a pro tip: store your rake and trowel in a dry place to prevent rust, which can leave unsightly marks on your sand over time.
Pro Tips for Zen Garden Designs
- Creating a zen garden is more about intention than precision—here’s how to elevate your design with thoughtful touches that bring harmony to every detail.
- The Sand Texture Secret: For that signature zen garden feel, sift your 2 cubic feet of fine sand before spreading it.
- Rock Placement Philosophy: When arranging your 10-15 medium-sized rocks, think about creating a "journey" through your garden.
Frequently asked questions
Got questions about creating your own zen garden? You’re not alone—many beginners (and even seasoned gardeners!) have curiosities about design, upkeep, and customization. Here are some of the most common ones, answered in a way that keeps your zen vibes intact.
What’s the best size for a zen garden?
A zen garden can be as small as a window box or as grand as a backyard retreat! For beginners, start with a 4’x4’ to 6’x8’ area—it’s manageable for raking patterns and arranging rocks. If space is tight, even a 1’x2’ tabletop garden works beautifully indoors. The key is proportion: ensure your design feels balanced, not cramped.
How long does it take to build a zen garden?
For a basic design, you can complete the foundation (raking sand, placing rocks) in 1–3 hours on your own. Adding intricate rock arrangements or moss layers might take a full day or weekend. Pro tip: Plan first! Sketch your layout (even roughly) to avoid mid-project headaches. Patience is part of the zen process—rush it, and you’ll miss the joy.
Do zen gardens need water?
Not necessarily! Traditional zen gardens use dry elements (raked sand, rocks, moss) to symbolize water. However, if you want to incorporate real water, a small bamboo fountain or shallow stone-lined dish can add soothing sounds. Just ensure it’s low-maintenance—zen gardens thrive on simplicity. Drainage is critical if you add water features to prevent soggy sand.
Can I use regular sand instead of zen garden sand?
While play sand or horticultural sand works in a pinch, specialty zen sand (like kinako or raked sand) is finer and smoother, making it easier to create crisp patterns. Regular sand may clump or contain debris, which can disrupt your meditative raking. If you’re on a budget, rinse and sift your sand first—just avoid coarse or construction-grade sand.
What if my zen garden looks messy after rain?
Rain can disrupt your hard work, but it’s fixable! Let the sand dry completely (1–2 days), then rake it gently with a hake (traditional bamboo rake) to restore smoothness. For muddy spots, sprinkle a thin layer of fresh sand and rake again. Pro tip: Place your garden under a small roof or awning to minimize rain interference—zen gardens are meant to be maintained with ease, not stress.
How can I personalize my zen garden without breaking the style?
Keep the minimalist core (rocks, sand, simplicity) but add subtle personal touches! Swap traditional rocks for local stones or smooth river pebbles. Incorporate a small wooden lantern, a hand-painted stone, or even dried grasses in a low vase. Avoid clutter—think one meaningful element, not a decor explosion. Your garden should still feel like a breathing, peaceful space.
Wrapping up and next steps
Creating a zen garden is more than just arranging rocks and raking sand—it’s an invitation to slow down and reconnect with tranquility. Whether you’re a seasoned gardener or a beginner, these minimalist designs offer a peaceful escape, blending simplicity with purpose.
The key? Start small, stay mindful, and let the process unfold naturally.
Ready to transform your space? Grab your rake, gather a few stones, and begin your zen journey today! 🌿✨ For deeper inspiration, explore local landscaping workshops or dive into books on Japanese garden philosophy.