Container Gardens
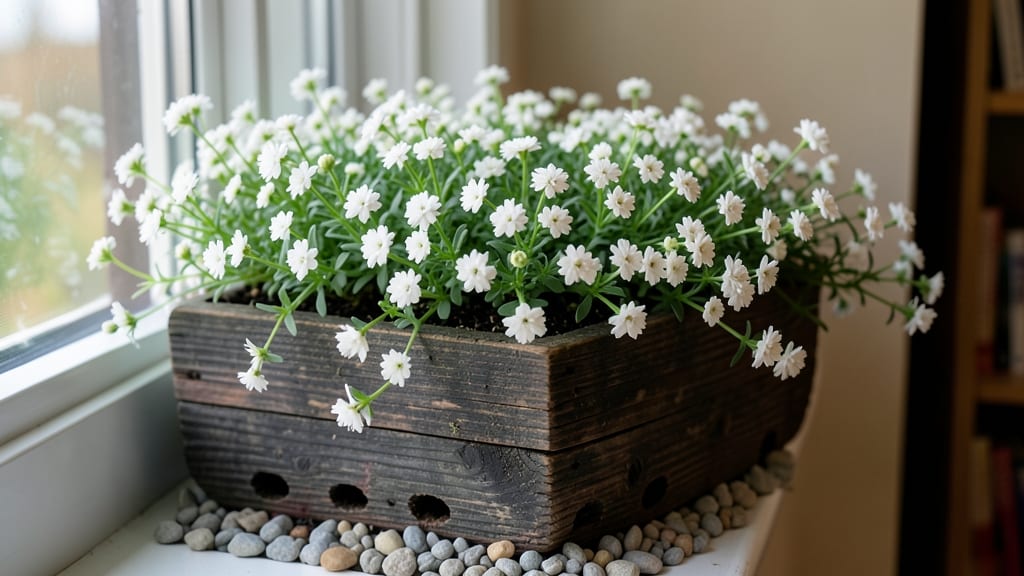
My first window box gardening project turned a dreary apartment balcony into a vibrant green oasis—something I never expected from a few shallow planters. The key was pairing sun-loving herbs with shade-tolerant flowers, creating layers that spill over the edges like a living waterfall.
You don’t need a green thumb to make this work; just the right plants and a little creativity to match your home’s style.
Start with plants that thrive in shallow roots, like petunias, pansies, or trailing ferns. A 5-inch-deep box works for most annuals, while deeper boxes (8+ inches) let you grow herbs or small veggies.
Drainage is non-negotiable—add a layer of gravel or broken pottery at the bottom, or your soil will turn into a swamp. Sunlight is your biggest factor: south-facing boxes get 6+ hours of light, while north-facing spots need shade lovers like impatiens or ferns.
By late spring, you’ll have a cascading display that brightens your home’s exterior—think lavender-blue lobelia spilling over edges or crimson geraniums popping against white siding. The best part?
Swap out plants seasonally: cool-weather pansies in spring, heat-loving zinnias in summer. Even in winter, evergreen boxwoods or dusty miller add structure and color.
Common mistakes? Overwatering (check soil moisture before adding more) or ignoring pests (neem oil keeps aphids away). The payoff is worth it: a low-maintenance way to add charm, curb appeal, and even fresh herbs to your doorstep. Ready to transform that empty space?
📚 In This Guide
- What you need
- Instructions
- Tips and common mistakes
- Wrapping up and next steps
What you need
- ● Window box: Choose one with drainage holes (width: 8–12 inches, depth: 6–10 inches). Wood, plastic, or metal options work—just ensure it’s sturdy!
- ● Potting soil: 2–3 cubic feet of high-quality, well-draining container mix (avoid garden soil—it compacts!).
- ● Plants: Flowers: Petunias, geraniums, or lobelia (3–5 plants per box, spaced 6–8 inches apart).
- ● Herbs: Thyme, oregano, or parsley (1–2 plants per box).
- ● Vegetables: Lettuce, radishes, or dwarf tomatoes (2–3 plants, depending on size).
- ● Drainage material: 1–2 inches of gravel, pebbles, or broken pottery at the bottom (prevents root rot!).
- ● Gloves (gardening or work gloves).
- ● Trowel or small shovel (for planting).
- ● Watering can with a narrow spout (or a spray nozzle).
- ○ Fertilizer: Slow-release granules or liquid feed (optional but helpful!).
- ● Mulch: Cocoa coir or shredded bark (to retain moisture and suppress weeds).
- ● Stakes or ties (for tall plants like tomatoes or snapdragons).
- ● A sunny spot: Most window boxes need 4–6 hours of sunlight daily (check plant tags!).
- ● Access to water: Ensure your setup is near a hose or water source for easy maintenance.
- ● Weather prep: If in a cold climate, choose frost-resistant plants or use a frost cloth in winter.
Step-by-Step instructions for window box gardening
Transforming your windowsills into vibrant vertical gardens is simpler than you think—here's the method I've perfected over years of testing.
Select and Prepare the Window Box
Choose a box with a depth of at least 6 inches to accommodate root systems while allowing drainage. I prefer cedar or redwood for their natural resistance to rot—these materials last for years without warping. Ensure the box has drainage holes drilled along the bottom edge, spaced about 2 inches apart. If your box lacks them, use a 1/8-inch drill bit to create them yourself.
Line the bottom of the box with landscape fabric to prevent soil from washing out through the holes while still allowing water to drain freely. This simple step prevents messes and keeps your plants healthy by preventing root-bound conditions. For extra stability, attach the box securely to the window frame using L-brackets—nothing ruins a project faster than a box falling during a summer storm.
Layer Soil and Add Moisture-Retaining Materials
Fill the bottom third of the box with gravel or coarse perlite to create a drainage layer. This prevents waterlogging, which is especially critical in shallow window boxes where roots have limited space to breathe. Next, add a 2-inch layer of high-quality potting mix—I recommend a blend designed for containers, as it drains well while retaining enough moisture for delicate window box plants.
For the remaining space, mix the remaining 4 inches of potting mix with 1 cup of perlite per cubic foot of soil. This improves aeration and prevents compaction, which is crucial in confined spaces. Water the soil thoroughly until it's evenly moist but not soggy—you should see water trickle out the drainage holes. This ensures your plants start with optimal hydration without sitting in standing water.
Plant With Spacing and Companion Pairings
Arrange your plants in odd-numbered groupings for visual balance—three or five plants per box creates a natural, full look. Place taller plants like snapdragons or petunias at the back and trailing varieties like ivy or nasturtiums at the front. I like to plant 3 inches apart for most annuals, but adjust based on mature size—crowding leads to competition for light and nutrients.
Dig holes slightly deeper than the root ball of each plant and place them gently, ensuring the top of the root ball sits just below the box rim. Fill the holes with soil and press lightly to eliminate air pockets. Water immediately after planting to settle the soil and remove any air gaps around the roots. This first watering helps the plants establish contact with the soil particles, reducing transplant shock.
Position for Optimal Light and Watering Schedule
Window boxes thrive in 4-6 hours of direct sunlight daily, but adjust based on your plants' needs—some, like coleus or impatiens, tolerate partial shade. South- or west-facing windows provide the most light, while north-facing boxes work best for shade-loving varieties. If your window doesn't get enough light, supplement with a full-spectrum LED grow light placed 6-12 inches away for 6-8 hours daily.
Water deeply every 2-3 days during the growing season, checking the soil moisture by sticking your finger 1 inch deep. If it feels dry, water until it runs out the drainage holes—this ensures roots get the moisture they need without becoming waterlogged. In hot weather, you may need to water daily, especially for trailing plants that dry out faster. Mulch the soil surface with 1 inch of shredded bark to retain moisture and suppress weeds, though weeds are rare in such confined spaces.
Maintain With Pruning and Seasonal Adjustments
Deadhead spent blooms regularly to encourage continuous flowering—this simple task prevents seed production and redirects the plant's energy into more vibrant blooms. Use clean, sharp scissors to snip just above a set of leaves or the next bud. For trailing plants, gently weave stems through the box's edges to create a fuller, cascading effect. Prune leggy growth by pinching back the tips to encourage bushier, more compact plants.
As seasons change, swap out plants for seasonal varieties. In spring, opt for pansies or violas; in summer, geraniums or marigolds; and in fall, chrysanthemums or ornamental kale. This rotation keeps your window box vibrant year-round. Before winter, remove annuals and refresh the soil with a 2-inch layer of compost to replenish nutrients for next season's plants.
Tips & tricks for perfect window box gardening
Creating a thriving window box garden takes more than just planting—it requires strategic planning to maximize space and beauty. Here are the key insights I've learned from years of experimenting with vertical greenery.
Drainage is Non-Negotiable: In Step 1, when selecting your window box, verify that drainage holes are properly spaced every 2 inches along the bottom edge. I've seen countless window boxes fail because of poor drainage—roots suffocate when water pools at the bottom. If your box lacks holes, use a 1/8-inch drill bit to create them yourself, and always line the bottom with landscape fabric to prevent soil from washing out while allowing water to escape freely.
Soil Composition Matters More Than You Think: The soil mixture in Step 2 is where many gardeners go wrong. The critical ratio of 2 inches of potting mix followed by 4 inches mixed with 1 cup of perlite per cubic foot creates the perfect balance of aeration and moisture retention. I recommend using a container-specific potting mix rather than garden soil—it drains faster and prevents compaction in the confined space. After mixing, water thoroughly until you see moisture trickle from the drainage holes; this ensures even hydration without waterlogging.
Plant Placement Creates Visual Impact: In Step 3, the arrangement of plants makes all the difference. When creating odd-numbered groupings (three or five plants per box), place your tallest varieties like snapdragons at the back and trailing plants like ivy at the front. The 3-inch spacing between plants allows room for growth while preventing competition for light and nutrients. Pro tip: Dig holes slightly deeper than the root ball and press the soil gently to eliminate air pockets—this reduces transplant shock and helps roots establish contact with the soil more quickly.
Light Requirements Vary by Season: The 4-6 hours of direct sunlight mentioned in Step 4 is a general guideline, but it's crucial to adjust based on seasonal changes. In summer, when the sun is more intense, you might need to provide afternoon shade for delicate varieties. Conversely, in winter, supplement with a full-spectrum LED grow light placed 6-12 inches away for 6-8 hours daily if natural light is insufficient. Always check the specific needs of your plants—some, like coleus, tolerate partial shade, while others, like geraniums, thrive in full sun.
Pro Tips for Window Box Gardening
- Creating a thriving window box garden takes more than just planting—it requires strategic planning to maximize space and beauty.
- Drainage is Non-Negotiable: In Step 1, when selecting your window box, verify that drainage holes are properly spaced every 2 inches along the bottom edge.
- Soil Composition Matters More Than You Think: The soil mixture in Step 2 is where many gardeners go wrong.
Frequently asked questions
Got questions about bringing your window box garden to life? You’re not alone—here are some of the most common ones, answered in a snap! Whether you’re a newbie or a seasoned green thumb, these tips will help you grow with confidence.
What’s the best soil mix for window box gardening?
Use a lightweight, well-draining potting mix blended with perlite or vermiculite (20-30% of the mix). Avoid garden soil—it compacts and drains poorly in shallow boxes. For herbs and veggies, add compost for nutrients, but avoid heavy mixes that retain too much moisture.
When is the ideal time to plant in a window box?
For cool-season crops (like pansies or lettuce), plant in early spring or late summer. Warm-season plants (tomatoes, basil) thrive when soil temps hit 60°F+—usually after your last frost date. Succulents and herbs can often go in year-round in mild climates, but check local frost guidelines!
How often should I water my window box plants?
Check soil moisture daily—window boxes dry out fast due to sun exposure and wind. Water deeply in the morning (1–2 times/day in summer) until water drains from the bottom. Pro tip: Use a self-watering system or drip irrigation to keep roots happy without overwatering.
Can I grow vegetables in a window box, or is it just for flowers?
Try shallow-rooted veggies like lettuce, radishes, green onions, or cherry tomatoes (use dwarf varieties). Herbs like basil, thyme, and parsley also thrive. Just ensure your box is at least 6–12 inches deep and gets 4–6 hours of sunlight daily.
How do I keep pests away from my window box plants?
Prevent pests with neem oil or insecticidal soap for aphids/spider mites. Use row covers for cabbage moths. Encourage beneficial bugs like ladybugs by planting marigolds or dill. For slugs, add a thin layer of diatomaceous earth or copper tape around the edges.
What are some low-maintenance window box plants for beginners?
Start with hardy annuals like pansies, petunias, or impatiens—they bloom nonstop with minimal care. Succulents (sedum, echeveria) and herbs (rosemary, oregano) also thrive with infrequent watering. Choose drought-tolerant varieties if you travel often!
Wrapping up and next steps
Window box gardening is a delightful way to bring nature’s beauty to your space—no matter the season! 🌸 Whether you’re a beginner or a seasoned green thumb, these vertical gardens add charm, freshness, and even edible delights to your home. Start small, experiment with plants, and let your creativity bloom!
Ready to dive in? Pick a sunny spot, gather your supplies, and plant your first window box today! Your balcony or windowsill will thank you with bursts of color and life year-round. Happy gardening! 🌿