Pests and Diseases
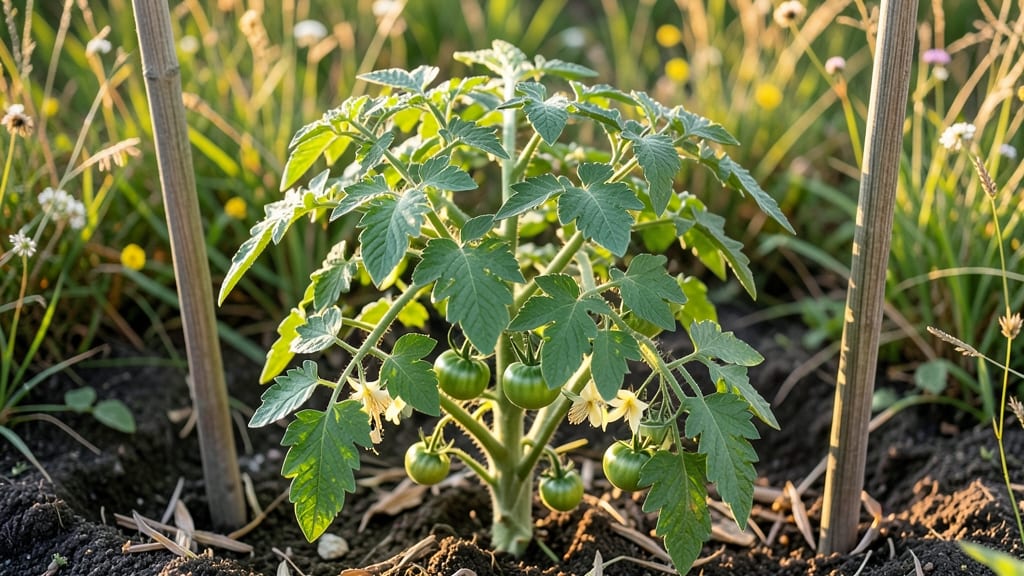
Mastering tomato gardening tips starts with one simple truth: the best harvests come from plants that feel at home in their soil. 🌱 I’ve grown tomatoes for over a decade, and the difference between a handful of fruits and a towering plant loaded with beefsteak slices boils down to these foundational steps—soil prep, smart spacing, and consistent care that keeps pests guessing.
The secret isn’t complicated—it’s about giving tomatoes what they crave: rich, well-draining soil, 6-8 hours of sun daily, and water at the roots, not the leaves.
Most gardeners overlook pruning (I did for years), but removing suckers and lower leaves improves airflow and redirects energy to fruit production. Even in small spaces, a 5-gallon container can yield 10+ pounds of tomatoes if you follow these basics.
By midseason, you’ll notice fewer pests and more flowers converting to fruit. The plants grow taller, the vines thicken, and the flavor? Unmatched by store-bought varieties.
The key is staying ahead of common issues like blight and aphids—simple fixes like neem oil sprays and row covers save entire plants without harsh chemicals.
Works for backyard plots, balconies, or even a sunny windowsill. Whether you’re a first-timer or a seasoned grower tweaking your approach, these tips cut through the guesswork. Let’s get those plants thriving—and your kitchen table overflowing with homegrown tomatoes.
📚 In This Guide
- What you need
- Instructions
- Tips and common mistakes
- Wrapping up and next steps
What you need
- ● Tomato seeds or seedlings: Choose disease-resistant varieties (e.g., 'Celebrity,' 'Solar Fire,' or 'Mountain Merit'). Quantity: 6–12 plants (or 2–3 plants per person, if sharing).
- ● Growing containers or garden beds: Containers: 5-gallon pots or larger (minimum 12–18 inches deep and 18–24 inches wide per plant). Quantity: 1 per plant.
- ● Garden beds: Well-draining soil with 6+ hours of sunlight daily. Amend with compost (2–3 inches mixed into top 6 inches of soil).
- ● Potting mix or garden soil: Lightweight, sterilized mix with 50% compost or aged manure. Quantity: 1–2 cubic feet per plant.
- ● Fertilizer: Balanced starter fertilizer: 10-10-10 or 5-5-5 (follow label for application rates).
- ● Organic slow-release option: Fish emulsion (1-2 tbsp per gallon of water) or worm castings (1 cup per plant).
- ● Support structures: Cages: 4–6 ft tall (galvanized or plastic). Quantity: 1 per plant.
- ● Trellis or stakes: 6–8 ft bamboo or wooden stakes + soft ties (e.g., garden twine or Velcro strips).
- ● Mulch: Straw, grass clippings, or shredded leaves (2–3 inches thick) to retain moisture and deter pests.
- ● Watering tools: Drip irrigation kit or soaker hose (to avoid wetting foliage).
- ● Watering can with a rose attachment (for seedlings).
- ● Pruning tools: Sharp bypass pruners (sterilized with rubbing alcohol) and gloves.
- ● Pest/disease prevention: Neem oil (1 tsp per quart of water) or copper fungicide (for early blight prevention).
- ● Row covers (floating fabric) to protect seedlings from pests like flea beetles.
- ● Soil test kit: Check pH (ideal: 6.0–6.8) and nutrient levels before planting.
- ● Succession planting seeds: For a continuous harvest (e.g., 'Tiny Tim' or 'Patio' varieties).
- ● Reflective mulch: Aluminum foil or silver plastic sheets to deter pests like aphids.
- ● Plant markers: Biodegradable labels or popsicle sticks to track varieties.
- ● Harvest basket: A breathable mesh bag to keep tomatoes from bruising.
Step-by-step instructions for season-long tomato success
Here’s how I keep my tomato plants thriving from transplant to harvest—while keeping pests at bay.
🌱 Step 1: Start with Strong, Disease-Free Transplants
Choose heirloom or hybrid varieties suited to your climate zone, then purchase healthy, stocky seedlings with deep green leaves and no yellowing. Avoid leggy plants—they’ll struggle to recover. If starting from seed, provide 14-16 hours of light daily from day one to prevent weak stems.
Hardening off seedlings is critical. Begin 10-14 days before transplanting by placing them outside in partial shade for 1-2 hours daily, gradually increasing exposure. Watch for wilting or curled leaves—this means they’re not ready yet. Transplant on an overcast afternoon to reduce shock.
☀️ Step 2: Site and Support for Maximum Airflow
Tomatoes thrive in full sun (6-8 hours daily) with well-draining soil amended with compost. I always plant them near basil or marigolds—these companions deter pests naturally. Bury half the stem when transplanting to encourage root growth along the buried portion.
Install cages or sturdy stakes immediately. Weak stems snap under fruit weight, and you’ll lose the harvest. Use galvanized wire cages for indeterminate varieties (they grow tall) or bamboo stakes for determinate types. Prune suckers—those little shoots in the leaf axils—weekly to focus energy on fruit production.
💧 Step 3: Water Deeply and Consistently
Water deeply at the base (not overhead) 2-3 times per week, ensuring 1-2 inches of moisture reaches the roots. Shallow watering stresses plants and invites blossom-end rot (a calcium deficiency). Use drip irrigation or soaker hoses to keep foliage dry—this prevents fungal diseases like early blight.
Mulch with 2-3 inches of straw or shredded leaves to retain moisture and suppress weeds. Check soil moisture by digging 2 inches deep—if it’s dry, water again. Avoid wetting leaves, especially in the evening, to prevent powdery mildew from spreading overnight.
✂️ Step 4: Prune and Monitor for Pests
Prune yellow or diseased leaves immediately to prevent spread. Remove lower leaves touching the soil to reduce blight risk. For indeterminate varieties, prune suckers larger than a pencil—these compete for nutrients. Harvest regularly to encourage more production; overripe tomatoes on the vine attract pests.
Inspect plants weekly for early signs of pests: aphids (curled leaves), hornworms (chewed leaves), or whiteflies (tiny white flies when disturbed). Spray with neem oil or insecticidal soap at dusk for best results. Avoid broad-spectrum chemicals—they kill beneficial insects too.
🌿 Step 5: Fertilize and Adjust for Peak Production
Side-dress with balanced fertilizer (10-10-10) when first flowers appear, then switch to low-nitrogen, high-phosphorus (5-10-10) when fruit sets. Over-fertilizing with nitrogen leads to leafy growth at the expense of tomatoes. Water thoroughly after fertilizing to prevent root burn.
Watch for blossom-end rot (dark sunken spots on fruit)—this means calcium deficiency. Sprinkle crushed eggshells or bone meal around the base and water in. If fruit cracks, reduce watering slightly and mulch thicker to stabilize soil moisture.
Tips & tricks for season-long tomato success
Keeping tomato plants thriving all season requires attention to detail—and a few insider tricks I've learned after years of trial and error. Here's what actually makes the difference between a decent harvest and a bumper crop.
The Light Factor: That 14-16 hours of daily light for seedlings isn't just a suggestion—it's non-negotiable for strong stems. I use a combination of natural sunlight and a grow light on a timer to hit this exactly. The weak stems you get from insufficient light will never support heavy fruit, no matter how much you stake them later.
Hardening Off Strategy: When you're hardening off seedlings during those 10-14 days, I recommend increasing exposure by 30 minutes every other day rather than daily. This gradual approach prevents shock while still preparing plants for transplant. Watch for leaves that stay curled after a few hours in the sun—that's your cue to slow down the process.
Soil Preparation Secret: Before planting, I mix in 2-3 inches of compost AND add a handful of crushed eggshells directly into each planting hole. The compost provides nutrients while the eggshells create a calcium reservoir right where the roots need it most. This simple step nearly eliminates blossom-end rot before it starts.
Watering Precision: Those 2-3 waterings per week should be deep enough to moisten the soil 6-8 inches down, not just the top 2 inches. I test this by sticking a long screwdriver into the soil—if it comes out dry at that depth, it's time to water again. The key is consistency: better to water thoroughly once than lightly three times.
Pro Tips for Tomato Gardening Tips
- Keeping tomato plants thriving all season requires attention to detail—and a few insider tricks I've learned after ye...
- The Light Factor: That 14-16 hours of daily light for seedlings isn't just a suggestion—it's non-negotiable for stron...
- Hardening Off Strategy: When you're hardening off seedlings during those 10-14 days, I recommend increasing exposure ...
Frequently asked questions
Got questions about growing tomatoes? You’re not alone! Here are answers to the most common tomato gardening dilemmas to keep your plants thriving and your harvest bountiful.
When is the best time to plant tomatoes?
Plant tomatoes after the last frost when soil temps reach at least 60°F (15°C). For most regions, this means late spring (April–June). Start seeds indoors 6–8 weeks before transplanting for a head start. Pro tip: Use a soil thermometer to check—cool soil slows germination!
How do I keep pests like hornworms and aphids off my tomatoes?
Prevent pests with neem oil or insecticidal soap for aphids, and handpick hornworms (they’re easy to spot!). Plant basil nearby—it repels pests naturally. For severe infestations, introduce parasitic wasps (like Cotesia congregata) or use BT (Bacillus thuringiensis) for caterpillars.
Why are my tomato leaves turning yellow?
Yellow leaves often signal overwatering or nutrient deficiency. Check soil moisture—tomatoes prefer 1–1.5 inches of water weekly. Yellowing lower leaves? It’s normal aging. Bright yellow with brown edges? Likely overwatering or chlorosis (iron deficiency). Amend soil with compost or use a chelated iron supplement.
How long does it take for tomatoes to grow from seed?
From seed to harvest, tomatoes take 60–100 days, depending on the variety. Determinate types (bush tomatoes) mature faster (50–60 days), while indeterminate (vining) varieties can take 70–100+ days. Track days from transplanting—most seed packets list the days to maturity for guidance.
Can I grow tomatoes in containers? What’s the best setup?
Use containers at least 5 gallons for dwarf varieties or 10+ gallons for indeterminate types. Ensure they have drainage holes and fill with well-draining potting mix. Place in full sun (6+ hours/day) and fertilize weekly with balanced liquid fertilizer. Pro tip: Add cactus soil for better aeration!
What should I do if my tomatoes crack?
Cracking happens from uneven watering (too much after drought) or rapid growth. Prevent it by watering consistently (1–1.5 inches/week) and mulching to retain moisture. If it’s already cracked, harvest early—cracked tomatoes are still edible! For future plants, use drip irrigation to avoid wetting leaves (which causes disease).
Wrapping up and next steps
Growing thriving, pest-resistant tomatoes is totally within your reach—just remember: healthy soil, smart spacing, and proactive care are your best allies. 🌱 With these season-long tips, you’ll enjoy bountiful harvests while keeping pests at bay.
Now that you’re armed with the know-how, why not share your progress? Snap photos of your plants, tag fellow gardeners, or even gift homegrown tomatoes to neighbors—your green thumb will inspire others!
Ready to take it further? Experiment with companion planting or try organic sprays next season. Happy gardening! 🌿