Tools
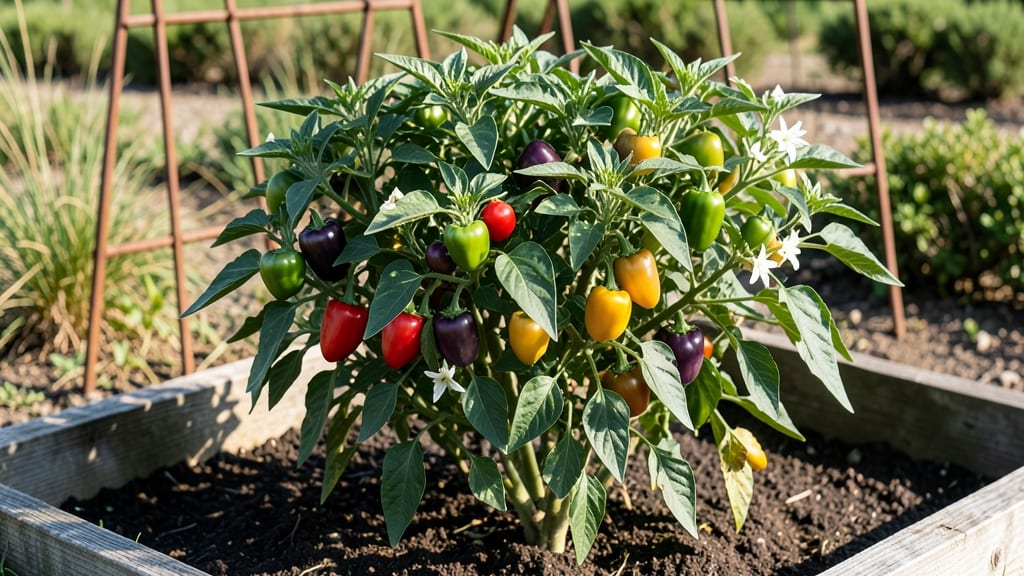
Growing salsa garden peppers means fiery flavors straight from your kitchen window or patio. 🌿 I’ve turned my tiny balcony into a spice factory with just three jalapeño plants—no yard needed. These peppers thrive in containers, so you can grow them anywhere with enough sunlight.
The secret is heat-loving soil and consistent watering—never soggy roots. Start with compact varieties like ‘Apache’ or ‘Carolina Reaper’ for intense flavor in small spaces. They’ll reward you with harvests every 6-8 weeks once established, perfect for fresh salsa or drying.
You’ll end up with glossy green pods that turn vibrant red, yellow, or orange—each packed with heat. The first harvest arrives in about 90 days, and with proper care, plants keep producing well into fall. My salsa game changed forever after that first batch.
Works for beginners and spice lovers alike—just avoid overwatering and keep them in full sun. Here’s how to make it happen without the fuss of a big garden.
📚 In This Guide
- What you need
- Instructions
- Tips and common mistakes
- Wrapping up and next steps
What you need
- ● Salsa garden pepper seeds or seedlings: Choose compact varieties like ‘Apache,’ ‘Lipstick,’ or ‘Shishito’ (3–5 plants for a family-size harvest).
- ● Growing containers: 5–10 gallon pots (1 per plant, with drainage holes)
- ● OR raised beds (at least 12" deep, 2–3 ft wide)
- ● High-quality potting mix: Lightweight, well-draining blend (avoid garden soil—it compacts!). Pro tip: Mix in perlite or coco coir for extra aeration. 💡
- ○ Balcony planter or vertical garden kit: (Optional) For small spaces—hanging pockets or trellises work great for trailing varieties.
- ● Trowel or small hand shovel (for transplanting seedlings)
- ● Watering can with a fine rose nozzle (peppers hate soggy roots!)
- ● Pruning shears (to trim leggy stems and encourage bushiness)
- ● pH test kit (ideal soil pH: 6.0–6.8 for peppers)
- ● Fertilizer: Balanced liquid fertilizer (10-10-10) OR
- ● Slow-release granular fertilizer (like 5-10-10)
- ● Mulch (straw or shredded leaves) (to retain moisture and deter weeds)
- ○ Support stakes or cages (optional, for taller varieties like ‘Jalapeño M’)
- ● Sunlight: 6–8 hours of direct sun daily (south-facing windows or a sunny balcony).
- ● Warmth: Peppers thrive in temps above 65°F (18°C). Use a heat mat if starting indoors early. 🌡️
- ● Water: Consistent moisture (let the top inch of soil dry between waterings).
- ● Patience: Germination takes 7–14 days, and harvest starts 60–90 days after planting!
Step-by-step instructions for growing salsa garden peppers in small spaces
Here's my foolproof method for growing bold, flavorful peppers year-round—even in tiny balconies or windowsills.
🌱 Step 1: Choose and Prepare Containers for Peppers
Peppers need room to grow, so use the 4 large fabric pots (12 inches deep) from your list. Fabric pots prevent root circling and dry out faster than plastic, which helps prevent overwatering. Fill each pot with 2 gallons of the potting mix—don't use garden soil, as it compacts too easily and drains poorly.
Add 1 tablespoon of slow-release fertilizer to each pot and mix it into the top 2 inches of soil. This gives peppers a steady nutrient boost without burning their roots. Tap the pot gently to settle the soil, then water until moisture runs freely from the drainage holes. This ensures the soil is evenly damp before planting.
🌱 Step 2: Plant Peppers and Provide Warmth
Dig a hole in each pot twice as deep as the root ball of your pepper plants. Place one plant per pot, then fill the hole with soil, pressing lightly to remove air pockets. Peppers hate soggy roots, so make sure the drainage holes are uncovered and the pot sits on a saucer to catch excess water.
Peppers thrive in warmth, so keep them in a spot where temperatures stay above 65°F. If your space runs cooler, use the grow light for 14-16 hours daily, keeping it 6 inches above the plants. You'll see new growth within 7-10 days—this is your signal that the roots have settled in and the plant is happy.
☀️ Step 3: Water and Feed for Maximum Flavor
Water peppers once a week, giving each plant 1 cup of water at the base. Let the top 1 inch of soil dry out between waterings—this prevents blossom-end rot, a common pepper problem. Use the liquid fertilizer every 4 weeks to keep peppers producing. Mix 1 teaspoon per gallon of water and apply it directly to the soil, not the leaves.
Peppers love sunlight, so place them in the brightest spot you have. If you're using the grow light, adjust it so the leaves just brush against it—this ensures even growth. You'll know your peppers are thriving when they develop dark green, glossy leaves and start forming buds within 6-8 weeks.
✂️ Step 4: Prune and Harvest for Continuous Production
Once your peppers start fruiting, use the pruning shears to trim any yellow or damaged leaves—this keeps energy focused on producing new peppers. Pinch off the first few flowers if your plant looks stressed; this helps the plant establish stronger roots before heavy fruiting. Harvest peppers when they reach full color but are still firm—this encourages more production.
Peppers are ready to pick when they're bright red, green, or whatever color your variety turns and feel slightly soft to the touch. Use the harvest basket to collect them, and store them in the fridge for up to 2 weeks. If you're growing multiple varieties, label each pot so you don’t mix up your salsa ingredients!
Tips & tricks for perfect salsa garden peppers
Growing peppers in small spaces is totally doable—here's how to maximize your harvest with these game-changing tips.
Container Selection Matters: Those 12-inch fabric pots are perfect for peppers because they prevent root circling and dry out faster than plastic. If you're using plastic containers instead, add extra drainage holes yourself—they're not always included, and peppers absolutely hate soggy roots. Pro tip: Elevate your pots on feet or bricks to improve airflow at the bottom.
Warmth is Non-Negotiable: Maintaining that 65°F minimum temperature is critical, especially if you're growing in cooler climates. I've seen peppers struggle when temperatures dip below this—leaves turn yellow and growth slows dramatically. If your space runs cooler, that 14-16 hour grow light schedule becomes even more important. Place a small thermometer near your plants to monitor temperature fluctuations.
Watering Wisdom: The once-a-week watering schedule works best when you give each plant exactly 1 cup at the base. Here's the thing: peppers are drought-tolerant but hate wet feet. Let that top inch of soil dry completely between waterings—this prevents blossom-end rot, which is that ugly black spot you don't want on your peppers. A moisture meter helps if you're unsure—aim for slightly dry soil rather than damp.
Light Positioning: When using your grow light, keep it just 6 inches above the plants and adjust so leaves brush against it. This ensures even growth without burning the tops. I've noticed that peppers grown under lights develop more intense flavors when they get this consistent light exposure. Rotate your pots every few days so all sides get equal light—this prevents lopsided growth.
Pro Tips for Salsa Garden Peppers
- Growing peppers in small spaces is totally doable—here's how to maximize your harvest with these game-changing tips.
- Container Selection Matters: Those 12-inch fabric pots are perfect for peppers because they prevent root circling and...
- Warmth is Non-Negotiable: Maintaining that 65°F minimum temperature is critical, especially if you're growing in cool...
Frequently asked questions
Got questions about growing salsa garden peppers in small spaces? You’re not alone!
Here are answers to the most common queries—from timing to troubleshooting—so you can master your compact harvest.
How long does it take for salsa garden peppers to produce fruit?
Most salsa pepper varieties (like jalapeño, serrano, or habanero) take 60–90 days from transplanting to produce peppers, depending on the type and growing conditions. Start seeds indoors 8–10 weeks before your last frost date to ensure a timely harvest. Patience pays off—early blooms may drop, but consistent care leads to a steady supply!
Can I grow salsa peppers year-round, even in cold climates?
Use containers or a greenhouse to extend your season. In cold zones, start seeds indoors in early spring, transplant outdoors after frost, and bring pots inside before winter. Compact varieties (like ‘Apache’ jalapeño) thrive in containers and can be overwintered with grow lights. Just ensure 6–8 hours of sunlight daily—even in winter!
What’s the best alternative if my salsa peppers aren’t fruiting?
If peppers refuse to set fruit, check these fixes first:
- Heat stress: Peppers need warmth (70–85°F) to pollinate. Use a fan to mimic wind or hand-pollinate with a paintbrush.
- Low light: Move plants to a sunnier spot or supplement with grow lights (12+ hours/day).
- Nutrient deficiency: Feed with a balanced fertilizer (like 10-10-10) or compost tea every 2–3 weeks.
- Overwatering: Peppers hate soggy roots—ensure well-draining soil and water at the base.
How do I know when salsa peppers are ripe for picking?
Ripeness depends on your flavor goals:
- Green peppers: Harvest when firm and glossy (great for raw salsas).
- Red/yellow peppers: Wait until fully colored—they’re sweeter and richer in flavor!
- Spicy peppers (jalapeño/serrano): Pick when they reach your desired heat level (usually 3–5 inches long).
What pests should I watch for with salsa garden peppers?
Common culprits include:
- Aphids/spider mites: Blast off with a water spray or use neem oil.
- Flea beetles: Cover seedlings with row fabric until established.
- Peppers bugs: Remove eggs (tiny white specks) from leaves daily.
- Blossom end rot: Caused by calcium deficiency or uneven watering. Fix with crushed eggshells in soil and mulch.
Wrapping up and next steps
Growing salsa garden peppers in compact spaces isn’t just possible—it’s a rewarding adventure that brings bold flavors and vibrant colors to your kitchen year-round! Whether you’re a balcony gardener or a small-space enthusiast, these versatile peppers prove that big harvests don’t need big yards.
With the right tools, a little creativity, and the tips you’ve learned, you’re ready to turn even the tiniest patch of soil (or container!) into a fiery, flavorful oasis.
🌱 Your next step? Grab your seeds, pick a sunny spot, and start planting—your future salsa nights are just a few weeks (and a few harvests) away! 🔥