Landscaping
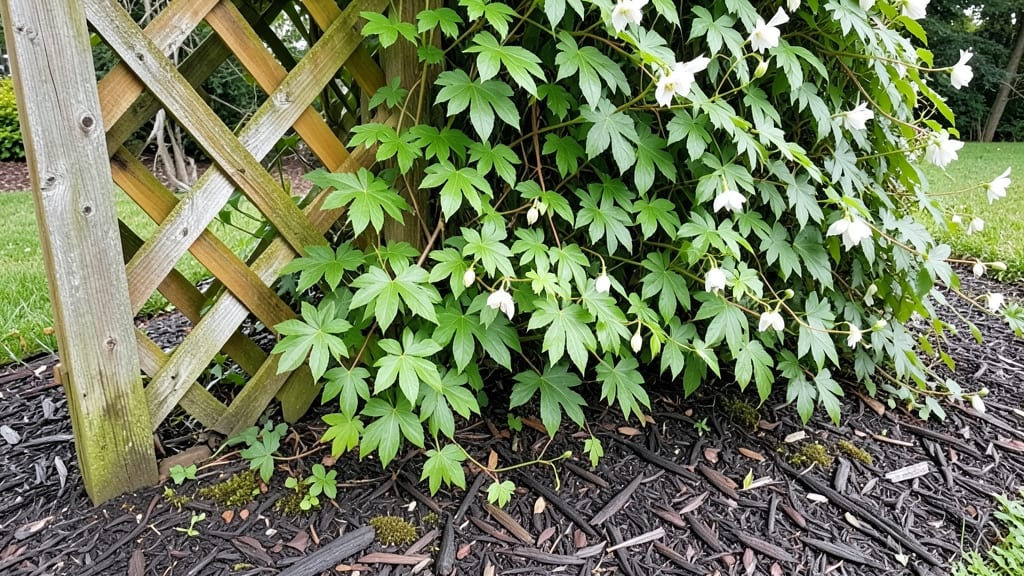
That fence isn’t a boundary—it’s your garden’s secret weapon for privacy and productivity. 🌿 I transformed my narrow yard by stacking plants vertically against the fence, creating layers that block views while maximizing growing space. The key is choosing plants that climb, sprawl, or stay compact without crowding each other.
Start with a sturdy trellis or lattice for vines like clematis or morning glories, then add mid-height shrubs like abelia or dwarf lilacs for texture. Tuck in ground covers like creeping thyme or ajuga to fill gaps at the base.
Most of these thrive in partial shade, making this perfect for fenced areas that get afternoon sun.
By summer, you’ll have a lush, living screen that hides neighbors while producing flowers, edibles, or fragrant foliage. The best part? No more wasted space—every inch becomes useful. Plus, the vertical layers create microclimates that extend your growing season.
Works for any fence height, from 3-foot pickets to 6-foot privacy screens. Here’s how to plan your layers without overcrowding—because a well-designed vertical garden should look intentional, not chaotic.
📚 In This Guide
- What you need
- Instructions
- Tips and common mistakes
- Wrapping up and next steps
What you need
- ● Trellis or lattice panels: 1-2 panels (4’ x 8’ each) or pre-made vertical garden frames (adjust size to fence height). Opt for galvanized metal, wood, or PVC for durability.
- ● Privacy screening plants: Climbing vines (e.g., Clematis, Wisteria, or Ivy) – 3-5 plants per panel.
- ● Fast-growing shrubs (e.g., Bamboo, Hydrangeas, or Boxwood) – 1-3 per linear foot of fence.
- ● Dwarf fruit trees (e.g., Apple or Fig) – 1-2 for height + productivity.
- ● Potting soil: 2-3 bags (10-20 lbs each) of well-draining, organic mix (e.g., Miracle-Gro or FoxFarm Ocean Forest).
- ● Containers or planters: Wall-mounted pockets (for modular gardens) – 10-20 pockets per panel.
- ● Hanging baskets (for trailing plants) – 3-5 baskets.
- ● Fabric grow bags (for lightweight options) – 1-2 bags.
- ● Mulch: 1 bag of cedar chips or shredded bark to retain moisture.
- ● Fertilizer: Slow-release granules (e.g., Osmocote) or liquid feed (e.g., Fish emulsion).
- ● Measuring tape & pencil (to mark plant spacing).
- ● Drill + screws/anchors (for securing trellis to fence; use masonry bits if fence is brick/concrete).
- ● Garden gloves (to protect hands from thorns or soil).
- ● Pruners (bypass pruners for clean cuts).
- ● Trowel or spade (for planting).
- ● Watering can or hose with spray nozzle (for gentle watering).
- ○ Optional: Level (to ensure trellis is straight).
- ● String line (for marking even spacing).
- ● Decorative stakes or LED lights (for ambiance).
- ● Fence assessment: Ensure your fence is stable (no sagging or loose panels). For chain-link, add a sturdy backboard to prevent plant damage.
- ● Sunlight check: Note how much sun/shade your fence gets (e.g., Morning sun = hydrangeas; Full sun = succulents).
- ● Drainage plan: If using containers, ensure they have drainage holes or elevate them to prevent root rot.
- ● Permits (if needed):
Step-by-Step instructions for creating a privacy garden against a fence
Here's how to transform that empty fence space into a lush, private garden in just a few focused steps.
🪴 Step 1: Prepare the Space and Install Trellises
Start by clearing away any weeds or debris along the fence line. Use the wooden trellis panels to create vertical structure—attach them to the fence using galvanized screws spaced 12 inches apart along the top and bottom edges. For extra stability, add a horizontal support beam at 3 feet if your fence is tall. The trellis should extend 2-3 feet outward from the fence to create a layered look.
I like to install the trellis at a slight angle (about 10 degrees) so climbing plants can wrap around naturally. This also helps prevent water from pooling behind the structure. Once secured, you'll have a sturdy framework ready for your vertical plants.
🌱 Step 2: Plant Tall Climbing Plants at the Back
Begin with the fast-growing vines like morning glory or clematis at the base of the trellis. Dig holes 12-18 inches deep and place each plant 6-12 inches away from the fence to allow room for root spread. Mix the slow-release fertilizer into the backfill soil to give them a nutrient boost right away.
Water deeply after planting to settle the soil around the roots. You'll see new growth within 2-3 weeks—that's your signal everything is working. These plants will quickly cover the trellis, creating an instant privacy screen. I always plant them slightly staggered so they fill in evenly.
🌿 Step 3: Add Mid-Height Shrubs for Texture
Next, plant the compact shrubs like hydrangeas or abelia in front of the climbing vines, spacing them 18-24 inches apart. These will create a lush middle layer that softens the vertical lines. Dig holes just deep enough to accommodate the root balls, then water thoroughly to help them establish quickly.
Here's the thing—mulch immediately with the shredded bark to retain moisture and suppress weeds. Spread it 2-3 inches thick in a circle around each plant, keeping it 2 inches away from the stems to prevent rot. You'll notice less watering needed once the mulch settles in.
✂️ Step 4: Fill the Front with Low-Growing Plants
Complete the look with the ground cover plants like creeping thyme or ajuga along the front edge. Space them 12 inches apart to allow them to spread and fill gaps naturally. These plants will cascade slightly over the edges, adding softness to the design.
Water lightly after planting to avoid disturbing the roots. Within 4-6 weeks, you'll see these plants spread and connect, creating a seamless transition between the middle layer and the ground. This is where the real magic happens—the garden starts to feel complete.
💧 Step 5: Maintain with Strategic Watering and Pruning
Water the entire garden deeply once a week during the first 3 months to help roots establish. After that, most of these plants will be drought-tolerant once settled. I always check the soil 1 inch below the surface—if it's dry, it's time to water.
Prune the climbing vines once in early spring and again in late summer to encourage bushier growth. For the shrubs, trim back any leggy stems in late winter before new growth begins. This keeps everything looking neat while promoting healthy growth. You'll love how this garden transforms from sparse to full in just a few months.
Tips & tricks for creating a privacy garden against a fence
These practical tips will help you create a lush, functional privacy garden that thrives for years.
Trellis Installation: When attaching your wooden trellis panels, use a level to ensure they're perfectly vertical before securing with galvanized screws. The slight 10-degree angle mentioned in Step 1 isn't just decorative—it helps water drain properly and prevents rot at the base. I've found that pre-drilling screw holes prevents wood splitting, especially with larger trellis panels.
Planting Strategy: In Step 2, when planting your fast-growing vines, consider adding a handful of compost to each planting hole for extra nutrients. The 12-18 inch depth recommendation works perfectly for most climbing plants, but if you're planting clematis, go deeper—about 18-24 inches—to accommodate their extensive root systems. The staggered planting pattern creates visual interest while ensuring even coverage.
Mulching Wisdom: That 2-3 inch layer of shredded bark in Step 3 is your secret weapon for moisture retention. I like to add a thin layer of landscape fabric under the mulch to prevent weeds from competing with your plants. This simple step can reduce your watering needs by up to 30% once established. Just remember to keep it 2 inches away from plant stems to prevent rot.
Maintenance Schedule: The pruning schedule in Step 5 is perfect for keeping your garden looking its best. I've found that marking these dates on your calendar right after planting helps you stay on track. Early spring pruning encourages new growth, while late summer trimming prevents leggy vines. For shrubs, a light trim in late winter removes dead growth and shapes the plant for the season ahead.
Pro Tips for Garden Against Fence
- These practical tips will help you create a lush, functional privacy garden that thrives for years.
- Trellis Installation: When attaching your wooden trellis panels, use a level to ensure they're perfectly vertical bef...
- Planting Strategy: In Step 2, when planting your fast-growing vines, consider adding a handful of compost to each pla...
Frequently asked questions
What’s the best spacing between plants when gardening against a fence?
Leave 12–18 inches between plants for shrubs and perennials, and 6–12 inches for smaller annuals or herbs. This ensures airflow and prevents overcrowding, which can lead to disease or stunted growth. Check plant tags for specific spacing needs—taller varieties near the fence work best!
How long does it take for a fence-side garden to mature and provide privacy?
Fast-growing options like bamboo, arborvitae, or ivy-covered trellises can offer partial privacy in 1–2 years. Slower growers (e.g., boxwood or holly) may take 3–5 years to fill in completely. Layering plants of different heights speeds up the process!
Are there budget-friendly alternatives to traditional fencing plants?
Use climbing vines (e.g., clematis, wisteria) on trellises, native shrubs (often cheaper and low-maintenance), or even stacked planters with deep-rooted plants like rosemary or lavender. Repurposed wood or metal screens also add texture without breaking the bank.
How do I keep pests away from my fence-side garden?
Start with healthy soil (compost + mulch) to deter pests naturally. Use neem oil or physical barriers (like copper tape for slugs) if needed. Plant pest-repelling companions, such as marigolds (for aphids) or basil (for mosquitoes), near vulnerable plants.
Will a garden against the fence damage my home’s foundation or siding?
Only if water pools against the fence or roots invade cracks. Avoid planting deep-rooted trees (e.g., willows, poplars) within 10 feet of your home. Opt for shallow-rooted shrubs or ground covers, and ensure proper drainage with gravel or French drains if needed.
Wrapping up and next steps
A garden against a fence isn’t just a space-saving hack—it’s a chance to transform a narrow yard into a lush, private oasis with minimal effort. 🌿 By stacking plants vertically, you’ve unlocked year-round beauty, privacy, and even edible harvests, all while working with what you’ve got.
The best part? Every layer you add is a step toward a garden that feels like a retreat, not a compromise.
Ready to turn your fence into a feature? Start small—pick one plant or structure from this guide and build from there. Before you know it, your vertical garden will be the talk of the neighborhood (and your Instagram feed!). Happy planting! 🌱