Vegetables
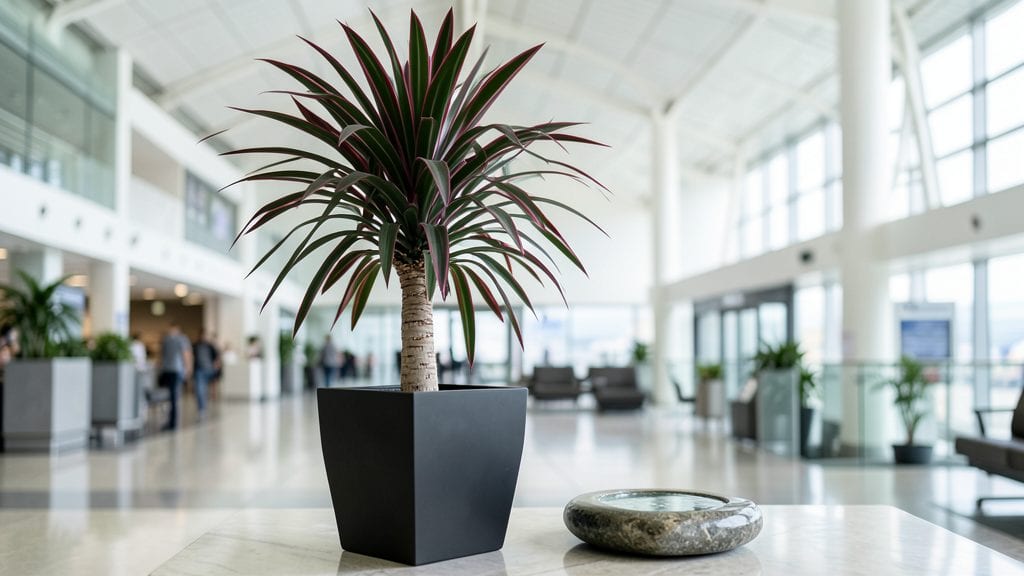
Singapore Airport Gardens showcase how even the busiest urban spaces can thrive with vertical vegetable layers that maximize every inch of space. ✨ The Changi Airport’s lush gardens prove that edible landscapes aren’t just for sprawling backyards—they’re perfect for compact settings where creativity matters more than square footage.
Native tropical plants like lemongrass, kaffir lime, and edible ginger intertwine with ornamental foliage, creating a harvestable tapestry that feeds both the body and the soul.
The real genius lies in their layered approach: raised beds hug the walls, trellises climb upward, and hanging baskets dangle just above head height. This isn’t just aesthetics—it’s a functional system where every plant has purpose, whether it’s a fragrant herb for tea or a leafy green for stir-fries.
The gardens even incorporate water features that double as irrigation, proving sustainability doesn’t require sacrifice. What makes it work? Smart spacing, drought-tolerant choices, and a design that turns maintenance into a meditative ritual.
You’ll leave inspired to rethink your own small space—whether it’s a balcony, rooftop, or narrow yard. The key isn’t having acres; it’s arranging what you have with intention.
Imagine snipping fresh basil for a meal while watching planes take off, or harvesting chili peppers that thrive in a corner most would ignore. These gardens remind us that beauty and productivity can coexist, even in the most unexpected places.
For home gardeners, the takeaway is simple: start small, grow upward, and let nature do the rest. The same principles apply whether you’re designing a windowsill herb garden or a full-scale urban farm. Here’s how to borrow their approach for your own compact harvests—without the airport-scale budget.
📚 In This Guide
- What you need
- Instructions
- Tips and common mistakes
- Wrapping up and next steps
What you need
- ● Vertical Planter System: 3–5 modular pockets (e.g., GrowVeg Vertical Garden or DIY fabric pockets) – 12–18" deep for root growth.
- ● High-Quality Potting Mix: 2–3 bags (5L each) of peat-free, nutrient-rich blend (e.g., Miracle-Gro Organic Choice or coco coir-based mix).
- ● Slow-Release Fertilizer: 1–2 packets of organic vegetable fertilizer (e.g., Osmocote Smart-Release or fish emulsion).
- ● Seeds or Seedlings: Leafy Greens: 10–15 seeds/seedlings (e.g., lettuce, kale, or bok choy – fast-growing, shallow roots).
- ● Herbs: 5–8 seedlings (e.g., basil, Thai basil, or mint – compact and aromatic).
- ● Compact Varieties: 3–5 seedlings (e.g., cherry tomatoes, dwarf peppers, or bush beans).
- ● Watering System: Drip irrigation kit or self-watering reservoir (e.g., Blumax Self-Watering Planter).
- ● Spray bottle (for seedlings).
- ● Support Structures: Small stakes or twine (for vining plants like bush beans).
- ● Tools: Hand trowel (for planting).
- ● Pruning shears (for harvesting/trimming).
- ● Lighting: LED grow lights (if natural light is <12 hours/day).
- ● Mulch: Straw or shredded leaves (to retain moisture).
- ● Compost Tea: Homemade or store-bought (for nutrient boost).
- ● Pest Control: Neem oil spray or beneficial ladybugs (for Singapore’s common pests like aphids).
- ● Decorative Touches: Solar-powered fairy lights or chalkboard labels (for a Changi Airport Gardens vibe!).
Step-by-Step instructions for creating a vertical Singapore Airport Gardens-style vegetable planter
This space-saving system lets you grow a full harvest in minimal square footage—perfect for urban balconies or small patios.
🪴 Step 1: Build the Vertical Framework
Start with a sturdy wooden pallet or metal grid frame (I use treated cedar for longevity). Secure 3-4 horizontal slats across the frame, spaced 12-18 inches apart—this creates your planting tiers. The bottom layer should sit on the ground or a shallow tray to catch runoff, while upper layers need drip irrigation holes drilled along the edges.
Line each tier with landscape fabric to prevent soil from spilling through gaps. I staple the fabric tightly, then fold the edges inward to create a clean planting surface. This keeps your vertical layers neat and prevents soil loss when watering. If using a metal frame, add plastic mesh between tiers for extra stability.
🌱 Step 2: Layer Soil and Plants Strategically
Fill the bottom tier with 2 gallons of potting mix mixed with 1 cup compost. This layer supports heavier plants like lettuce, kale, or Swiss chard, which thrive in deeper soil. For the middle tiers, use 1 gallon of potting mix per layer, blending in ½ cup perlite for drainage—ideal for bush beans, radishes, or herbs like basil.
Top tiers get ½ gallon of lightweight mix (potting soil + ¼ cup coconut coir) for shallow-rooted greens like spinach or microgreens. Plant the tallest varieties at the bottom and shortest at the top to maximize sunlight exposure. I always stagger plants slightly toward the back of each tier so they don’t block light for lower layers.
💧 Step 3: Install Drip Irrigation for Precision
Run ¼-inch tubing along the back edge of each tier, connecting to a water reservoir at the top. Place drip emitters every 12 inches along the tubing, angling them slightly downward to water the center of each plant. This prevents runoff and ensures even moisture—critical for vertical systems where gravity can cause dry spots.
Test the setup by filling the reservoir and watching how water distributes. Adjust emitter spacing if some plants receive more water than others. I like to run the system for 10 minutes daily, then check soil moisture—top layers dry faster, so you may need to water them an extra 2-3 minutes.
☀️ Step 4: Optimize Light and Airflow
Position your vertical garden in full sun (6+ hours daily) or under grow lights if indoors. South-facing walls or balconies work best. For indoor setups, use LED grow lights on a 14-hour timer, keeping them 6-8 inches above the top tier. Rotate the frame quarter-turn weekly so all plants get even light exposure.
Ensure 2-3 inches of space between the frame and any walls to improve airflow. Poor circulation invites pests and fungal issues. I also add small fans on low settings near the garden during hot afternoons—this mimics breezy conditions and strengthens stems.
✂️ Step 5: Maintain and Harvest Layer by Layer
Water top tiers first, then work downward to prevent soggy bottom layers. Harvest leafy greens by snipping outer leaves, leaving the center to regrow. For root vegetables like radishes, pull them when they reach 1-1.5 inches in diameter—overcrowding stunts growth. I harvest top-tier crops every 3-5 days to encourage continuous production.
Fertilize every 4-6 weeks with ½ cup fish emulsion dissolved in water, applied through the drip system. Prune leggy stems immediately to redirect energy to fruit-bearing plants. By rotating crops seasonally (spring: greens, summer: beans, fall: kale), you’ll maximize yield in the same vertical space.
Tips & tricks for perfect vertical Singapore Airport Gardens
Transforming limited space into a thriving garden takes strategic planning—and these pro tips will help you maximize every inch of your vertical system.
Framework Stability: Don't skimp on securing your 3-4 horizontal slats in Step 1. Use stainless steel screws (not nails) for wooden frames to prevent rust, and add corner braces if your frame feels wobbly. I learned this the hard way after my first cedar frame sagged under heavy soil—now I reinforce all joints before adding weight. This ensures your tiers stay perfectly level for even water distribution and plant growth.
Soil Layering Secret: When creating your 2 gallons of bottom-tier mix in Step 2, add ½ cup worm castings to the 1 cup compost for extra microbial activity. The top tiers' ½ gallon lightweight mix should include 1 tablespoon of mycorrhizal fungi to help shallow roots establish faster. This creates a thriving ecosystem where each layer supports the one above it—just like Singapore's famous vertical farms.
Irrigation Precision: Those 10 minutes daily of irrigation in Step 3 are critical, but don't forget to calibrate your emitters. Place a measuring cup under each emitter for 1 minute to ensure consistent flow. You'll likely need to adjust spacing—some plants (like basil) need 0.5 gallons/hour while others (like radishes) thrive with 0.3 gallons/hour. The extra 2-3 minutes for top layers should deliver ¼ cup more water per tier to compensate for evaporation.
Light Optimization: For indoor setups, position your LED grow lights on adjustable arms so you can raise them as plants grow. I start with 6 inches above the top tier and adjust weekly—this prevents light burn while maintaining optimal intensity. The 14-hour timer works perfectly, but add 2 hours of red spectrum light in the evening to boost flowering in herbs like basil. This mimics Singapore's tropical daylight patterns for maximum yield.
Pro Tips for Singapore Airport Gardens
- Transforming limited space into a thriving garden takes strategic planning—and these pro tips will help you maximize every inch of your vertical system.
- Framework Stability: Don't skimp on securing your 3-4 horizontal slats in Step 1.
- Soil Layering Secret: When creating your 2 gallons of bottom-tier mix in Step 2, add ½ cup worm castings to the 1 cup compost for extra microbial activity.
Frequently asked questions
Got questions about growing your own Singapore Airport Gardens-style vertical vegetable garden? Here are some answers to help you get started!
What types of vegetables work best in vertical layers for small spaces?
Leafy greens like lettuce, kale, and spinach thrive in vertical setups due to their shallow roots. Herbs (basil, mint, thyme) and compact veggies such as cherry tomatoes or dwarf peppers are also great choices. Avoid root vegetables like carrots or potatoes—they need deeper soil. Stick to fast-growing, shallow-rooted varieties for best results!
How long does it take to harvest vegetables in a vertical garden at Singapore Airport Gardens?
Harvest times vary! Leafy greens (e.g., lettuce) can be ready in 3–4 weeks, while herbs like basil take 4–6 weeks. Cherry tomatoes may take 2–3 months from seedling. Check seed packets for specific timelines—Singapore’s warm climate speeds things up, but consistent watering and sunlight (or grow lights) are key!
What’s the best way to water vertical gardens without over- or under-watering?
Use a drip irrigation system or a watering can with a long spout to reach all layers evenly. Water in the morning to reduce evaporation. Avoid soggy soil—let the top inch dry out between waterings. Pro tip: Self-watering planters (like those used in Airport Gardens) help maintain moisture without guesswork!
Can I grow these vertical gardens indoors near Singapore Airport?
Just ensure your space gets 6–8 hours of sunlight daily (south-facing windows work best). If natural light is limited, supplement with LED grow lights. Keep humidity moderate (Singapore’s climate helps here!) and avoid drafts. A small balcony or even a sunny hallway can work—just mimic the outdoor conditions of Airport Gardens!
What should I do if my vertical garden plants wilt or turn yellow?
Wilting often means underwatering or root stress—check soil moisture and adjust watering. Yellow leaves? Overwatering, nutrient deficiency, or poor drainage could be the culprit. Repot if roots are crowded, and add balanced fertilizer (like those used in Airport Gardens’ hydroponic setups). If pests appear, spray with neem oil or insecticidal soap.
Wrapping up and next steps
Transforming even the smallest urban space into a thriving garden is totally within reach—thanks to Singapore’s innovative airport gardens approach! By embracing vertical layers and compact designs, you can grow fresh veggies without sacrificing precious floor space.
Whether you’re a seasoned green thumb or just starting, these techniques prove that big harvests don’t need big plots.
Ready to turn your balcony or windowsill into a mini farm? Start small—pick one easy veggie like leafy greens or herbs—and let your urban harvest grow! 🌱💚