
Vegetables
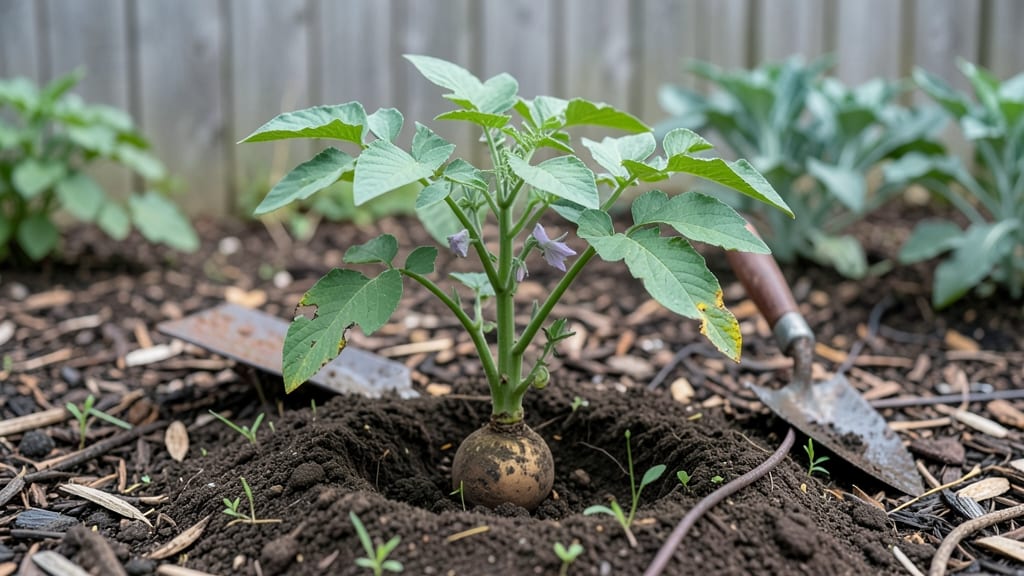
Mastering these potatoes gardening tips will transform your harvest—turning meager yields into a freezer full of plump, perfect tubers with just a few simple tricks. 🌱 I’ve dug up more than my share of small, misshapen tubers—until I learned these secrets that doubled my harvest last season.
The key isn’t just planting; it’s timing, soil prep, and knowing when to stop watering.
Start with loose, well-draining soil mixed with compost—potatoes hate soggy roots. Plant seed potatoes 3-4 inches deep and 12 inches apart, then hill soil around the stems as they grow.
Keep them in full sun and water consistently, but cut back 2 weeks before harvest to toughen the skins. My biggest mistake? Harvesting too early—wait until the foliage yellows completely.
📚 In This Guide
- What you need
- Instructions
- Tips and common mistakes
- Wrapping up and next steps
What you need
- ● Potato Seeds: Choose disease-resistant varieties like Yukon Gold, Red Pontiac, or Fingerling potatoes. Buy seed potatoes (not grocery store potatoes) from a trusted supplier. Aim for 2–3 pounds per 100 sq. ft.
- ● Garden Soil: Well-draining, loose soil with a pH of 5.0–6.5. Amend heavy clay soil with compost or sand.
- ● Fertilizer: Balanced fertilizer (10-10-10) or compost (apply at planting and mid-season).
- ● Potassium-rich fertilizer (like 0-0-53) to boost tuber development.
- ● Mulch: Straw, grass clippings, or leaves to retain moisture and suppress weeds. Use 2–4 inches once plants reach 6 inches tall.
- ● Garden Tools: Hand trowel or transplanting spade
- ● Garden fork (for loosening soil)
- ● Pruners (for harvesting)
- ○ Containers (Optional for Small Spaces): 10–12 inch deep pots or grow bags. Use 1–2 seed potatoes per 5-gallon container.
- ● Hilling Tool: A small shovel or hoe to create mounds for hill planting.
- ● Row Cover: Lightweight fabric to protect young plants from pests or frost.
- ● Potato Cage or Basket: For container growing to save space and support vines.
- ● Soil pH Test Kit: Ensures your soil is in the ideal range for potato growth.
- ● Organic Pest Control: Neem oil or diatomaceous earth for aphids or Colorado potato beetles.
Step-by-step instructions for growing potatoes like a pro
Here's my battle-tested method for growing potatoes that produce heavy yields with minimal fuss.
🌱 Step 1: Choose the Right Variety and Start Early
Potatoes fall into two main categories: early varieties (like 'Yukon Gold') mature in 90-100 days and thrive in cooler climates, while late varieties (like 'Russet') take 120-140 days but produce bigger tubers. I always plant early varieties 4-6 weeks before the last frost—this gives them a head start before the soil warms too much.
For 4 plants, you'll need 4-5 seed potatoes (cut larger ones into chunks with at least 2-3 eyes each). Let the cut pieces dry for 24 hours before planting to prevent rot. This is the moment that matters: healthy seed potatoes with visible eyes ensure strong, vigorous sprouts.
🪴 Step 2: Prepare the Soil and Plant Correctly
Potatoes need loose, well-draining soil rich in organic matter. Work in 3-4 inches of compost into the top 12 inches of soil before planting—this prevents tubers from growing too close to the surface, where they'll turn green and bitter. Avoid fresh manure; it can burn tender roots.
Plant seed potatoes 4-6 inches deep and 12 inches apart in rows 30 inches apart. If your soil is heavy clay, mix in sand or perlite to improve drainage. The key here is depth: shallow planting leads to small, misshapen tubers. Cover each seed potato with 3 inches of soil and water lightly to settle it in.
☀️ Step 3: Hill Soil as Plants Grow for Bigger Harvests
When your potato plants reach 6-8 inches tall, mound soil around the stems up to the leaves—this is called "hilling." Use the 3-4 inches of compost you prepared earlier to create a ridge 4-6 inches high. Repeat this every 2-3 weeks until the plants flower, ensuring 12 inches of soil coverage by harvest time.
Hilling encourages more tuber formation by blocking light, which triggers the plant to produce new growth below ground. You'll notice the stems thicken and leaves darken—this is your signal that the potatoes are bulking up. Never hill in wet soil; wait until it's dry to the touch to avoid compacting the roots.
💧 Step 4: Water and Fertilize for Maximum Yield
Potatoes need consistent moisture, especially during tuber formation. Water 1-2 inches per week, aiming for deep, infrequent watering rather than light daily sprinkles. The soil should stay evenly moist but not soggy—dry spells cause tubers to crack, while overwatering invites rot.
Side-dress with a balanced fertilizer (10-10-10) when plants flower, using ½ cup per plant. Avoid high-nitrogen fertilizers late in the season; they promote foliage growth at the expense of tuber development. Watch for yellowing leaves—this usually means the plant needs more phosphorus or potassium, not nitrogen.
⏰ Step 5: Harvest at the Right Time for Perfect Potatoes
Early varieties are ready when flowers appear and plants start to die back, usually around 90 days. For late varieties, wait until foliage yellows completely and dies—this can take up to 140 days. Dig carefully with a fork or your hands to avoid piercing the tubers.
Cure potatoes for 1-2 weeks in a dark, humid place (60-70°F) to thicken their skins. Store them in a cool (40-50°F), dark, well-ventilated space—never in the fridge, as the cold turns starches to sugar, making them taste sweet and mealy. You'll know they're stored properly when they keep for 4-6 months without sprouting.
Tips & tricks for perfect potato gardening
Growing potatoes that yield generously isn't just about luck—it's about understanding the subtle details that separate a mediocre harvest from a bountiful one. Here are the insights I've gathered after years of trial and error in my own garden.
Seed Potato Selection: When cutting larger seed potatoes into chunks with 2-3 eyes, make sure each piece has at least one eye facing upward. This ensures the sprout grows toward the surface, not into the soil. I've found that cutting with a sharp, sterilized knife and letting the pieces dry for the full 24 hours prevents rot—don't skip this step. The drying process forms a protective callus that keeps diseases at bay.
Soil Preparation Strategy: The 3-4 inches of compost you work into the top 12 inches of soil isn't just about nutrients—it's about creating the perfect environment. Mix in a handful of coarse sand or perlite if your soil is heavy clay, but don't overdo it. Aim for soil that crumbles easily when moist. I've seen tubers grow deformed when planted in compacted soil, so take the time to loosen it properly before planting.
Hilling Technique: When your plants reach 6-8 inches tall, mound that compost-rich soil around the stems up to the leaves. This isn't just about covering the tubers—it's about creating a dark environment that triggers more tuber formation. I like to hill every 2-3 weeks, but only when the soil is completely dry. Wet soil compacts and can smother the roots, so always wait until it's dry to the touch before adding more soil.
Watering Wisdom: The 1-2 inches of water per week recommendation is crucial, but timing matters just as much. Water deeply in the morning so the soil has all day to absorb moisture before evening. I've noticed that watering in the evening can lead to fungal issues, especially when the foliage stays wet overnight. Use a rain gauge or tuna can to measure your water accurately—eyeballing it often leads to either underwatering or overwatering.
Pro Tips for Potatoes Gardening Tips
- Growing potatoes that yield generously isn't just about luck—it's about understanding the subtle details that separate a mediocre harvest from a bountiful one.
- Seed Potato Selection: When cutting larger seed potatoes into chunks with 2-3 eyes, make sure each piece has at least one eye facing upward.
- Soil Preparation Strategy: The 3-4 inches of compost you work into the top 12 inches of soil isn't just about nutrients—it's about creating the perfect environment.
Frequently asked questions
Got questions about growing your dream potato crop? You’re not alone! Here are some of the most common concerns—plus quick, actionable answers to keep your spuds thriving.
How long does it take for potatoes to grow?
Most potato varieties mature in 90–120 days after planting, depending on the type (early, mid-season, or late). Early varieties (like ‘Yukon Gold’) can be ready in as little as 60–70 days, while russets may take closer to 110 days. Check seed packets for exact timelines!
Why are my potato leaves turning yellow?
Yellowing leaves are often a sign of blight, overwatering, or nutrient deficiency. Start by checking soil moisture—potatoes hate soggy roots! If blight (brown spots) appears, remove infected plants immediately and avoid watering overhead. A balanced fertilizer or compost can also help if leaves look pale or stunted.
When is the best time to harvest potatoes?
Harvest when plants flower and foliage yellows (for new potatoes) or after 2–3 weeks of wilting (for mature spuds). For storage varieties, wait until the vines die back completely. Dig gently with a fork to avoid bruising—never wash them until ready to use!
Can I grow potatoes in containers?
Use a 5-gallon bucket or deep pot (12+ inches) with drainage holes. Fill with loose, well-draining soil and plant seed potatoes 4–6 inches deep. Container-grown potatoes need regular watering and may yield smaller harvests, but they’re perfect for patios or small spaces!
What can I plant after potatoes to improve soil?
Potatoes are heavy feeders, so follow them with nitrogen-loving crops like beans, peas, or corn. For long-term soil health, plant cover crops (e.g., clover or winter rye) to restore nutrients. Avoid replanting potatoes or nightshades (tomatoes, peppers) in the same spot—rotate to prevent disease!
Wrapping up and next steps
Growing your own potatoes is a rewarding journey that combines patience, care, and a little creativity! 🌱 From choosing the right variety to mastering planting techniques and troubleshooting common issues, these potatoes gardening tips set you up for a bountiful harvest.
Whether you're a beginner or a seasoned gardener, the key is to start small, stay consistent, and enjoy the process—your future meals (and bragging rights!) will thank you.
Ready to dig in? Your next step: Grab those seed potatoes, mark your calendar for planting, and get ready to transform your garden into a potato powerhouse! 🚜✨ Happy growing!