Tools
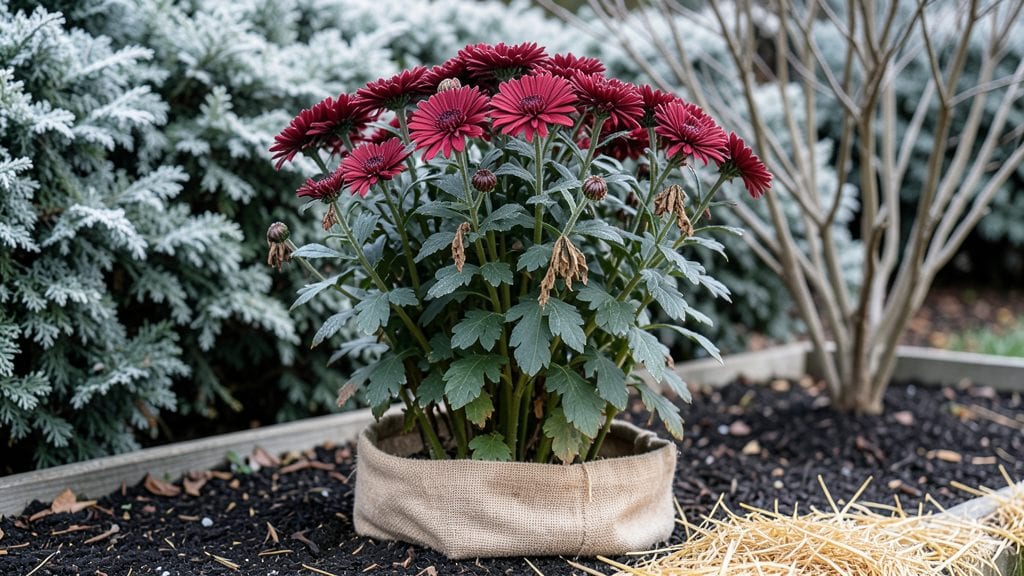
Overwintering garden mums isn't just about survival—it's about setting them up to return next year with bigger blooms and stronger stems than ever before. I've learned that skipping this step means sacrificing next season's showstopping color, but with the right timing and care, these perennials bounce back like champions.
The key is acting before the first hard frost, when the plants still have energy stored in their roots.
You'll need sharp pruners, a thick layer of mulch (straw or shredded leaves work best), and a way to shield the crown from extreme cold if your zone drops below 20°F. The process takes about 30 minutes and prevents the two biggest overwintering failures: rot from soggy soil and pest damage from weakened stems.
Even in harsh winters, proper prep means you'll see fresh green shoots pushing through the soil by late March or early April.
What you'll end up with is a garden that looks like it's been blooming all year—those familiar mums emerging when others are still struggling. The foliage stays lush, the blooms arrive earlier, and you avoid the disappointment of dead plants come spring.
This method works for USDA zones 5-9, with adjustments for colder climates where extra protection is needed.
Here's where it gets interesting—some gardeners swear by adding a lightweight row cover over the mulch for the harshest months, while others focus on soil prep.
The right approach depends on your local freeze patterns, but the principle stays the same: protect the roots, preserve the energy, and give them a fighting chance. Let's get those mums ready for another standout season.
📚 In This Guide
- What you need
- Instructions
- Tips and common mistakes
- Wrapping up and next steps
What you need
- ● Garden mums (Chrysanthemums): Choose hardy varieties like 'Indiana' or 'Mum's the Word'—they handle cold better!
- ● Garden gloves: A pair of durable, weather-resistant gloves (e.g., Wet & Forget or Fiskars)
- ● Pruning shears: Sharp, bypass-pruners (e.g., Felco F-2) for clean cuts
- ● Mulch: 2–3 inches of organic mulch (straw, shredded leaves, or pine bark)
- ● Burlap or frost cloth: Enough to wrap 2–3 plants (1–2 yards per plant)
- ● Stakes or small wooden dowels: 6–12 inches long (for support if needed)
- ● Garden twine or soft ties: For securing wraps (avoid plastic—it can trap moisture!)
- ● Watering can or hose with a gentle spray nozzle: For hydration adjustments
- ● Slow-release fertilizer: A balanced 10-10-10 or organic option (apply in early spring)
- ● Plant tags: To label varieties and track care notes
- ● Thermometer: A soil or air thermometer to monitor temps (aim for above 20°F)
- ● Compost or worm castings: For a nutrient boost before spring
- ● Decorative pots (if potted mums): Insulated containers for extra protection
Step-by-Step instructions for overwintering garden mums
Here’s the foolproof method I’ve used for years to keep garden mums thriving through winter.
Cut Back Foliage After First Frost
Wait until after the first hard frost has blackened the leaves—this signals the plant has entered dormancy. Using sharp pruners, trim back the entire plant to about 2 inches above the soil line. This prevents disease and rot by removing dead foliage while leaving enough growth to protect the crown from harsh winds.
Don’t rush this step. If you cut too early, new growth will be vulnerable to frost damage. I like to do this in late fall, just before the ground freezes. The remaining stems act as a natural insulator for the crown during winter.
Apply a Layer of Mulch for Insulation
Spread a 3-4 inch layer of straw mulch evenly over the base of the plant, extending it out 6 inches beyond the crown. Straw is ideal because it’s lightweight yet effective at trapping heat while allowing moisture to escape. Avoid using leaves or grass clippings—they can compact and suffocate the plant.
This mulch layer acts like a blanket, protecting the roots from extreme temperature fluctuations. Check it once or twice during winter to ensure it hasn’t shifted or compressed. If it does, fluff it up to maintain its insulating properties.
Protect with a Frost Blanket or Burlap Wrap
Wrap the entire plant (including the mulch) in a frost blanket or burlap sack to shield it from freezing winds and heavy snow. Secure it loosely with twine or clothespins—tight wraps can restrict airflow and trap moisture. This extra layer is crucial in zones with below 0°F temperatures, where even mulch alone may not be enough.
If you’re in a milder climate, you can skip the blanket and rely solely on mulch. But in colder regions, this step makes all the difference. I’ve seen mums survive -10°F winters with this protection—something they’d never do without it.
Monitor and Adjust Through Winter
Check your mums once a month during winter to ensure the mulch hasn’t shifted or the blanket hasn’t torn. If snow accumulates, gently brush it off the blanket to prevent excessive weight. Avoid disturbing the plant unless necessary—each check should be quick to minimize stress.
If you notice any exposed crowns or bare spots, add a little more mulch immediately. The goal is to keep the plant’s energy focused on survival, not recovery from cold damage. Most mums will stay dormant until late winter or early spring, so patience is key.
Uncover and Fertilize in Early Spring
Remove the frost blanket or burlap in early spring, just as new growth begins to emerge. This is usually around March or April, depending on your climate. Gently pull back the mulch as well, but leave about 1 inch around the base to protect against late frosts.
Once the soil warms to 50°F, apply a balanced 10-10-10 fertilizer around the base of the plant. Water deeply to help the roots wake up and establish new growth. You’ll see fresh shoots within 2-3 weeks, signaling that your mums are ready to rebound beautifully for another season.
Tips & tricks for overwintering garden mums
Here’s what I’ve learned from years of successfully overwintering garden mums—tricks that’ll help you avoid common mistakes and ensure your plants rebound beautifully next spring.
Timing is Everything: In Step 1, wait for that first hard frost to blacken the leaves before cutting back. This natural signal tells you the plant has fully entered dormancy. I’ve made the mistake of trimming too early, and the new growth that sprouted got fried by subsequent frosts. The remaining 2-inch stems actually help insulate the crown during winter, so don’t remove them completely.
Insulation Layer Secrets: When applying the 3-4 inch straw mulch in Step 2, focus on creating an even layer that extends 6 inches beyond the crown. The key is to avoid compacting the straw—it needs to stay fluffy to trap heat. I like to spread it in late afternoon when dew is present so it settles naturally. For extra protection in extremely cold zones (below 0°F), consider adding a second layer of straw once temperatures drop below 10°F.
Frost Protection Hacks: If you’re in a region that regularly dips below 0°F, the frost blanket in Step 3 is non-negotiable. I’ve found that securing it with clothespins works better than twine—it’s easier to adjust and less likely to cut into the stems. For plants in containers, consider wrapping them completely in bubble wrap before adding the frost blanket for an extra insulating layer.
Spring Transition Strategy: In Step 5, when removing the frost blanket in early spring, do it gradually over 2-3 days rather than all at once. This helps the plant acclimate to the changing temperatures. Once you’ve pulled back the mulch (leaving that 1-inch protective layer), I recommend doing a soil temperature check with a thermometer—wait until it consistently reaches 50°F before fertilizing. Cold soil can lock out nutrients, making your fertilizer less effective.
Pro Tips for Overwintering Garden Mums
- Here’s what I’ve learned from years of successfully overwintering garden mums—tricks that’ll help you avoid common mistakes and ensure your plants rebound beautifully next spring.
- Timing is Everything: In Step 1, wait for that first hard frost to blacken the leaves before cutting back.
- Insulation Layer Secrets: When applying the 3-4 inch straw mulch in Step 2, focus on creating an even layer that extends 6 inches beyond the crown.
Frequently asked questions
Got questions about keeping your garden mums thriving through winter? You’re not alone! Here are some of the most common concerns—and their solutions—to help your cold-hardy perennials rebound stronger than ever.
When is the best time to start overwintering garden mums?
Begin preparing your mums for winter after the first hard frost (typically late fall) but before the ground freezes solid. This usually means late October to early November in most climates. Cut back foliage to 2–3 inches above the ground, then mulch heavily once temperatures dip below freezing. Pro tip: If frost hits early, act fast—delaying can stress the plants!
Do I need to cover my mums for winter, or is mulch enough?
Mulch (like straw or shredded leaves) is your first line of defense, but extra protection helps in harsh winters. Use a breathable cover (like burlap or frost cloth) over mums in zones 5–7 if snow cover is unreliable. Remove covers in early spring once temperatures rise above freezing to prevent rot. Warning: Avoid plastic—it traps moisture and can suffocate roots!
Can I overwinter mums in containers, or do they need to be planted in the ground?
Container-grown mums can overwinter, but they’re trickier. Move pots to a sheltered spot (like a garage or unheated shed) and wrap them in insulation (like bubble wrap). Keep soil slightly moist but not soggy. If your zone gets below 10°F, consider planting them in the ground for the winter—perennials handle cold better in soil.
What should I do if my mums look dead in spring?
Don’t panic! Mums often look dormant until late spring. Wait until after the last frost to assess. If stems are still firm, they’re likely alive—just slow to wake up. Trim back any mushy or discolored growth and fertilize lightly. Tip: A gentle scratch test (peel back bark) can reveal green tissue = life!
Are there any low-maintenance alternatives to traditional garden mums for winter?
Yes! Try hardy perennials like Russian sage, coneflowers, or black-eyed Susans—they’re cold-tolerant and often require less fuss. For color, heuchera (coral bells) or sedum (stonecrop) add winter interest with minimal care. Just mulch well, and they’ll bounce back too!
Wrapping up and next steps
Overwintering garden mums doesn’t have to be a gamble—with the right care, these cold-hardy perennials will thrive and reward you with even more vibrant blooms next season! 🌸 From choosing the perfect spot to protecting them with mulch or frost cloth, every step sets the stage for a stunning comeback. Your effort today ensures a burst of color tomorrow!
Ready to put your new knowledge into action? Pick a sunny weekend, gather your supplies, and give your mums the cozy winter prep they deserve. Start planning now—your future garden will thank you!