
Blooming
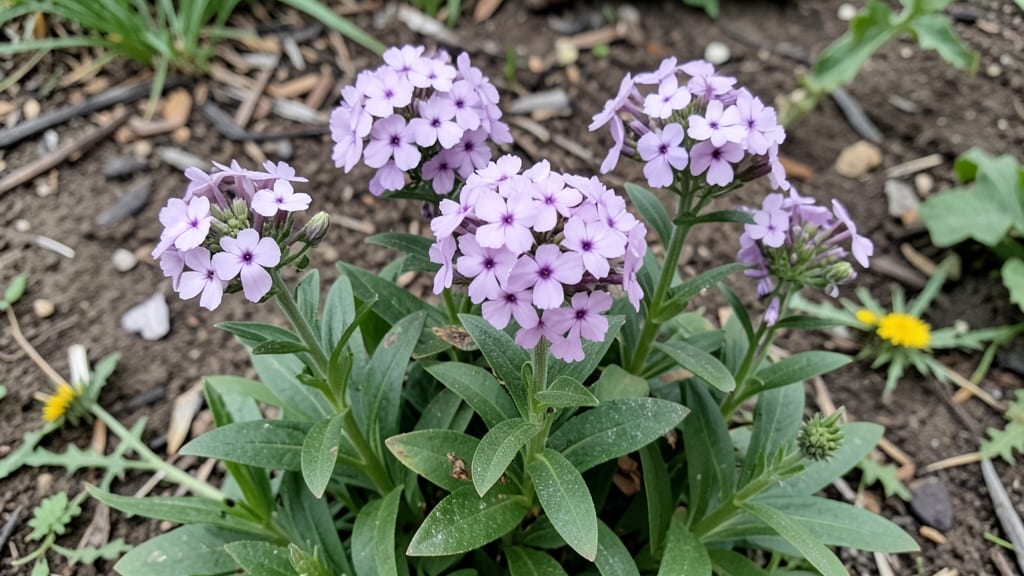
Long Island’s compact yards and sandy soil demand a clever twist on traditional gardening—and vertical designs might just be the game-changer you’ve been missing. 🌿 I’ve transformed my own backyard into a lush, space-efficient oasis by stacking plants upward, where every inch counts.
The key? Choosing native species that thrive in our sandy, coastal soil while keeping maintenance low.
Most people assume they need a sprawling yard for a stunning garden, but vertical solutions work perfectly for Long Island’s typical half-acre lots. You’ll need sturdy trellises, wall-mounted planters, or even repurposed wooden pallets—nothing fancy, just smart.
Focus on drought-tolerant plants like beach heather, switchgrass, or salt-tolerant shrubs that handle our Zone 7b-8a climate like champs.
The payoff? A garden that stays vibrant through summer heat and coastal winds, with less watering and weeding than traditional beds. Imagine fragrant lavender cascading down a wall, sunflowers reaching for the sky, and pollinators buzzing between layers of greenery. This isn’t just gardening—it’s reclaiming space without sacrificing beauty.
Works for urban backyards, small patios, or even a single sunny corner. Let’s make your yard work harder—and look better—than ever before.
📚 In This Guide
- What you need
- Instructions
- Tips and common mistakes
- Wrapping up and next steps
What you need
- ● Vertical garden structure: Pre-made planters (e.g., GreenStalk or Wall-O-Water), or DIY options like wooden pallets, trellises, or hanging pockets (quantity depends on space—aim for 10–20 pockets/planters for a small-to-medium garden).
- ● Growing medium: Lightweight potting mix (e.g., Miracle-Gro Moisture Control or coco coir blend) – 5–10 gallons per structure.
- ● Plants: Choose succulents, herbs (basil, thyme), or trailing flowers (petunias, ferns)—select varieties labeled for container gardening.
- ● Drainage system: Pebbles, gravel, or hydroponic net cups (1–2 inches per pocket/planter).
- ○ Watering supplies: Self-watering reservoir (optional but highly recommended for Long Island’s humidity).
- ● Spray bottle or drip irrigation kit (for precision).
- ● Basic tools: Trowel, pruners, measuring tape, and gloves (for safety and grip).
- ● Mounting hardware: Screws, brackets, or L-brackets (if attaching to walls/fences).
- ● Sunlight assessment: Confirm your space gets 4–6 hours of sunlight daily (critical for plant health!).
- ○ Optional upgrades: LED grow lights (for shady spots).
- ● Automatic timer for irrigation.
- ● Decorative elements (e.g., fairy lights or mosaic tiles for flair).
Step-by-step instructions for creating a vertical garden on Long Island
Transform tight spaces into lush vertical gardens with this space-saving approach perfect for Long Island's climate.
🌱 Step 1: Select and Prepare Vertical Structures
Choose structures that complement your space while supporting plant weight. Trellises, wall-mounted planters, and tiered shelves work beautifully for Long Island's mix of sun and shade. I prefer cedar or powder-coated metal frames—they resist the island's humidity and salt air better than untreated wood.
Measure your wall or fence first. Most vertical gardens need 6-8 feet of vertical space to accommodate mature plants. For example, a 4-foot-tall trellis can support climbing roses or pole beans, while a 3-tiered shelf unit works well for herbs and compact shrubs. Secure structures with heavy-duty brackets rated for 20+ pounds—Long Island's occasional storms can test even sturdy setups.
🪴 Step 2: Choose Plants Suited to Long Island's Microclimates
Select plants that thrive in your specific zone (typically 7a-7b) and match your light conditions. Coastal areas get salty breezes, while inland spots may face more intense summer heat. I recommend drought-tolerant perennials like lavender and Russian sage for sun-drenched walls, while ferns and hostas thrive in shaded vertical pockets.
For edible gardens, consider vertical herbs like thyme or oregano in pockets or climbing cucumbers on trellises. Space plants 8-12 inches apart to prevent overcrowding. Group plants with similar water needs together—this saves time and prevents root competition. Always check plant tags for mature size; what looks small in a nursery can sprawl 6 feet wide once established.
☀️ Step 3: Install Irrigation Systems for Low-Maintenance Care
Long Island's unpredictable rain means you'll need reliable water delivery. Drip irrigation systems work best for vertical gardens—they deliver water directly to roots without wetting leaves (which reduces fungal risks). Use ¼-inch tubing with emitters spaced 12-18 inches apart, adjusted for plant spacing.
Install a timer set for 10-15 minutes daily during dry spells. Test the system before planting by running it for 30 minutes and checking for even moisture distribution. For coastal gardens, use corrosion-resistant fittings. I add a 5-gallon reservoir at the base to catch overflow and provide extra moisture during heatwaves.
🌿 Step 4: Plant and Establish Your Vertical Garden
Begin by filling containers with well-draining potting mix—Long Island's clay-heavy soil drains poorly, so avoid garden soil in elevated planters. For trellises, use 3-4 inch deep pockets filled with a mix of potting soil and 20% perlite for aeration. Gently remove plants from nursery pots and place them in their vertical homes, pressing lightly to secure.
Water thoroughly after planting to settle the soil and eliminate air pockets. Mulch with 1 inch of shredded bark to retain moisture and suppress weeds. Watch for first signs of new growth within 2-3 weeks—this confirms your plants have established roots. If leaves yellow, you're either overwatering or dealing with salt spray damage (common near coastlines).
⏰ Step 5: Maintain Through Long Island's Seasons
Adjust care as seasons shift. During summer's peak heat (85°F+), increase watering to 20 minutes daily and monitor for pests like spider mites. In fall, reduce fertilizer to half-strength to encourage root hardening before winter. Prune leggy growth in early spring to promote bushier, more productive plants.
Winter care depends on your plants: hardy perennials like lavender need no protection, while tropicals (like hibiscus) should be moved indoors or wrapped in burlap. Check irrigation systems before freezing temps arrive—burst pipes can devastate months of work. I always do a final check in November to ensure everything's secured for winter's winds.
Tips & tricks for perfect Long Island vertical garden design
Creating a stunning vertical garden on Long Island doesn't have to be overwhelming—these key strategies will help you avoid common pitfalls and maximize your space's potential.
Location Matters: Before installing your vertical structures, take time to map your garden's microclimates. Coastal areas near the water may experience salt spray, which can damage tender plants, while inland spots can get intense afternoon sun. Position sun-loving plants like lavender and Russian sage on south-facing walls, and shade-tolerant varieties like ferns on north-facing walls. I've learned this the hard way—my first attempt with sun-lovers in a shaded spot resulted in leggy, weak plants that never thrived.
Soil Depth is Critical: When filling your 3-4 inch deep pockets for trellises, don't be tempted to use garden soil from your yard—Long Island's clay-heavy soil drains poorly and compacts easily. Instead, create a custom mix of potting soil with 20% perlite for aeration. This combination prevents waterlogging while providing the drainage vertical gardens desperately need. I've seen many gardens fail because people skipped this step, leading to root rot within weeks.
Irrigation Timing Strategy: The 10-15 minute daily watering recommendation works perfectly during normal conditions, but Long Island's unpredictable weather demands flexibility. Install your irrigation timer for the 10-15 minute range, but be prepared to adjust during heatwaves (85°F+). I always keep a rain gauge nearby—if we get more than an inch of rain in 24 hours, I temporarily disable the system to prevent overwatering. The 30-minute test run before planting is crucial too; it reveals any uneven distribution that could lead to dry pockets or waterlogged areas.
Seasonal Adjustments: The transition from summer to fall is where many vertical gardens fail. When temperatures drop below 60°F in fall, reduce your fertilizer to half-strength to encourage root hardening. I've found that plants fertilized too late in the season become more susceptible to winter damage. For winter protection, focus on securing your irrigation systems by November—this simple check prevents frozen pipes that could ruin months of work.
Pro Tips for Long Island Garden
- Creating a stunning vertical garden on Long Island doesn't have to be overwhelming—these key strategies will help you avoid common pitfalls and maximize your space's potential.
- Location Matters: Before installing your vertical structures, take time to map your garden's microclimates.
- Soil Depth is Critical: When filling your 3-4 inch deep pockets for trellises, don't be tempted to use garden soil from your yard—Long Island's clay-heavy soil drains poorly and compacts easily.
Frequently asked questions
Got questions about transforming your Long Island garden into a vertical oasis? We’ve got answers!
Whether you're working with limited space or dreaming of lush greenery, these FAQs will help you navigate the basics of vertical garden design—from setup to upkeep.
What’s the best time of year to install a vertical garden on Long Island?
For most plants, spring (April–May) or early fall (September–October) is ideal—soil is warm, and temperatures are mild. Avoid extreme heat (summer) or frost (winter), which can stress new roots. If using hardy perennials or succulents, you can plant in late spring too!
How do I prevent my vertical garden from drying out too quickly?
Long Island’s humid summers and sandy soil can drain moisture fast. Use self-watering systems, moisture-retaining gels, or drip irrigation. Group plants with similar water needs, and mulch the base to lock in humidity. Morning watering reduces evaporation!
Can I grow vegetables in a vertical garden on Long Island?
Try leafy greens (kale, lettuce), herbs (basil, thyme), strawberries, or cherry tomatoes in fabric pockets or stacked planters. Opt for compact varieties suited to Long Island’s Zone 7b climate. Just ensure your setup gets 6+ hours of sun daily for fruiting plants.
What’s the easiest vertical garden system for beginners?
Start with wall-mounted planters or pocket planters—they’re lightweight, affordable, and forgiving. For zero-maintenance, try pre-assembled vertical kits (like Garden Tower or GreenStalk). If DIYing, cedar or treated wood frames with coconut coir or felt pockets work great!
How do I keep pests away from my vertical garden?
Long Island’s deer, rabbits, and aphids love vertical gardens! Use physical barriers (netting, chicken wire), neem oil, or companion planting (marigolds deter pests). Elevate planters off the ground to avoid slugs, and inspect leaves weekly for early signs of trouble.
Are there space-saving alternatives if my walls aren’t ideal?
No problem! Try freestanding vertical planters, trellises, or hanging pockets for patios. For small yards, tiered shelves or ladder-style gardens maximize space without wall mounting. Even a repurposed pallet or wire grid can work—get creative!
Wrapping up and next steps
Transforming your Long Island garden into a vertical oasis is all about maximizing beauty in minimal space—and you’ve got this! Whether you’re working with a tiny balcony or a cozy courtyard, vertical design brings lush greenery, vibrant blooms, and serene charm without sacrificing square footage.
Start small, experiment with textures, and let your creativity grow—literally.
Ready to elevate your outdoor space? Pick one vertical project today—whether it’s a trellis, wall planter, or hanging garden—and watch your compact space bloom into something extraordinary. 🌿✨