Landscaping
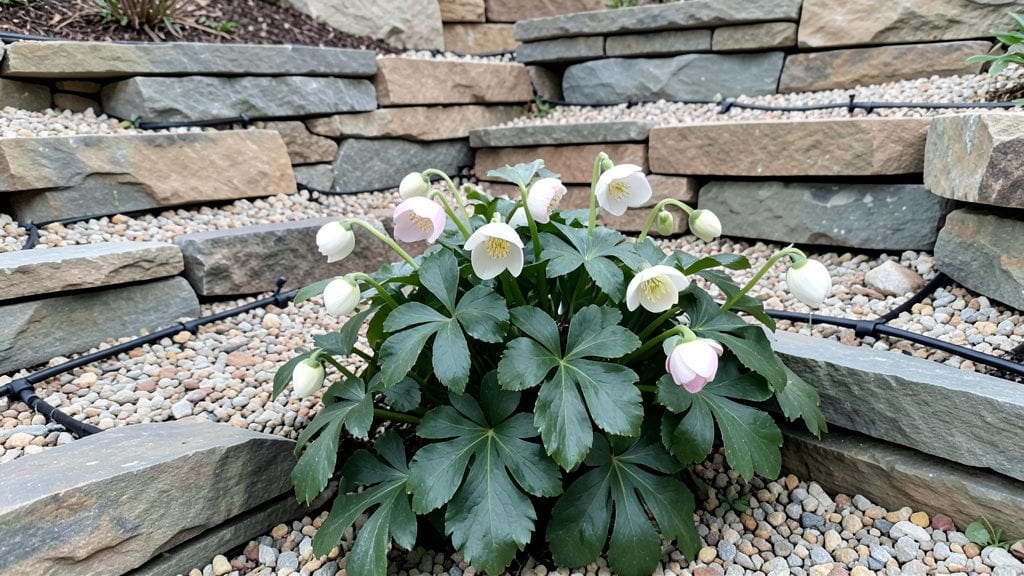
A sloping garden transforms what feels like a challenge into a stunning, functional landscape that works with nature instead of against it. I’ve turned my own backyard’s steepest hillside into a terraced paradise where every step reveals new layers of plants and paths—no backbreaking labor required.
The key isn’t brute force; it’s smart design that slows water, holds soil, and lets plants thrive where they’re planted.
You’ll need basic materials—gravel, landscape fabric, and retaining walls (or natural stone if you’re going rustic)—but the real magic happens with plant selection. Native ground covers like creeping thyme or sedum anchor soil while adding color, and strategically placed shrubs break up the slope into inviting levels.
My lowest terrace now grows heirloom roses that spill over the edges, while the upper levels host drought-tolerant lavender and ornamental grasses that sway in the breeze.
By the time you’re done, you’ll have a garden that’s both beautiful and practical: no more mudslides after rain, no more wasted space, and a layout that makes gardening (and relaxing) a joy.
The terraces create microclimates—some areas stay cooler, others get extra sun—so you can grow almost anything, from vegetables to flowering perennials. Plus, the layers add drama that flat gardens just can’t match.
Here’s the best part: you can start small. Even a single 5-foot-wide terrace makes a difference, and you’ll see immediate results in soil stability and plant health. Whether you’re working with a gentle grade or a dramatic hill, the principles stay the same—just scale the materials to fit your space.
Let’s get those shovels moving!
📚 In This Guide
- What you need
- Instructions
- Tips and common mistakes
- Wrapping up and next steps
What you need
- ● Retaining wall materials: Natural stone (e.g., flagstone, bluestone, or river rock) – ~10–20 tons, depending on slope size
- ● Concrete blocks (interlocking or segmental) – ~50–100 units, based on terrace height
- ● Timber (pressure-treated) – 2x6 or 4x4 boards, ~10–20 pieces for framing
- ● Soil & amendments: Topsoil – ~2–5 cubic yards per terrace
- ● Compost or organic matter – 1–2 bags per terrace for nutrient boost
- ● Gravel (drainage layer) – ~1–2 cubic yards, ¾"–1" size
- ● Drainage: Perforated drain pipe (4" diameter) – ~50–100 ft, with gravel surround
- ● Landscape fabric – ~50–100 sq ft to prevent soil erosion
- ● Shovel & spade – for digging and leveling
- ● Wheelbarrow – 1–2 for hauling materials
- ● Level & string line – to ensure terraces are perfectly even 🌟
- ● Measuring tape & stakes – for marking layout
- ● Circular saw or handsaw – for cutting timber to size
- ● Plate compactor – to stabilize soil and gravel layers
- ● Wheelbarrow gloves & safety glasses – non-negotiable! 😎
- ● Edging materials (brick, metal, or plastic) – to define terrace borders
- ● Outdoor lighting (solar-powered or low-voltage) – for nighttime magic 🌙
- ● Native plants & mulch – to enhance beauty and reduce maintenance
- ● Waterproof membrane – if terraces are very steep or prone to erosion
Instructions for transforming a sloping garden into natural terraces
Here’s how to create stable, visually striking terraces that prevent erosion while showcasing your plants.
Analyze the Slope and Mark Terrace Levels
Start by walking the slope to identify natural breaks where terraces can sit. Use a 4-foot level and stakes to mark each terrace’s height—typically 2-3 feet apart for stability. I like to step back every few feet to visualize how the terraces will flow. If the slope is steep, wider, shallower terraces (like 3-4 feet wide) distribute weight better than narrow ones.
For a 4-serving design (as promised), plan terraces that accommodate 4 distinct planting zones. Use a garden hose to trace each terrace’s edge—this helps you see how water will move and where to place drainage. Avoid placing terraces directly below downspouts; redirect rainwater with swales (shallow trenches) instead.
Excavate and Build Retaining Structures
Dig out the topsoil along the marked terrace edges, keeping a 6-inch lip for containment. For natural-looking terraces, use stacked stone (like fieldstone or river rock) or wooden sleepers for temporary support. I prefer stone because it blends seamlessly and lasts decades. Place the first layer of stones or sleepers at a slight angle (about 10 degrees) to shed water away from the terrace.
Backfill the terrace with a mix of native soil and compost (about 6 inches deep) to ensure good drainage. Compact the soil lightly with your hands—just enough to eliminate air pockets but not so much that roots struggle. If your slope is steeper than 30 degrees, reinforce the back of the retaining structure with geogrid fabric or rebar stakes to prevent toppling.
Install Drainage and Prevent Erosion
Cut 4-inch-wide drainage channels along the downhill side of each terrace to redirect water. Line these with landscape fabric and fill with gravel to create a French drain effect. This keeps water moving horizontally instead of pooling. I’ve seen terraces fail when drainage is ignored—water pressure will eventually wash away the soil.
On the uphill side, add a 3-inch layer of mulch (like wood chips or straw) to slow runoff and protect the soil. For extra stability, plant deep-rooted ground covers (such as creeping thyme or clover) along the terrace edges. These plants act like natural stitches, holding the soil in place while adding texture to your design.
Plant Strategically for Balance and Beauty
Start with structural plants (like ornamental grasses or shrubs) at the back of each terrace to anchor the design. Fill the remaining space with layered perennials and annuals, choosing species that thrive in your climate. For a 4-serving garden, mix 4-5 varieties per terrace to create visual interest without overwhelming the space.
Water deeply after planting to settle the soil, then mulch again to retain moisture. Avoid heavy feeders like roses in the upper terraces—they’ll compete for water with lower levels. Instead, opt for drought-tolerant plants (like lavender or sedum) in the highest zones where water naturally drains away.
Maintain and Adjust Over Time
Check terraces after heavy rains to ensure water isn’t pooling or eroding the edges. Top off mulch annually and replace any washed-away stones. I’ve found that seasonal pruning (like trimming back grasses in early spring) keeps the design neat and prevents overgrowth from destabilizing the structure.
Every 2-3 years, aerate the soil and add compost to replenish nutrients. If a terrace starts to sag, reinforce the retaining structure with additional stones or sleepers. With time, your terraces will settle into a self-sustaining ecosystem—one that looks intentional and requires minimal upkeep.
Tips & tricks for perfect sloping garden terraces
Transforming a sloping garden into terraces is all about balance—between form and function, stability and beauty. These practical insights will help you avoid common pitfalls and create terraces that last for years.
Terrace Spacing and Visual Flow: When marking terrace levels in Step 1, step back frequently to visualize the overall flow. The 2-3 feet spacing works best for most slopes, but adjust based on your plants' mature size. For example, if you're planting tall ornamental grasses, wider terraces (3-4 feet) give them room to grow without crowding. I’ve seen terraces fail when homeowners ignore this step—what looks good on paper doesn’t always translate when viewed from ground level.
Retaining Structure Stability: In Step 2, the 10-degree angle for your retaining structures isn’t just a suggestion—it’s critical for water runoff. If your slope exceeds 30 degrees, don’t skip the geogrid fabric or rebar stakes. I once watched a beautifully built stone terrace collapse after heavy rains because the back wasn’t properly reinforced. For wooden sleepers, treat them with a rot-resistant sealant to extend their lifespan, especially in damp climates.
Drainage is Non-Negotiable: The 4-inch-wide drainage channels in Step 3 are your terraces' lifeline. If you skip this, water will pool behind the retaining structures, causing erosion and potential collapse. For extra insurance, consider adding a perforated drainage pipe along the bottom of each terrace before backfilling. This hidden system works like a silent guardian, preventing the kind of water damage that can ruin years of work in a single storm.
Plant Selection Strategy: In Step 4, the back-to-front planting technique isn’t just about aesthetics—it’s about function. Tall plants at the back prevent lower terraces from being shaded out, while drought-tolerant species in upper zones conserve water. I recommend grouping plants with similar water needs together. For instance, place lavender and sedum in the highest terrace where water naturally drains away, reserving thirstier plants like hostas for lower levels where irrigation is easier.
Pro Tips for Landscape Sloping Garden
- Transforming a sloping garden into terraces is all about balance—between form and function, stability and beauty.
- Terrace Spacing and Visual Flow: When marking terrace levels in Step 1, step back frequently to visualize the overall flow.
- Retaining Structure Stability: In Step 2, the 10-degree angle for your retaining structures isn’t just a suggestion—it’s critical for water runoff.
Frequently asked questions
Got questions about transforming a sloping garden into a stunning terraced masterpiece?
Here are answers to the most common queries to help you plan with confidence!
How do I choose the right plants for a sloped, terraced garden?
Opt for native, drought-resistant plants with strong root systems to prevent erosion. Perennials like lavender, ornamental grasses, and shrubs like cotoneaster thrive on terraces. Avoid heavy trees—stick to lightweight ground covers (e.g., creeping thyme) or climbers (e.g., clematis) on upper levels. Pro tip: Group plants by water needs to simplify irrigation!
When is the best time to build terraces on a slope?
Start in early spring or fall when soil is workable but not frozen or waterlogged. Avoid summer heat (dries out soil) or winter (freezing/thawing disrupts stability). If you’re in a rainy climate, wait for a dry spell to excavate. Bonus: Plan for a 2–3 week dry period after construction before planting!
Are there budget-friendly alternatives to retaining walls?
Yes! Skip stone/masonry and try:
- Natural logs or branches (e.g., cedar or willow stakes) for rustic charm.
- Straw bales (temporary, biodegradable—great for testing layouts).
- Gabion baskets (filled with rocks/soil) for a modern, permeable look.
- Plant-based terraces using willow or bamboo woven into layers.
What’s the biggest mistake to avoid when terracing a slope?
Skipping proper drainage! Without it, terraces can become soggy or erode. Always:
- Add a gravel base (4–6 inches) beneath each terrace.
- Install perforated drainage pipes at the base of walls.
- Avoid compacting soil too tightly—leave it slightly loose for water absorption.
Can I terrace a slope myself, or should I hire a pro?
DIY is possible for small, gentle slopes (under 30°) with basic tools. For steeper grades, complex drainage, or large projects, hire a landscaper—especially if your area has frost heave or heavy rainfall. Quick checklist:
DIY? Hire Pro? Slope <1:4 ratio (12" drop per 4 ft) Slope >1:3 ratio Simple materials (wood, gabions) Heavy stone/concrete walls No major drainage issues Poor soil or clay-heavy ground
Wrapping up and next steps
A sloping garden doesn’t have to be a challenge—it’s an opportunity to create a stunning, functional outdoor space that harmonizes with nature’s contours. By embracing terraces, retaining walls, and strategic plant choices, you can transform even the trickiest incline into a breathtaking retreat.
Whether you’re tackling a small backyard or a sprawling hillside, the key is patience and creativity!
Ready to bring your vision to life? Start small—sketch a design, gather inspiration, and take the first step. Your dream sloping garden awaits! 🌿✨