Container Gardens
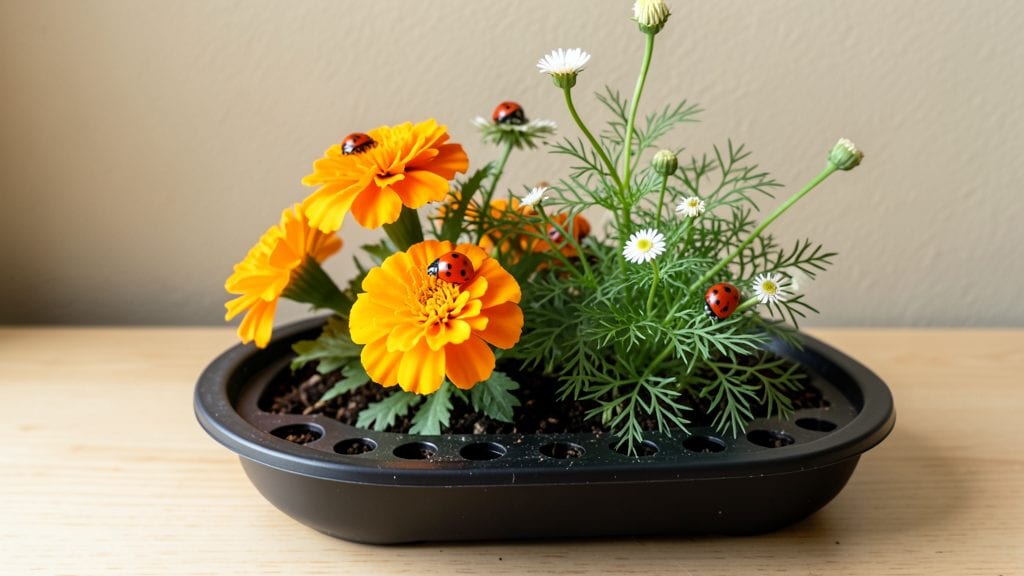
Ladybug indoor gardens turn your smallest windowsill into a living, buzzing fairy tale. 🌿 I’ve watched real ladybugs patrol my fern terrarium, munching aphids while adding a playful charm that store-bought decor never could.
The magic isn’t just in the bugs—it’s in how they transform a simple plant into a tiny ecosystem that feels alive and purposeful.
You don’t need a greenhouse or fancy supplies—just a shallow container, some potting mix, and ladybugs you can order online or find in your yard. Pair them with pest-loving plants like spider plants or mint, and suddenly your shelf isn’t just decor; it’s a working pest-control team.
The best part? Kids and adults alike will pause to watch them work, turning gardening into an interactive story.
By the time your ladybugs establish their patrol, you’ll have a thriving mini-garden that doubles as a living pest deterrent. The plants stay healthier, the bugs stay happy, and your space gets a whimsical touch that no plastic figurine could match.
Plus, it’s a conversation starter—everyone who sees it will ask how it works.
Works in sunrooms, offices, or even a repurposed cake stand. The key is keeping the environment moist (but not soggy) and providing plenty of aphids or mealybugs for them to snack on. Here’s how to set up your first ladybug patrol without the guesswork.
📚 In This Guide
- What you need
- Instructions
- Tips and common mistakes
- Wrapping up and next steps
What you need
- ● Container: 1–2 small, shallow planters (4–6 inches deep) or repurposed containers (e.g., glass jars, teacups, or terracotta pots with drainage holes).
- ● Pro tip: Ensure containers have drainage holes or use a layer of pebbles to prevent root rot! 💡
- ● Soil: 1–2 cups of lightweight, well-draining potting mix (avoid garden soil—it’s too dense!).
- ○ Optional: Mix in 1–2 tbsp of perlite or vermiculite for extra aeration.
- ● Ladybug-friendly plants: 1–3 small, non-toxic plants like sweet alyssum, basil, marigolds, or dwarf sunflowers (check toxicity for pets!).
- ● Bonus: Add a tiny water source (like a shallow dish with pebbles) to attract ladybugs! 💧
- ● Ladybugs: 5–10 live ladybugs (purchased online or from a garden center—avoid releasing wild-caught ones!).
- ● Tip: Release them in the evening when they’re least active! 🌙
- ● Basic tools: 1 small trowel or spoon for planting.
- ● 1 spray bottle (for misting plants lightly).
- ○ 1 pair of gardening gloves (optional but helpful!).
- ● Decorative elements: Tiny pebbles, moss, or painted stones for aesthetics.
- ● LED grow lights (if natural light is limited—6–8 hours/day).
- ● A magnifying glass (for observing ladybugs up close—kids love this!).
- ● Herbs like thyme or dill (ladybugs adore them!).
How to create ladybug-friendly indoor planters
Tiny spaces deserve big pollinator action—here's how to craft charming, functional habitats that welcome ladybugs indoors.
🪴 Step 1: Select Containers and Prepare Drainage
Choose shallow, wide containers with drainage holes—think terracotta saucers or repurposed wooden boxes with drilled holes. I like to use 4-inch diameter pots for individual plants or a 12-inch square wooden planter for a small pollinator garden. Line the bottom with a 1-inch layer of pebbles to create drainage space and prevent soil compaction.
Place a mesh screen over the drainage holes to keep soil in while allowing excess water to escape. This prevents ladybugs from escaping through the holes while maintaining proper airflow. If using a decorative container without holes, drill ¼-inch holes along the bottom edge—just enough to let water drain without letting tiny ladybugs slip through.
🌱 Step 2: Layer Soil and Add Ladybug Attractants
Fill containers with 2 inches of well-draining potting mix, leaving space for plants and ladybugs to thrive. I mix in a ½-inch layer of sand at the bottom to improve drainage further. Ladybugs love plants with small, clustered flowers—aloe vera, tiny succulents, or miniature marigolds work perfectly for indoor planters.
Add crushed eggshells (a natural calcium source) and dried leaves for ladybugs to hide and hunt aphids. Sprinkle a light layer of coconut coir on top to mimic natural leaf litter. This provides both shelter and a food source for ladybugs while keeping the soil moist but not soggy.
☀️ Step 3: Plant Ladybug-Friendly Flora
Plant 4-6 small pollinator-friendly plants per container, spacing them 2-3 inches apart to allow airflow and easy ladybug movement. I prefer tiny basil, thyme, or dwarf sunflowers—their flowers attract aphids, which in turn draw ladybugs. Place the planter near a south-facing window where it gets 4-6 hours of indirect sunlight daily.
Water gently after planting, ensuring the soil is moist but not waterlogged. Avoid overhead watering—it can wash away the delicate ladybug habitat layers. Instead, use a watering can with a narrow spout to direct moisture to the soil surface only.
🐞 Step 4: Introduce Ladybugs and Monitor
Purchase ladybugs from a reputable supplier and release them early in the morning when temperatures are 65-75°F. Gently place them on the leaves using a soft paintbrush—avoid dropping them directly onto the soil. I like to introduce 20-30 ladybugs per container to ensure a strong population.
Watch for signs of activity: tiny black or orange spots crawling on leaves or aphid reduction within a week. If ladybugs disappear, check for dry soil (they need moisture) or overcrowding (too many plants in one space). Keep the environment humid but not damp—a small pebble tray with water nearby helps maintain ideal conditions.
⏰ Step 5: Maintain and Expand the Habitat
Every 2-3 weeks, add fresh aphid-infested leaves (from nearby plants) to give ladybugs a steady food source. Avoid pesticides—even natural ones like neem oil can harm ladybugs. Instead, prune yellowing leaves and replace them with healthy foliage to keep the habitat vibrant.
If ladybugs start to decline, introduce more aphids or mealybugs (their favorite food). You’ll know your garden is thriving when ladybugs lay eggs (tiny yellow-orange dots on undersides of leaves) and new generations appear. Rotate plants seasonally to keep the ecosystem dynamic and engaging.
Tips & tricks for whimsical ladybug gardens
Creating a thriving ladybug habitat takes a few strategic touches—here's how to set yours up for success.
Container Selection: For the best airflow and drainage, opt for containers with multiple drainage holes rather than just one. I've found that terracotta pots with 4-6 evenly spaced holes work beautifully—just make sure they're shallow enough for ladybugs to move freely. If using decorative containers, drill holes along the bottom edge using a ¼-inch bit to prevent soil loss while keeping ladybugs contained.
Soil Layering Strategy: The ½-inch sand layer in Step 2 isn't just for drainage—it mimics natural conditions ladybugs prefer. I like to mix in a handful of perlite with the sand to create even more air pockets. This prevents compaction and keeps roots healthy, which indirectly benefits your ladybug population by maintaining a stable habitat.
Lighting Optimization: The 4-6 hours of indirect sunlight mentioned in Step 3 is ideal, but placement matters more than you might think. Position your planter 12-18 inches from the window to prevent overheating while still maximizing light exposure. If your space gets only artificial light, supplement with a grow light on a 12-hour cycle to maintain the same ecosystem conditions.
Ladybug Introduction: When releasing your 20-30 ladybugs in Step 4, do it on a cool morning when temperatures are between 65-75°F. I've found that gently tapping ladybugs onto leaves with a soft paintbrush helps them orient themselves better than simply dropping them in. This reduces initial stress and gives them a better chance to establish themselves in their new home.
Pro Tips for Ladybug Indoor Gardens
- Creating a thriving ladybug habitat takes a few strategic touches—here's how to set yours up for success.
- Container Selection: For the best airflow and drainage, opt for containers with multiple drainage holes rather than j...
- Soil Layering Strategy: The ½-inch sand layer in Step 2 isn't just for drainage—it mimics natural conditions ladybugs...
Frequently asked questions
Got questions about creating your own ladybug indoor garden? You’re not alone!
Here are some of the most common concerns—plus straightforward answers to help you get started with confidence.
Can I grow ladybugs indoors year-round?
Ladybugs thrive indoors as long as you provide the right conditions: a cool, humid environment (60–75°F), plenty of aphids or pollen for food, and a small escape-proof container (like a mesh cage or terrarium). Just avoid direct sunlight and drafts to keep them happy.
How long does it take to see ladybugs in my garden?
Timing depends on the life stage you start with. If you introduce adult ladybugs, you’ll see them immediately. For eggs or larvae, expect 2–4 weeks to see adults emerge. Patience pays off—watch for tiny orange eggs clustered on leaves!
What plants work best for ladybugs in small spaces?
Stick to low-maintenance, aphid-friendly plants like:
- Herbs: Basil, dill, or parsley (aphids love them too!)
- Vegetables: Lettuce, spinach, or peas (great for larvae)
- Flowers: Marigolds or nasturtiums (pollinator magnets)
What should I do if my ladybugs disappear?
Don’t panic! Ladybugs might be hibernating (winter) or escaping (summer heat). Check for:
- Temperature extremes: Keep them in a stable 65–75°F zone.
- Escape routes: Ensure lids/covers are secure.
- Food shortages: Add more aphids or pollen if plants are clean.
Are there alternatives if ladybugs aren’t an option?
Yes! Try these pollinator-friendly indoor gardening swaps:
- Praying mantises: Eat pests but need more space.
- Lacewings: Gentle predators; great for small gardens.
- Beneficial nematodes: Microscopic but effective against soil pests.
Wrapping up and next steps
Creating a ladybug indoor garden is a delightful way to bring nature’s charm into your home while supporting pollinators—no matter how small your space! 🌿 With the right materials, a little creativity, and a touch of care, you’ll craft a thriving mini-ecosystem that’s as fun to watch as it is beneficial.
Whether you’re a gardening newbie or a seasoned green thumb, this project is a rewarding way to nurture life indoors.
Ready to take the next step? Start small—pick a container, gather your plants, and let your imagination guide you! Share your progress or tag us in your ladybug garden photos—we’d love to see your whimsical creations. Happy gardening! 🐞✨