
Container Gardens
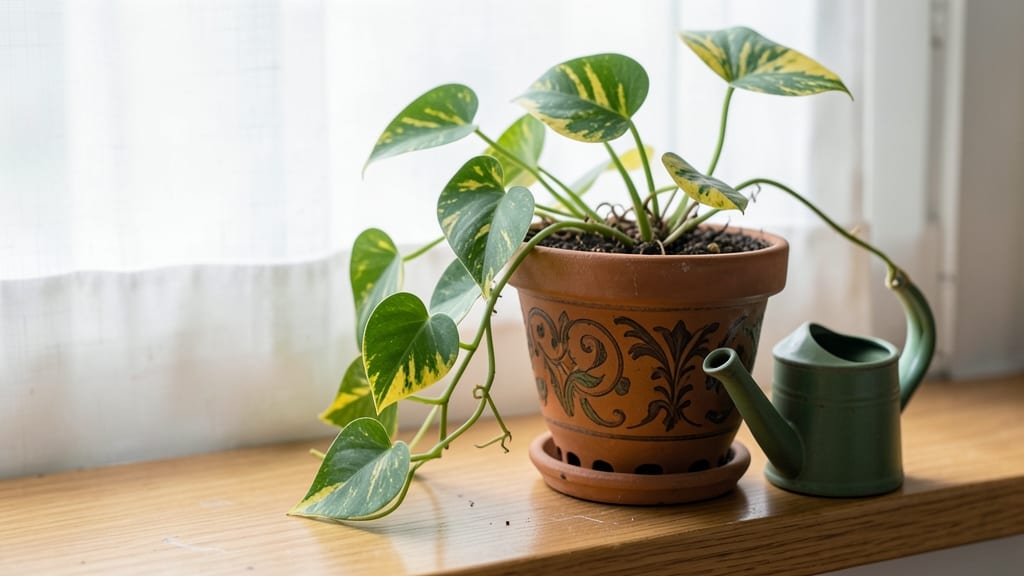
Indoor gardening activities turn even the smallest apartments into lush green retreats. ✨ My first terrarium still sits on my desk, a tiny ecosystem that thrives without sunlight or fuss—proof that you don’t need a yard to grow something beautiful.
The best part? These projects double as decor, air purifiers, and stress relievers, all while teaching you the basics of plant care without the outdoor hassles.
Start with simple projects like seed bombing or creating a vertical herb garden using recycled containers. You’ll need basic supplies: a few plants (or seeds), small pots, soil, and maybe some decorative stones or moss for texture.
The setup takes under an hour, and the results—fresh greenery year-round—are instant mood boosters. Even if your space is just a windowsill, you can transform it into a thriving mini garden.
Imagine waking up to the crisp scent of mint on your kitchen counter or watching tiny ferns unfurl in a glass cloche. These indoor activities aren’t just about growing plants; they’re about creating a cozy, personalized space that reflects your style.
The satisfaction of nurturing something from seed to bloom—no matter how small—is unmatched. Plus, you’ll learn tricks to keep plants alive through winter when outdoor gardening slows down.
From beginner-friendly terrariums to stylish hanging planters, these projects adapt to any home. Whether you’re a first-time gardener or looking to refresh your indoor space, there’s a project here that’ll spark joy—and maybe even a little green jealousy from your neighbors. Let’s get those tiny spaces growing!
📚 In This Guide
- What you need
- Instructions
- Tips and common mistakes
- Wrapping up and next steps
What you need
- ● Containers: 1–5 containers (depending on plants) with drainage holes
- ● Recommended sizes: 4–6 inches in diameter for herbs, 6+ inches for leafy greens
- ● Materials: Terracotta, ceramic, or plastic (ensure breathability)
- ● Growing Medium: 1 bag of high-quality potting soil (sterilized, well-draining)
- ○ Optional: Perlite or vermiculite (1 part per 4 parts soil) for aeration
- ● Seeds or Seedlings: Herbs: Basil, mint, or parsley (5–10 seeds or 3–5 seedlings)
- ● Leafy greens: Lettuce or spinach (10–20 seeds)
- ● Succulents: Echeveria or Haworthia (3–5 small plants)
- ● Watering Tools: 1 small watering can with a narrow spout or spray bottle
- ○ 1 moisture meter (optional but helpful)
- ● Lighting: Grow lights (LED or fluorescent, 12–16 inches above plants)
- ● OR a sunny windowsill (south-facing preferred)
- ● Fertilizer: Balanced liquid fertilizer (e.g., 10-10-10) or organic options like fish emulsion
- ● Humidity tray: A shallow tray with pebbles and water to boost moisture
- ● Plant labels: Markers + popsicle sticks to track varieties
- ● Pruning shears: Small scissors for trimming (sterilized with rubbing alcohol)
How to launch your indoor gardening journey in small spaces
Tiny spaces need clever tricks—not just elbow room. Here’s how to turn limited square footage into lush, thriving greenery.
🌱 Step 1: Choose the Right Plants for Your Space
Start with plants that match your light conditions. If you only have a north-facing window, go for shade-tolerant varieties like snake plants or pothos. For brighter spots, try succulents or herbs like basil, which thrive in indirect sunlight. I always check the plant tags for light requirements—this saves me from buying plants that will struggle and die within weeks.
Look for compact varieties or dwarf plants if space is extremely limited. These grow just as beautifully but take up far less room. A single 6-inch pot can hold a thriving peperomia or miniature fern, while a small hanging basket works perfectly for trailing plants like string of pearls. Real talk: Avoid anything labeled "tropical" unless you have a warm, humid spot—most indoor spaces just don’t cut it.
☀️ Step 2: Optimize Light with Simple Hacks
Even without a sunroom, you can create ideal light conditions. Place pots near the brightest window you have—south-facing windows are best, but east or west works too. If your space is dim, rotate plants every 2-3 weeks so they grow evenly. I’ve seen plants lean dramatically toward one side if left in the same spot too long.
For extra brightness, use a grow light on a timer for 12-14 hours daily. LED grow lights are energy-efficient and fit easily on shelves. Position the light 6-12 inches above the plants, and adjust as they grow. Watch for yellowing leaves—this is your cue to move the plant closer to the light or increase exposure time. If leaves turn crispy or brown, it’s too much light, so back off a bit.
💧 Step 3: Master Watering Without Overdoing It
Most indoor plants die from overwatering, not underwatering. Stick your finger 1 inch into the soil—if it feels dry, it’s time to water. If it’s still damp, wait another day. I use a spray bottle for delicate plants like fittonia or maidenhair ferns, while larger plants like snake plants can handle a good soak from the bottom.
Drainage is key—always use pots with holes, and never let plants sit in saucers of standing water. I place mine on a tray lined with pebbles to catch excess moisture. Overwatered plants wilt suddenly, even if the soil feels wet. If this happens, let the soil dry out completely before watering again. Here’s the thing—succulents and cacti need watering only every 2-3 weeks, while tropical plants may need it weekly.
🪴 Step 4: Select Containers That Work for Your Style
Choose pots with drainage holes to prevent root rot, but don’t overlook aesthetics. A 6-inch ceramic pot adds charm to a windowsill, while a hanging basket saves floor space. I repurpose old mugs for herbs like thyme or rosemary—just poke a few holes in the bottom first. Just remember, the pot should be 1-2 inches larger in diameter than the plant’s root ball to avoid overcrowding.
Grouping plants by water needs simplifies care. Place high-maintenance plants like calatheas together so you can water them all at once. For a cohesive look, stick to a color scheme—neutrals like terracotta or white pair well with almost any plant. If you’re short on shelf space, vertical gardens or wall-mounted planters free up floor room while adding greenery. Don’t skip the saucer—it catches drips and keeps your surfaces clean.
⏰ Step 5: Keep a Simple Maintenance Routine
Dust leaves regularly with a damp cloth—this helps plants breathe and absorb light better. I do this every 2 weeks for glossy-leaved plants like peace lilies or philodendrons. Prune leggy stems to encourage bushier growth, and pinch back new growth on herbs to keep them compact. Fertilize lightly every 4-6 weeks during growing season with a balanced liquid fertilizer.
Watch for pests like spider mites or aphids, especially on new plants. Isolate affected plants immediately and treat with neem oil or insecticidal soap. I’ve caught infestations early by inspecting leaves weekly under a bright light. Rotate plants occasionally so all sides get even light exposure, and wipe windowsills to maximize natural light. With these small habits, your indoor garden will stay vibrant year-round.
Tips & tricks for perfect indoor gardening in small spaces
Small spaces can still grow big results—here are the tricks that make all the difference when working with limited square footage.
Light Rotation Secret: In Step 2, when you rotate your plants every 2-3 weeks, take it a step further by giving them a quarter-turn each time. This prevents that classic "leggy" growth where plants stretch toward the light. I’ve seen snake plants grow perfectly round by doing this—no more lopsided growth!
Grow Light Placement: For the 12-14 hour grow light schedule in Step 2, position your light 6-12 inches above the plants but adjust based on leaf color. If leaves turn yellow, lower the light slightly. If they crisp up, raise it back. I’ve ruined three batches of basil before learning this—now I check leaf color daily during the first week.
Watering Hack: In Step 3, when checking soil moisture, press your finger in an inch deep—but don’t just check one spot. Test multiple areas of the pot since moisture can vary. I learned this the hard way after overwatering one side of a pothos while the other side was still bone dry. Also, use room-temperature water—cold water can shock plant roots.
Container Upgrade: For Step 4, if you’re using repurposed containers like mugs, drill holes in the bottom AND sides if possible. This creates better airflow and prevents root rot. I’ve had herbs thrive in coffee mugs with holes drilled on all sides—just make sure the holes are small enough to hold soil but large enough for drainage.
Pro Tips for Indoor Gardening Activities
- Small spaces can still grow big results—here are the tricks that make all the difference when working with limited square footage.
- Light Rotation Secret: In Step 2, when you rotate your plants every 2-3 weeks, take it a step further by giving them a quarter-turn each time.
- Grow Light Placement: For the 12-14 hour grow light schedule in Step 2, position your light 6-12 inches above the plants but adjust based on leaf color.
Frequently asked questions
Got questions about indoor gardening?
You’re not alone! Here are answers to some of the most common queries to help you grow confidently—even in small spaces.
What are the easiest plants for beginners to grow indoors?
Start with low-maintenance plants like snake plants, pothos, or peperomia. These thrive in indirect light, need minimal watering, and forgive occasional neglect. Herbs like basil and mint are also great for beginners—they’re forgiving and useful in the kitchen! Pro tip: Avoid fussy plants like ferns or orchids until you’ve mastered basics.
How often should I water my indoor plants?
Watering depends on the plant, pot size, and humidity. As a rule, wait until the top 1–2 inches of soil are dry before watering. Overwatering is a common mistake—most indoor plants prefer slightly dry soil to soggy roots. Check the weight of the pot: if it feels light, it’s time to water! Pro tip: Use a moisture meter for tricky plants like succulents.
Can I use regular potting soil for all indoor plants?
Not always! Some plants (like succulents or air plants) need well-draining soil mixed with perlite or sand. Others, like ferns, prefer peat-heavy or moisture-retentive blends. Always check the plant’s care guide—most recommend a lightweight, airy mix for containers. Pro tip: Add a handful of compost to boost nutrients.
What if my indoor plants aren’t getting enough light?
If leaves turn pale or stretch toward the window (etiolation), your plants need more light. Move them closer to a south- or west-facing window or use a grow light (LED bulbs work well). Rotate pots weekly so all sides get even exposure. For low-light spots, choose shade-tolerant plants like ZZ plants or cast iron plants. Pro tip: Dust leaves monthly to maximize light absorption.
How do I deal with pests like spider mites or fungus gnats?
Start with isolation—quarantine the affected plant. Wipe leaves with a soapy water solution (1 tsp mild soap per quart of water) or use neem oil for mites. For fungus gnats, let the soil dry out between waterings and add a thin layer of sand or mosquito bits to the topsoil. Pro tip: Check the undersides of leaves and stems first—pests love hiding there!
Can I grow edible plants indoors year-round?
Herbs (basil, parsley, cilantro), leafy greens (kale, lettuce), and dwarf tomatoes or peppers thrive indoors with 6–8 hours of light daily. Use grow lights if natural light is limited, and choose compact varieties. Just ensure proper airflow to prevent mold. Pro tip: Harvest regularly to encourage bushier growth!
Wrapping up and next steps
Indoor gardening isn’t just about filling small spaces with greenery—it’s a rewarding journey that brings freshness, creativity, and even a little zen into your daily life.
Whether you’re growing herbs for cooking, flowers for joy, or veggies for a mini harvest, every tiny sprout is a step toward a healthier, happier home. 🌱
Ready to dive in? Start small—pick one plant or project from this guide and watch your confidence (and garden!) grow.
Before you know it, you’ll be experimenting with new varieties, sharing your green thumbs with friends, or even turning your hobby into a thriving indoor ecosystem. Your green space awaits—what will you grow next?