Lawn
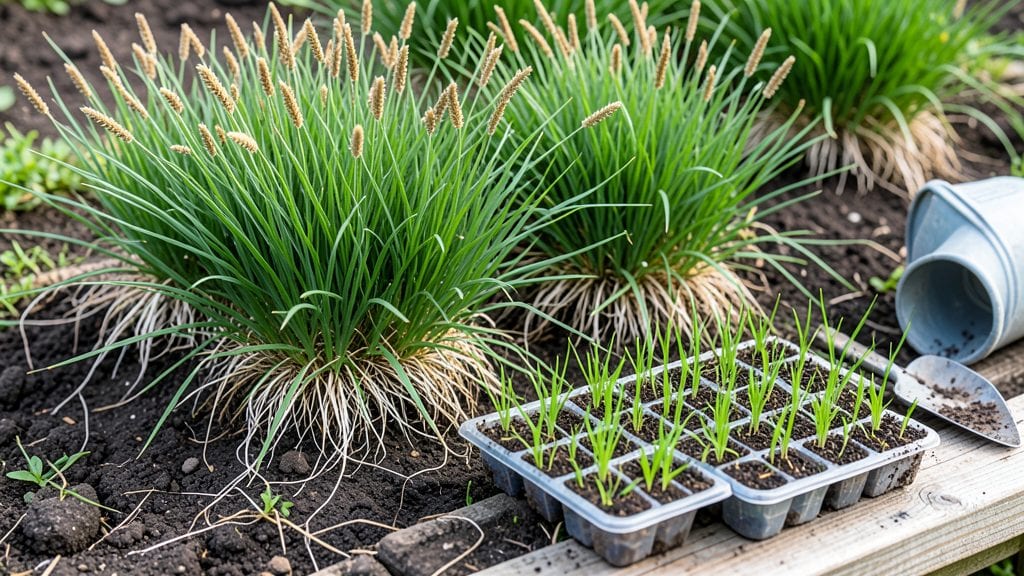
Grass roots gardening starts with the belief that every yard—even a tiny patch—can become a thriving ecosystem that works with nature, not against it. 🌱 I stumbled onto this approach after watching my neighbor’s urban lot transform from a patchy lawn into a year-round haven for bees and butterflies, all using plants that needed almost no water once established.
The magic isn’t in fancy tools or perfect rows; it’s in choosing the right plants and letting them do the heavy lifting.
This method thrives on three simple principles: native plants that belong in your climate, layered designs that keep color and texture going all year, and a hands-off approach once the garden settles in.
You’ll use materials like logs, stones, and recycled wood for borders instead of plastic, and every plant will pull its weight—whether it’s a drought-resistant shrub, a pollinator magnet, or a ground cover that smothers weeds. The best part?
Most of these gardens cost less than a single bag of store-bought mulch to start.
What you end up with is a garden that feels alive, not like a chore. Imagine walking past in December and spotting bright red berries on a winterberry bush while a nearby salvia hums with early bees.
The plants you choose will handle heatwaves, droughts, and even deer better than anything from a big-box store, and you’ll spend less than an hour a month on maintenance. The real reward? A space that gives back more than it takes—whether that’s food, habitat, or just quiet joy.
This approach works for balconies, backyards, or community plots—anywhere you can dig in. The key is starting small, letting nature lead, and sharing what you learn with others. Here’s how to begin without overcomplicating it.
📚 In This Guide
- What you need
- Instructions
- Tips and common mistakes
- Wrapping up and next steps
What you need
- ● Garden beds or containers: 1-2 raised beds (4’x8’ or custom size) or
- ● 5-10 large containers (12"+ depth, with drainage holes)
- ● Soil: 1 cubic yard of high-quality garden soil (or potting mix for containers)
- ● Compost (1-2 bags, 40 lb each) for nutrient boost
- ● Plants: Perennials (e.g., lavender, coneflowers, hostas) – 3-5 plants per bed
- ● Biennials (e.g., foxgloves, hollyhocks) – 2-3 plants
- ● Cold-hardy annuals (e.g., pansies, snapdragons) – 5-10 plants
- ● Ground cover (e.g., creeping thyme, clover) – 1-2 bags
- ● Tools: Garden trowel (for transplanting)
- ● Pruners (sharp, for trimming)
- ● Garden gloves (1 pair, adjustable fit)
- ● Watering can or hose with adjustable nozzle
- ● Mulch (2-3 bags, shredded bark or straw) to retain moisture
- ● Drip irrigation kit (for hands-off watering)
- ● Plant markers (to track varieties)
- ● Organic fertilizer (slow-release, 10-10-10 ratio)
- ● Decorative stones or edging (for a polished look)
Step-by-Step instructions for building a low-maintenance year-round garden
Here's how to create a vibrant garden that thrives with minimal effort—layer by layer.
🌱 Step 1: Plan Your Planting Layers for Seasonal Interest
Start by sketching your garden space and dividing it into three layers: tall perennial shrubs (back), mid-height perennials (middle), and ground covers/annuals (front). I like to use evergreens like boxwood or dwarf holly for the back layer—they provide structure year-round. Choose plants that bloom at different times so you always have color.
For the middle layer, select perennials with varied heights (like coneflowers or black-eyed Susans) and bloom times. Add a few grasses like fountain grass for texture and movement. Front layers should include low-growing perennials (like creeping thyme) and annuals (like pansies) that tolerate foot traffic. This ensures your garden stays lively from early spring to late fall.
🪴 Step 2: Prepare the Soil for Healthy Growth
Remove existing grass or weeds from your chosen area, then loosen the soil with a garden fork to a depth of 12 inches. Mix in 2-3 inches of compost (from your materials list) to improve drainage and fertility. I like to work the compost into the top 6 inches of soil, where most roots will grow.
For heavier clay soil, add a 50-50 mix of compost and coarse sand to create a looser, more workable texture. Test the soil pH—most perennials prefer a slightly acidic to neutral range (6.0-7.0). If your soil is too alkaline, add sulfur or peat moss to adjust it gradually. Well-amended soil means less watering and fewer fertilizers later.
☀️ Step 3: Plant Perennials and Shrubs for Structure
Dig holes twice as wide as the root ball but only as deep as the container. Gently remove plants from their pots and tease out any root-bound roots at the edges. Place each plant in its hole, ensuring the top of the root ball sits level with the surrounding soil—burying too deep can suffocate stems.
Fill the hole with soil, pressing lightly to eliminate air pockets, then water deeply to settle the roots. Space shrubs 3-6 feet apart (check plant tags for mature size) and perennials 18-24 inches apart. Mulch with 2-3 inches of shredded bark (from your materials) around each plant, keeping it 2 inches away from stems to prevent rot. This mulch layer preserves moisture and suppresses weeds.
🌿 Step 4: Add Mid-Layer Perennials and Grasses
Plant mid-height perennials in clusters of 3-5 plants for a natural, full look. Dig holes just deep enough to accommodate the roots, then place each plant so the crown sits just below soil level. Press soil firmly around the base and water thoroughly. Grasses like fountain grass should be planted in small groups of 3 to create movement and contrast.
For a textural contrast, alternate broadleaf perennials (like hostas) with narrow grasses (like blue fescue). This layer should fill in gaps between shrubs and ground covers, ensuring no bare soil shows. Water lightly after planting to help soil settle, but avoid overwatering—perennials establish roots best with moderate moisture.
💧 Step 5: Finish with Ground Covers and Annuals
Spread creeping thyme or ajuga (low-growing perennials) over the front layer, spacing them 12-18 inches apart. These plants will fill in quickly, crowding out weeds. For color, add pansies or violas in early spring and fall—they thrive in cooler weather and bloom until frost.
Water the entire garden deeply once a week (or more in extreme heat) to encourage deep root growth. Once established, most perennials only need water during drought conditions. Avoid high-nitrogen fertilizers—they encourage leafy growth at the expense of flowers. Instead, use a balanced 10-10-10 fertilizer sparingly in early spring.
⏰ Step 6: Maintain with Minimal Effort
Mulch again in early spring and fall to refresh the layer and suppress weeds. Deadhead spent blooms on perennials to encourage reblooming (like coneflowers or black-eyed Susans). Prune shrubs in late winter or early spring before new growth appears—this keeps them healthy and shaped.
Divide overcrowded perennials every 3-4 years to rejuvenate growth. If a plant struggles, check for pests or disease (like powdery mildew) and treat early. With this layered approach, your garden will look lush and intentional with almost no daily work—just seasonal check-ins.
Tips & tricks for perfect year-round garden layers
Creating a garden that stays vibrant all year takes a few key strategies—here's how to avoid common pitfalls and get the most out of your layered design.
Layer Planning: When sketching your garden layout in Step 1, I recommend using graph paper to scale your space accurately. This helps visualize how each plant will mature—especially important for shrubs that can grow 6 feet tall! I like to draw my garden as if looking down from above, using different colored pencils for each layer. This visual approach prevents overcrowding and ensures every plant has room to thrive without competing for sunlight.
Soil Prep Secret: In Step 2, don't just mix compost into the soil—create "compost pockets" by digging small holes (about 6 inches deep) around each planting area and filling them with compost before backfilling. This targeted approach gives roots immediate access to nutrients while preventing compaction. For clay soil, I add a handful of perlite to the compost-sand mix to improve aeration even more.
Planting Technique: The crown placement in Step 3 is crucial—it's the spot where stems meet roots. If you bury the crown too deeply (more than 1 inch below soil level), you risk suffocating the plant. I use a small marker or stick to note the original soil line on the root ball before planting, then adjust until it sits perfectly level with the surrounding soil.
Maintenance Shortcuts: For Step 6, I've found that applying a 2-inch layer of cocoa bean mulch (instead of shredded bark) not only suppresses weeds but also adds nitrogen to the soil as it breaks down. Plus, it looks beautiful and smells amazing! Just be sure to keep it 2 inches away from stems to prevent rot, just like with regular mulch.
Pro Tips for Grass Roots Gardening
- Creating a garden that stays vibrant all year takes a few key strategies—here's how to avoid common pitfalls and get the most out of your layered design.
- Layer Planning: When sketching your garden layout in Step 1, I recommend using graph paper to scale your space accurately.
- Soil Prep Secret: In Step 2, don't just mix compost into the soil—create "compost pockets" by digging small holes (about 6 inches deep) around each planting area and filling them with compost before backfilling.
Frequently asked questions
Got questions about grass roots gardening?
You’re not alone—let’s dig into the most common ones to help you grow with confidence!
What’s the easiest way to start grass roots gardening on a budget?
Begin with perennial ground covers like clover or creeping thyme—they’re low-cost, drought-tolerant, and suppress weeds naturally. Repurpose old containers as planters, or swap seeds with neighbors. Focus on one layer at a time (e.g., shade plants first) to avoid overwhelm.
When’s the best time to plant for year-round layers?
Plant cool-season crops (spinach, kale) in early spring/fall, while warm-season plants (tomatoes, peppers) thrive in late spring. For perennials, late summer/early fall gives roots time to establish before winter. Layering (adding new plants gradually) lets you adjust timing—no rush!
Can I use grass roots gardening in small spaces like balconies or patios?
Opt for vertical layers (herbs in hanging pots, strawberries in tiered planters) or microgreens in shallow trays. Dwarf varieties (e.g., bush beans, lettuce) work perfectly. Even a 6-inch pot can grow a thriving “mini ecosystem” with the right mix.
How do I keep pests away without chemicals in a layered garden?
Diversity is your best defense! Plant companion pairs (e.g., marigolds + tomatoes) to repel pests naturally. Use mulch (straw, leaves) to deter weeds and retain moisture. For stubborn bugs, handpick early or introduce beneficial insects like ladybugs—no harsh sprays needed!
What if my climate is too hot/cold for traditional gardening?
Choose climate-adapted plants: heat-lovers (okra, rosemary) for dry areas; cold-hardy perennials (asparagus, rhubarb) for chilly zones. Shade layers (hostas, ferns) protect soil moisture in hot spots. Season extenders (row covers, cold frames) can add 2–4 weeks to your growing season.
Wrapping up and next steps
Grass roots gardening isn’t just about growing plants—it’s about revitalizing your space, connecting with nature, and simplifying sustainability. By layering perennials, ground covers, and seasonal blooms, you create a low-maintenance oasis that thrives with minimal effort.
Whether you’re a beginner or a seasoned green thumb, these year-round layers make gardening joyful and manageable.
Ready to dive in? Start small—pick one layer to test this season, then expand as you gain confidence. Your future self (and the bees!) will thank you. 🌱✨