Lawn
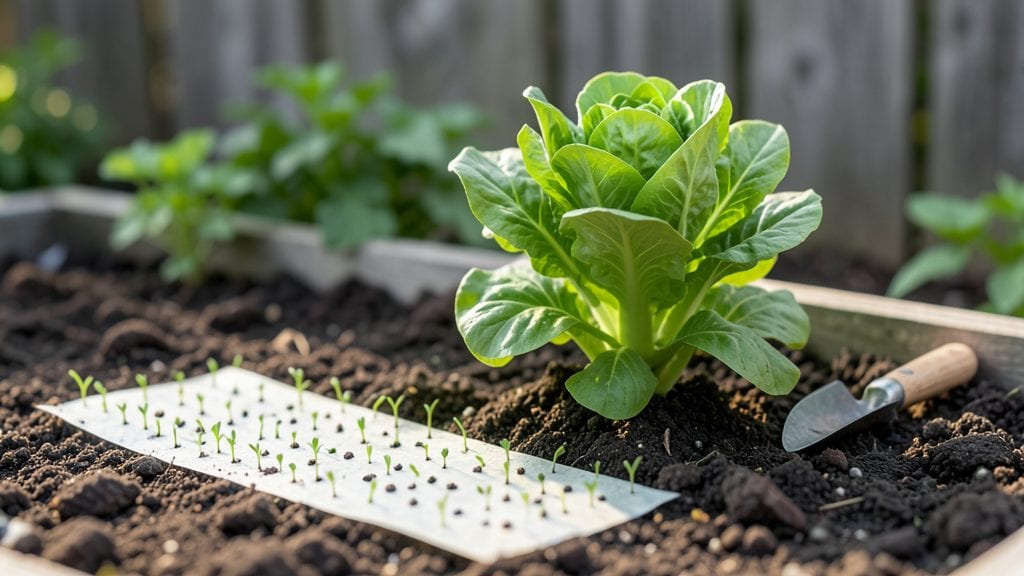
Planting seeds with garden seed tape saves you from the guesswork of spacing and depth—no more overcrowded seedlings or buried treasures that never sprout. 🌱 I used to struggle with uneven germination and wasted seeds until I tried this method, which keeps everything perfectly aligned from day one.
The tape itself is a strip of biodegradable material with seeds embedded at precise intervals, so you just lay it down and cover it with soil.
The real game-changer is how much faster your garden comes together. You’ll see neat rows of seedlings emerging at the same time, with no thinning required—just watch them grow straight and strong.
It works especially well for small seeds like carrots, lettuce, or radishes, where spacing is critical, but also for herbs like basil or dill. Plus, it cuts planting time by half, which means more time enjoying your garden instead of fussing over it.
Once planted, the tape dissolves naturally, leaving the roots free to grow without restriction. You’ll notice healthier seedlings with less competition for nutrients, and the neat rows make weeding a breeze.
The key is keeping the soil consistently moist until germination—just a light misting each morning—and avoiding heavy water pressure that could wash the tape away.
This method isn’t just for beginners; even experienced gardeners swear by it for high-value crops or when time is tight. Whether you’re prepping a vegetable bed, a flower border, or a herb spiral, seed tape turns planting from a chore into a quick, satisfying setup.
Ready to try it? Let’s get those seeds in the ground the easy way.
📚 In This Guide
- What you need
- Instructions
- Tips and common mistakes
- Wrapping up and next steps
What you need
- ● Garden seed tape – Choose pre-spaced seeds (e.g., basil, lettuce, or marigolds) or DIY with your own seeds and tape.
- ● Scissors or craft knife – For cutting seed tape to desired lengths.
- ● Soil or seed-starting mix – Lightweight, moisture-retentive blend (e.g., 2-3 cubic feet for small gardens).
- ● Watering can or spray bottle – Gentle watering avoids displacing seeds.
- ○ Garden twine or stakes (optional but helpful) – For marking rows if needed.
- ● Gloves – Protect your hands from soil and sharp tape edges.
- ● Measuring tape or ruler – Ensure proper spacing (check seed tape specs!).
- ○ Plant labels (optional) – Write names/dates if mixing varieties.
- ● Shade cloth or row cover – For delicate seedlings (if planting outdoors early).
- ● Sunlight access – Confirm your garden spot gets 4–8+ hours of sun daily (varies by plant).
- ● Weather check – Avoid planting during frost or extreme heat (follow seed tape instructions!).
- ● Soil prep – Loosen soil 6–12 inches deep for roots to thrive.
Step-by-Step instructions for using garden seed tape
Here's how to use seed tape for faster, neater planting—no more guessing spacing or depth.
🌱 Step 1: Prepare Your Seed Tape and Soil
Start by unwinding your seed tape and laying it flat on a clean surface. I like to cut it into sections based on the length of my rows—this prevents tangling later. The tape has seeds embedded at precise intervals, so no measuring required. Just make sure the seeds are facing upward (they're usually printed on the tape).
Next, prepare your planting area by loosening the soil to a depth of 1 inch. Remove any rocks or debris, then create a shallow furrow about ½ inch deep—just enough to nestle the seeds. Water the furrow lightly so the soil is moist but not soggy. This ensures the tape will stick and the seeds will have immediate hydration.
💧 Step 2: Plant the Seed Tape
Lay the seed tape into the furrow with the seeds facing down. Gently press the tape into the soil so it stays in place—you want just enough contact to hold it, but don’t bury it completely. The tape itself will biodegrade, so it won’t interfere with germination. I find it helpful to use my finger to smooth the soil over the tape lightly, ensuring the seeds are covered but not smothered.
Water the row again with a gentle spray to settle the soil around the tape. You’ll see the seeds perfectly spaced, which means no thinning later. This is where seed tape shines—no more overcrowding or gaps. If you’re planting multiple rows, keep the spacing between rows consistent with the plant’s mature width (check your seed packet for guidance).
☀️ Step 3: Provide Light and Moisture
After planting, keep the soil consistently moist but not waterlogged for the first 7-10 days. You’ll notice the tape helps retain moisture near the seeds, so you won’t need to water as frequently as with loose seeds. Place a small marker or stake at one end of the row to track progress—this prevents disturbing the tape while checking for sprouts.
Seed tape works best in well-draining soil with full sun to partial shade, depending on the plant. Most varieties thrive with 6+ hours of sunlight daily. Watch for the first signs of germination—tiny green shoots pushing through the soil. Once they appear, you can reduce watering slightly but keep the area moist until the seedlings are 2-3 inches tall.
✂️ Step 4: Maintain and Thin (If Needed)
Unlike loose seeds, seed tape usually eliminates the need for thinning because the seeds are pre-spaced. However, if some seeds fail to germinate, you can gently remove any weak or missing seedlings by hand. Use a small trowel or your fingers to carefully lift the tape slightly and snip the struggling seedling at soil level—this prevents disturbing the roots of healthy plants.
Once seedlings reach 2 inches tall, you can remove the seed tape entirely if desired. It will dissolve naturally, but it’s not necessary—many gardeners leave it in place as it decomposes. Keep the soil moist and fertilize lightly with a balanced, water-soluble fertilizer once the seedlings have 3-4 true leaves. This encourages strong, healthy growth without overwhelming the young plants.
Tips & tricks for perfect garden seed tape planting
Here's the secret to making seed tape work even faster and more reliably for you.
Seed Orientation Matters: Confession: I skipped checking seed orientation for years and wondered why germination rates were inconsistent. Always verify seeds face downward before planting—most tapes have printed indicators. This ensures proper contact with soil moisture and light conditions for optimal germination.
Soil Prep is Non-Negotiable: Don't rush the soil preparation in Step 1. Loosening to exactly 1 inch depth creates ideal conditions for root establishment. I've found that adding a thin layer of compost to the furrow before planting gives seedlings an extra nutrient boost right from the start.
Watering Strategy: The key to consistent moisture is gentle, frequent watering during those critical first 7-10 days. Instead of soaking, use a fine mist setting on your watering can or hose attachment. This prevents disturbing the delicate tape while maintaining proper hydration levels for germination.
Row Marking Hack: For large planting areas, use biodegradable flags or popsicle sticks labeled with the plant variety and planting date. This prevents mix-ups when managing multiple seed tapes and gives you a clear record of what's growing where.
Pro Tips for Garden Seed Tape
- Here's the secret to making seed tape work even faster and more reliably for you.
- Seed Orientation Matters: Confession: I skipped checking seed orientation for years and wondered why germination rates were inconsistent.
- Soil Prep is Non-Negotiable: Don't rush the soil preparation in Step 1.
Frequently asked questions
Got questions about garden seed tape?
You’re not alone! Here are answers to the most common ones to help you get started with confidence.
What’s the best time of year to plant seed tape?
Seed tape thrives in spring or early fall when soil temps are 50–75°F. Avoid extreme heat or cold—it can dry out seeds or hinder germination. Check your local frost dates for ideal timing!
Can I reuse seed tape from one season to the next?
Nope! Seed tape is single-use only. Once planted, the tape dissolves or degrades, and storing leftover seeds risks mold or poor viability. Buy fresh tape each season for best results.
What if my seed tape won’t stick to the soil?
Try these fixes:
- Moisten the tape slightly before pressing into soil.
- Use a light sprinkle of water over the area to help adhesion.
- Press gently with your fingers or a board to ensure contact.
Is seed tape better than traditional seeding?
Yes! Seed tape offers precision, faster germination, and fewer weeds since seeds are evenly spaced. It’s ideal for small plots, borders, or delicate flowers. For large areas, though, bulk seeds may still win.
What do I do if animals eat my seed tape?
Use physical barriers like row covers or chicken wire until sprouts emerge (usually 7–14 days). For stubborn critters, try hot pepper spray (safe for plants!) or plant in less accessible spots.
Wrapping up and next steps
Garden seed tape is your secret weapon for effortless, precise planting—no more messy seeds or guesswork! Whether you're a beginner or a seasoned gardener, this tool saves time, boosts success rates, and delivers neat, uniform rows that even the pros envy. 🌱✨
Ready to transform your garden? Grab your seed tape, pick a sunny spot, and start planting—your future veggies (and neighbors!) will thank you. What’s next? Try it with your favorite fast-growing herbs or flowers and share your progress with the gardening community!