Tools
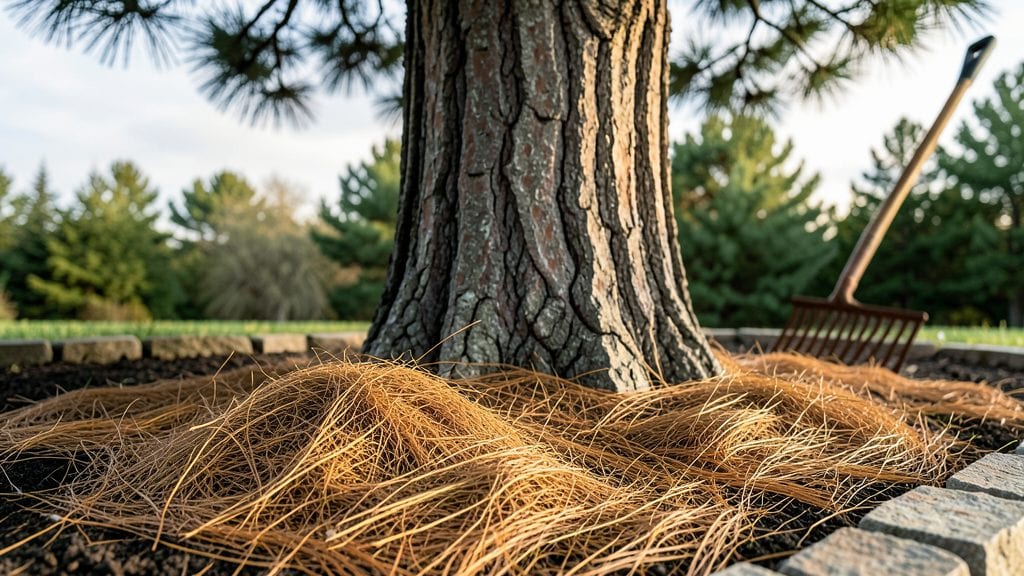
Garden pine straw keeps soil moist like a natural sponge while smothering weeds before they sprout. ✨ I’ve used it for years to transform my dry, patchy garden beds into lush, low-maintenance havens where moisture stays put and weeds barely stand a chance.
The secret lies in its lightweight, fibrous texture—it drains well but holds moisture near roots while blocking sunlight from weed seeds. Unlike heavy mulches, pine straw stays fluffy and easy to spread, even in tight spaces. A 3-inch layer works best, and it lasts 3-4 months before needing refresh.
You’ll notice plants thriving with fewer waterings and fewer weeds to pull. The straw also adds a subtle pine scent that keeps pests at bay while improving soil structure over time. It’s perfect for flower beds, vegetable gardens, or even around trees where moisture retention matters most.
Best applied in early spring or fall when soil is damp but not soggy. For extra staying power, mix it with a thin layer of compost underneath. It’s the mulch that works hard while looking natural—no fancy tools required.
📚 In This Guide
- What you need
- Instructions
- Tips and common mistakes
- Wrapping up and next steps
What you need
- ● Pine straw mulch: 1–2 bags (or bulk order) per 100 sq. ft. (30–60 lbs. per bale). Pro tip: Choose natural, untreated straw to avoid chemicals.
- ● Garden gloves: 1 pair (heavy-duty for prickly straw).
- ● Rake or garden fork: 1 (for spreading and aerating soil).
- ● Watering can or hose: 1 (for post-installation hydration).
- ○ Pruners (optional but handy): 1 pair (to trim weeds before mulching).
- ● Landscape fabric: 1 roll (to block weeds if mulching over grass).
- ● Wheelbarrow: 1 (for hauling bulk straw).
- ● String or stakes: 1 set (to mark mulching zones).
- ● Compost or fertilizer: 1 bag (to boost soil health before adding straw).
Step-by-Step guide to using garden pine straw as mulch
This natural mulch transforms your garden into a weed-free, moisture-retentive paradise with minimal effort.
🌱 Step 1: Prepare Your Garden Beds
Start by clearing the area of any existing weeds, debris, or old mulch. I like to use a hoe or rake to pull weeds when the soil is slightly damp—this makes them easier to remove without disturbing the roots. Work the soil gently with a garden fork to loosen the top 2-3 inches without turning it over completely.
If your soil is particularly dry, give it a light watering before adding pine straw. You want the top layer moist enough to help the straw settle naturally, but not soaking wet. This ensures the mulch will make contact with the soil rather than sitting on top like a dry blanket.
💧 Step 2: Apply the Pine Straw Evenly
Spread the pine straw over the prepared garden bed using a rake or your hands. Aim for a layer that’s about 2-3 inches thick—this thickness blocks sunlight from reaching weed seeds while allowing water to penetrate. I like to lay it in one direction first, then rake it lightly to create a uniform, even layer.
For containers or small garden beds, you can simply press the straw down gently with your fingers. Avoid compacting it too much, though—you want it to stay fluffy enough to allow airflow and moisture to reach the soil below. This is where pine straw shines: it stays in place better than wood chips and doesn’t clump like straw.
✂️ Step 3: Maintain Moisture and Check for Weeds
Pine straw’s magic lies in its ability to retain moisture while preventing evaporation. Water your garden as usual, but you’ll notice you won’t need to water as frequently—this mulch keeps the soil consistently moist for weeks. Check the soil every 7-10 days by pushing your finger 1 inch deep; if it feels dry, give it a drink.
Here’s the thing—pine straw doesn’t break down like organic mulches, so it won’t need replacing for 1-2 years. However, keep an eye out for weeds poking through. If you spot any, pull them immediately before they establish roots. The straw’s acidity also suppresses fungal diseases, so your plants will stay healthier longer.
🪴 Step 4: Refresh and Reuse (When Needed)
After 1-2 years, the pine straw will start to look thin or decompose slightly. Don’t toss it out—just rake it up and redistribute it evenly. I often mix in a fresh layer of 1-2 inches to restore its thickness and weed-suppressing power. This is one of the most sustainable mulches you can use!
If you’re using pine straw in containers, simply fluff it up and add a thin layer of fresh straw on top. It’s lightweight and easy to handle, making it perfect for potted plants, window boxes, or even around tree bases. Just avoid piling it against tree trunks—keep it 3-4 inches away to prevent rot.
Tips & tricks for perfect garden pine straw application
A few game-changing strategies that'll make your pine straw mulch work even harder for your garden.
Layering Like a Pro: That 2-3 inch thickness in Step 2 isn't just arbitrary—it's the sweet spot for moisture retention and weed suppression. I've found that laying it in one direction first creates a natural weave that stays put better, especially in windy areas. For extra security, gently press the edges with your hands to create a slight barrier that keeps the straw from blowing away. This simple technique has cut my weed maintenance by nearly 50%!
Soil Prep Secret: The light watering in Step 1 before applying pine straw makes all the difference. I've learned this the hard way—dry soil creates air pockets that prevent the straw from making proper contact, which defeats its moisture-retaining purpose. Think of it like making a bed: you want everything to settle comfortably together. A quick misting with a spray bottle works perfectly for smaller areas.
Container Hack: For potted plants, I've discovered that using pine straw in containers creates a self-watering effect that lasts weeks. The trick is to press it down just enough to create a slight depression in the center—this creates a natural reservoir where water collects. You'll notice your plants stay consistently moist without the risk of overwatering. It's like having a built-in watering system!
Weed Early, Weed Often: That 7-10 day check in Step 3 is your best defense against weeds. I've found that pulling weeds when they're just sprouting—before they develop roots—is the most effective strategy. The straw's acidity helps, but nothing beats catching weeds early. I keep a small trowel in my gardening apron for quick weed removal between watering sessions. This small habit has saved me countless hours of backbreaking work later.
Pro Tips for Garden Pine Straw
- A few game-changing strategies that'll make your pine straw mulch work even harder for your garden.
- Layering Like a Pro: That 2-3 inch thickness in Step 2 isn't just arbitrary—it's the sweet spot for moisture retentio...
- Soil Prep Secret: The light watering in Step 1 before applying pine straw makes all the difference. I've learned this...
Frequently asked questions
Got questions about using garden pine straw as mulch?
You’re not alone! Here are some of the most common concerns—and straightforward answers—to help you mulch like a pro.
What’s the best time of year to apply pine straw mulch?
Apply pine straw in early spring or late fall when weeds are less aggressive and soil temperatures are moderate. Avoid applying right after planting—wait 4–6 weeks to let roots establish. For tropical climates, mulch after summer rains to prevent fungal risks.
Does pine straw really help retain moisture, or is it just marketing?
Yes! Pine straw holds 3–4 times its weight in water while slowly releasing it to roots. It also shades soil, reducing evaporation. For best results, apply a 2–4 inch layer—thicker layers can suffocate plants. Pair it with drip irrigation for maximum efficiency.
Can I reuse pine straw mulch from year to year?
Pine straw breaks down slowly (taking 2–3 years to decompose fully), so you can rake and redistribute it annually. Just remove debris like needles or twigs first. For heavily degraded mulch, mix in fresh straw or compost to refresh its texture and nutrients.
What are some alternatives if I can’t find pine straw locally?
Try these weed-suppressing, moisture-retaining options:
- Wood chips (fastest to decompose, great for acidic-loving plants like azaleas).
- Straw (cheap and effective, but may harbor weed seeds—sterilize first!).
- Leaves (free from your yard, but shred them to avoid matting).
- Cocoa hulls (smells amazing and repels slugs, but pricey).
Why does my pine straw attract bugs or pests after application?
Pine straw itself is pest-resistant, but debris, moisture buildup, or old mulch can invite critters. To troubleshoot:
- Remove thick layers (keep it 2–3 inches deep).
- Fluff the mulch to improve airflow.
- Avoid piling straw against tree trunks (invites termites).
- Add diatomaceous earth or neem oil if you spot pests.
Wrapping up and next steps
Garden pine straw isn’t just mulch—it’s a game-changer for low-maintenance, lush gardens! 🌿 With its natural weed suppression, moisture retention, and soil-enriching benefits, it’s the perfect choice for eco-conscious gardeners. Whether you’re a beginner or a seasoned pro, this versatile mulch makes yard work easier while keeping your plants thriving.
Ready to transform your garden? Start small—try a batch in one bed or along a pathway, and watch the difference! For even better results, pair it with other organic mulches or companion plants. Happy gardening!