Tools
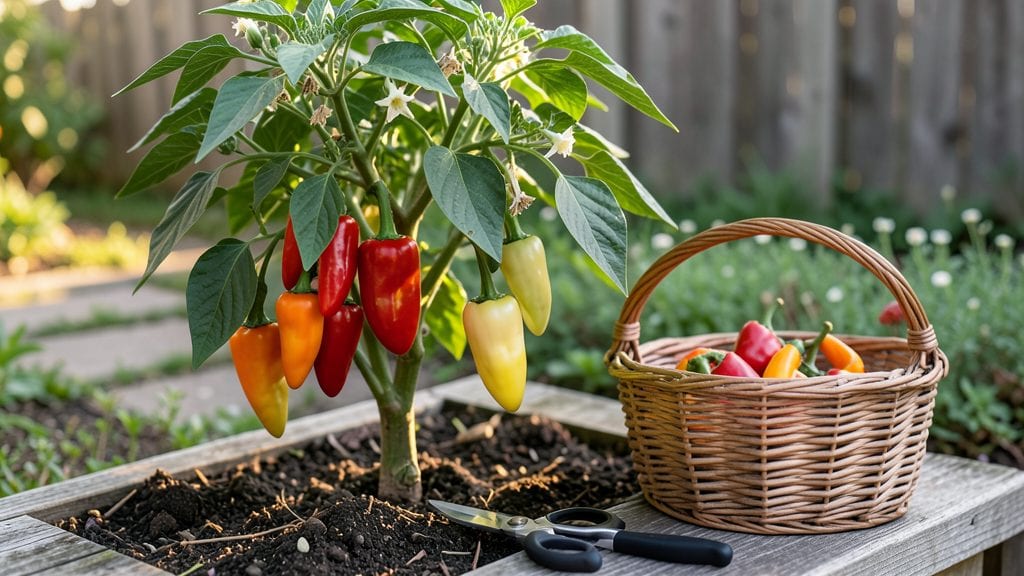
Growing garden hot peppers isn't just about heat—it's about unlocking flavors that turn every meal into an adventure. 🌶️ I learned the hard way that these fiery plants demand patience and precision, but the payoff is worth it: peppers that pack serious heat and vibrant colors.
The secret starts with the right variety—whether you crave Carolina Reapers or mild jalapeños—and understanding how each one behaves.
Hot peppers thrive in warm soil and full sun, but they’re finicky about water and fertilizer. Too much water dilutes their heat, while inconsistent feeding stunts growth.
My first harvest taught me that a balanced approach—like adding compost at planting and using a mild fertilizer every 4-6 weeks—keeps plants productive without burning them out. Even beginners can nail this with the right setup.
By mid-summer, you’ll be harvesting peppers that range from deep red to fiery orange, each one a testament to your care. The best part? These peppers keep producing for months, giving you a steady supply of heat for cooking, drying, or sharing.
Just watch for pests like aphids and diseases like powdery mildew—early action keeps your plants strong.
This guide covers everything from seed starting to harvesting, so you’ll know exactly what to do at every stage. Whether you’re growing in pots or garden beds, these tips ensure bold harvests and fewer disappointments. Let’s get those peppers growing!
📚 In This Guide
- What you need
- Instructions
- Tips and common mistakes
- Wrapping up and next steps
What you need
- ● Hot pepper seeds: Choose 5–10 varieties (e.g., Habanero, Jalapeño, or Ghost Pepper) based on your heat tolerance!
- ● Potting mix: 10–20 lbs of well-draining, organic seed-starting mix (or a blend with perlite/vermiculite).
- ● Containers or garden beds: For seedlings: 4–6" diameter pots (1–2 per seedling).
- ● For transplanting: 12" diameter pots or 18" deep in-ground plots (1 plant per 18" of space).
- ● Fertilizer: Balanced 10-10-10 or organic compost (1–2 tbsp per plant, every 4–6 weeks).
- ● Watering can or hose: With a gentle spray nozzle for seedlings.
- ● Gloves: Heavy-duty gardening gloves (hot peppers can sting!).
- ● Pruning shears: Sharp, sterilized shears for trimming.
- ● Stakes or cages: 3–4 ft tall (for tall varieties like Cayenne).
- ● Row covers: Lightweight fabric to protect seedlings from pests.
- ● pH test kit: Ideal soil pH: 6.0–6.8 (adjust with lime or sulfur if needed).
- ● Heat-resistant containers: For harvesting (e.g., glass jars with rubber bands to avoid burns!).
Step-by-step instructions for growing bold garden hot peppers
Here's how I grow peppers that pack serious heat—starting from seed to harvest.
🌱 Step 1: Start Seeds Indoors at the Right Time
Begin seeds 8-10 weeks before your last frost date. I use biodegradable seedling pots filled with sterile seed-starting mix to prevent damping-off. Plant seeds ¼ inch deep—any deeper delays germination because the seedling struggles to reach light.
Keep the soil 75-85°F using a seedling heat mat. Cover the tray with plastic wrap to trap warmth and moisture until sprouts appear. You'll see tiny green shoots in 7-14 days. Once they break through, remove the wrap immediately to prevent fungal growth.
☀️ Step 2: Provide Strong Light for Stocky Seedlings
Peppers need 14-16 hours of light daily from day one. A south-facing window rarely cuts it—seedlings stretch toward light and become leggy. I use a full-spectrum LED grow light 2-3 inches above the plants, raising it as they grow.
Healthy seedlings have thick stems and dark green leaves. If they look pale or stretched, lower the light closer. Avoid cold drafts—peppers hate sudden temperature drops. Keep them in a warm spot until all danger of frost has passed.
🪴 Step 3: Transplant Outdoors After Hardening Off
Two weeks before moving plants outside, start hardening them off. Place seedlings in a shaded spot for 1-2 hours the first day, gradually increasing time over 10-14 days. This toughens stems and prevents shock when they face full sun and wind.
Choose a location with full sun (6+ hours daily) and well-draining soil. Space plants 18-24 inches apart—crowding reduces airflow and invites disease. Bury stems slightly deeper than in pots to encourage strong root growth.
💧 Step 4: Water Deeply and Fertilize for Heat
Peppers hate soggy soil but need consistent moisture. Water 1 inch per week, letting the top 1-2 inches of soil dry between waterings. I mulch with 2-3 inches of organic mulch to retain moisture and suppress weeds.
Feed plants every 2-3 weeks with a balanced 10-10-10 fertilizer once they start flowering. Too much nitrogen makes plants leafy but fruitless. Watch for yellowing leaves—a sign of overwatering or nutrient deficiency. Adjust care based on what you see.
✂️ Step 5: Prune and Harvest for Maximum Heat
Pinch off the first few flowers if your plants are small—this redirects energy to root and stem growth. Once established, let peppers flower freely. Harvest when pods reach ¾ of their full size for the best flavor and heat. Use pruning shears to snip stems ¼ inch above the fruit.
Don’t let peppers stay on the vine too long—they’ll lose heat and flavor. Store harvested peppers in a cool, dry place. The longer they ripen off the plant, the more their heat intensifies. I always save seeds from the hottest peppers to grow next year’s boldest batch.
Tips & tricks for growing bold garden hot peppers
Here's what I've learned after growing some seriously fiery peppers that'll make your taste buds dance—and how to avoid the common pitfalls that turn heat into heartache.
Timing is Everything: That 8-10 week countdown from seed to transplant is non-negotiable for your region. Check your last frost date and work backward—rushing this schedule often leads to weak, leggy seedlings that struggle in the garden. I mark my calendar with reminders because missing this window means starting over.
The Light Factor: Those 14-16 hours of daily light aren't optional—they're what turn weak seedlings into powerhouses. If your south window isn't cutting it (and honestly, it rarely does), invest in a basic LED grow light. I position mine just 2-3 inches above the plants and raise it weekly. The moment you see seedlings stretching toward light like sun-worshippers, you know it's time to lower that light.
Hardening Off Strategy: The gradual 10-14 day hardening process is where most gardeners cut corners—and pay for it later. Start with just 1-2 hours of shade on day one, then increase by 30 minutes daily. I've seen plants go into shock when moved directly to full sun after indoor pampering. Think of it like giving your peppers a week-long vacation to adjust to the real world.
Heat-Building Secrets: For maximum capsaicin (that's the heat compound), harvest when pods reach ¾ of their full size—this is when the heat peaks. I use pruning shears to snip stems ¼ inch above the fruit to prevent disease entry points. And here's the pro move: store harvested peppers in a paper bag in a dark, cool place. The longer they ripen off the vine, the more their heat intensifies—sometimes doubling the Scoville rating!
Pro Tips for Garden Hot Peppers
- Here's what I've learned after growing some seriously fiery peppers that'll make your taste buds dance—and how to avoid the common pitfalls that turn heat into heartache.
- Timing is Everything: That 8-10 week countdown from seed to transplant is non-negotiable for your region.
- The Light Factor: Those 14-16 hours of daily light aren't optional—they're what turn weak seedlings into powerhouses.
Frequently asked questions
Got questions about growing your own fiery garden peppers?
You’re not alone! Here are answers to the most common queries—from heat levels to troubleshooting—so you can cultivate a thriving (and spicy) harvest.
How do I know which hot peppers are best for my climate?
Choose peppers suited to your USDA hardiness zone. Jalapeños and Serranos thrive in warm zones (7-10), while Habaneros or Ghost Peppers need long, hot summers (9-11). For cooler areas, opt for shorter-season varieties like Cayenne or Thai Chili. Always check seed packets for days-to-maturity!
When should I plant hot peppers outdoors?
Wait until after the last frost and soil temps hit 65°F+ (18°C+). Start seeds indoors 8–10 weeks before transplanting for a head start. Use black plastic mulch to warm the soil faster—peppers hate cold feet!
Why are my pepper plants wilting or turning yellow?
Yellow leaves often signal overwatering or nutrient deficiencies (like nitrogen). Wilting? Check for underwatering or root rot (common in soggy soil). Adjust care: water at the base (not leaves), amend soil with compost, and prune crowded foliage for airflow. Stress = less heat!
Can I grow hot peppers in containers? What’s the best setup?
Use a 5-gallon+ pot with drainage holes, a well-draining mix (like 60% potting soil + 40% perlite), and a south-facing spot for 6+ hours of sun. Dwarf varieties like Shishito or Mini Jalapeño thrive in containers. Fertilize every 2–3 weeks with a balanced, pepper-specific feed.
What can I do if my peppers aren’t getting spicy?
Heat fades if peppers overripe or don’t get enough sun. Harvest green for maximum capsaicin (the compound that packs the heat!). For extra kick, try stress training (light pruning) or fertilize with low-nitrogen, high-phosphorus feed. Pro tip: Some peppers (like Poblano) are naturally milder—pick heatier varieties if you crave fire!
Are there milder alternatives if I can’t handle the heat?
Yes! Try Poblano (mild, smoky), Bell Peppers (sweet, zero heat), or Shishito (90% mild, 10% surprise!). For a medium burn, Banana Peppers or Hungarian Wax deliver gentle zing. Always taste-test before cooking—some peppers (like Thai Bird’s Eye) hide their heat!
Wrapping up and next steps
Growing your own garden hot peppers is a rewarding journey that brings bold flavors and fiery excitement to your kitchen! Whether you’re a beginner or a seasoned gardener, the key is patience, the right conditions, and a little know-how.
Now that you’re armed with heat-level secrets, soil tips, and troubleshooting tricks, it’s time to roll up your sleeves and plant—your next spicy harvest is just a seed away! 🌱🔥
Ready to take the next step? Start small—pick a variety that suits your heat tolerance, and don’t forget to journal your progress! Share your pepper-growing wins with fellow spice lovers, and soon, you’ll be experimenting with homemade hot sauces, salsas, or even gifting your harvests.
Happy gardening! 🌶️✨