Tools
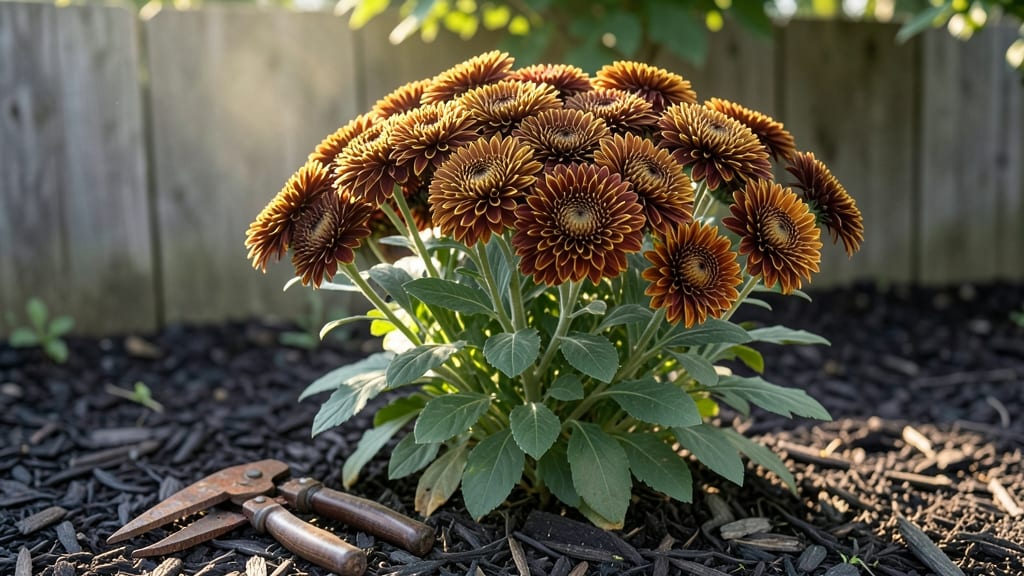
Transform your garden with fall mums this season—here’s how to grow them boldly from start to frost. 🌼 I’ve learned that the secret to showstopping chrysanthemums lies in timing, soil prep, and a few key care habits that keep them thriving when other flowers fade.
Plant them in late summer after the hottest days pass, giving roots time to establish before cooler weather sets in. Well-draining soil enriched with compost ensures strong stems and abundant blooms, while regular watering—about 1 inch per week—keeps them from wilting under autumn’s crisp air.
A sunny spot with at least 6 hours of light daily is non-negotiable for their best color.
With proper care, your mums will burst into deep reds, sunny yellows, and rich purples, turning your garden into a fall masterpiece. They’re also surprisingly low-maintenance—just watch for powdery mildew by spacing plants for airflow and deadhead spent blooms to encourage more flowers.
The payoff? A garden that stays stunning until the first hard frost.
Perfect for borders, containers, or mass planting, these perennials (or treated as annuals) adapt to most climates. Pro tip: Add mulch in early fall to protect roots from temperature swings. Ready to make your garden the envy of the neighborhood? Let’s get planting!
📚 In This Guide
- What you need
- Instructions
- Tips and common mistakes
- Wrapping up and next steps
What you need
- ● Fall mums (Chrysanthemum spp.) – Choose hardy, disease-resistant varieties like ‘Autumn Beauty’ or ‘Polar Bear’ (10–20 plants per 10 sq ft for full coverage). Opt for potted mums (4–6 inches in diameter) for easier planting.
- ● Well-draining potting soil – 1–2 bags (18–25 lbs each) per 10 sq ft. Mix in compost (1 part compost to 3 parts soil) for nutrients.
- ● Slow-release fertilizer – 10-10-10 or 14-14-14 (1 lb per 10 sq ft) to boost blooms.
- ● Organic mulch – Shredded bark or straw (2–3 inches thick) to retain moisture and protect roots.
- ● Garden trowel or hand shovel – For digging small holes (6–8 inches deep).
- ● Garden gloves – A pair to protect your hands from thorns and soil.
- ● Watering can or hose with a gentle spray nozzle – Avoid blasting roots.
- ● Pruning shears – To trim dead foliage or shape plants (sterilize with rubbing alcohol first!).
- ● Measuring tape or ruler – Ensure proper spacing (12–18 inches apart for mums).
- ● Epsom salt – 1 tbsp per plant (dissolved in water) for magnesium boosts.
- ● Plant stakes or labels – To track varieties and support taller stems.
- ● Garden twine – For securing stakes if needed.
- ● Slow-release granular fertilizer – Like Osmocote (apply mid-season for extra color).
- ● Decorative stones or edging – To define garden beds and add flair.
Step-by-Step guide to planting and caring for garden fall mums
Here's how to create a vibrant fall display that keeps blooming until frost.
🌱 Step 1: Choose the Right Location and Prepare the Soil
Fall mums thrive in full sun—at least 6 hours daily. I always pick a spot that gets morning sun and afternoon shade if your climate runs hot. The soil needs excellent drainage, so if yours is heavy clay, mix in 2-3 inches of compost and a handful of perlite per planting hole to loosen it up.
Dig holes twice as wide as the root ball and just as deep. Gently remove the plant from its container and tease the roots apart if they're circling—this encourages outward growth instead of root-bound stress. The top of the root ball should sit 1 inch below soil level to prevent stem rot from sitting water.
💧 Step 2: Plant and Water Deeply
Place each mum in its hole, spacing them 12-18 inches apart for a full, layered look. Backfill with soil, pressing lightly to remove air pockets but not compacting too tightly. Water immediately after planting—1 gallon per plant—to settle the soil and eliminate gaps.
Here's the thing—fall mums hate soggy roots. If your soil stays wet for more than a day after watering, mound soil slightly higher around the base to improve drainage. Mulch with 2 inches of shredded bark or pine straw to retain moisture and regulate soil temperature, but keep it 3 inches away from stems to prevent rot.
☀️ Step 3: Feed for Long-Lasting Blooms
Apply a balanced, slow-release fertilizer (10-10-10) at planting time, following label rates. Six weeks later, switch to a low-phosphorus fertilizer (like 5-10-5) to encourage more blooms instead of foliage. I always fertilize in the morning so plants have time to absorb nutrients before evening moisture settles in.
Watch for signs of over- or under-fertilizing: yellow leaves mean too much nitrogen, while sparse blooms signal a phosphorus deficiency. You'll see the best color when flowers stay vibrant and stems remain sturdy—no flopping or wilting.
✂️ Step 4: Deadhead and Prune for Continuous Color
Deadhead spent blooms by pinching off the flower head just above the first set of leaves. This redirects energy to new buds instead of seed production. I do this every 2-3 days during peak bloom to keep the display fresh. Avoid cutting into woody stems—stick to soft growth only.
If your mums look leggy or overgrown, give them a light trim by cutting back one-third of the tallest stems to encourage bushier growth. Do this in early fall before the first hard frost—it won't harm the plant and often triggers a second flush of blooms.
⏰ Step 5: Protect Through Frost
Once nighttime temperatures drop below 40°F, cover mums with frost cloth or a lightweight blanket to extend their season. Remove it during the day to let them bask in sunlight. You'll notice flowers wilting slightly in cold snaps—that's normal, but they'll perk up once warmed.
After the first hard frost, cut back stems to 6 inches and add a 2-inch layer of mulch to insulate roots. Most varieties survive winter if protected, and you'll see fresh growth in spring. If you're in a colder zone, dig up container-grown mums and store them in a cool, dark place until spring planting.
Tips & tricks for perfect garden fall mums
Between us, these little tricks will help your garden fall mums put on a show that lasts the whole season—no green thumb required.
Sunlight Strategy: Those 6 hours of daily sun are non-negotiable, but here's the secret: if your afternoons get scorching, move plants to a spot with morning sun and afternoon shade. I've seen mums wilt dramatically in intense afternoon heat, but they bounce back beautifully with this adjustment. For container mums, you can even rotate them throughout the day to give all sides equal exposure.
Soil Savvy: When amending heavy clay soil in Step 1, I recommend mixing in compost and perlite right in the hole—not just around it. This creates a perfect growing zone where roots can spread freely. For sandy soils, add a handful of peat moss to help retain moisture without suffocating roots. The key is that soil should drain well but still hold enough moisture to keep roots happy.
Watering Wisdom: That 1 gallon per plant after planting is just the beginning. For the first two weeks, check soil moisture daily—stick your finger an inch down. If it's dry, water slowly until it drains through. Overwatering is the #1 killer of fall mums, so always let the top inch dry out between waterings. A drip irrigation system set on a timer is my go-to for consistent moisture without soggy roots.
Frost Protection: When nighttime temps drop below 40°F, don't just throw any old blanket over your mums. Use frost cloth specifically designed for plants—it breathes while protecting. I've seen mums survive 28°F nights with proper frost cloth, but a heavy winter blanket can trap too much moisture and actually harm the plants. Always remove covers by mid-morning to let sunlight revive the flowers.
Pro Tips for Garden Fall Mums
- Between us, these little tricks will help your garden fall mums put on a show that lasts the whole season—no green th...
- Sunlight Strategy: Those 6 hours of daily sun are non-negotiable, but here's the secret: if your afternoons get scorc...
- Soil Savvy: When amending heavy clay soil in Step 1, I recommend mixing in compost and perlite right in the hole—not ...
Frequently asked questions
Got questions about bringing bold fall color to your garden? Here are some of the most common ones—and their easy answers!
When is the best time to plant fall mums for maximum impact?
Plant your garden fall mums 4–6 weeks before the first frost in your area (typically late August to early October). This gives roots time to establish before cold weather hits. For cooler climates, aim for early September—mums thrive when they have 6–8 weeks of warm soil to grow!
How often should I water newly planted mums?
Water deeply 2–3 times per week after planting to keep soil moist (but not soggy). Once established, mums are drought-tolerant but wilting leaves mean it’s time to hydrate. Mulch around the base to retain moisture and protect roots—just keep mulch 2–3 inches away from stems to avoid rot.
Why are my mums’ leaves turning yellow or brown?
Yellowing leaves often signal overwatering or poor drainage, while brown edges can mean underwatering or heat stress. Check soil moisture with your finger—it should feel damp but not muddy. If pests like aphids or spider mites are the culprit, spray with neem oil or a mild insecticidal soap for a natural fix.
Can I reuse last year’s mums in my garden?
Dig up overwintered mums in early spring, divide clumps, and replant in fresh soil. Choose healthy, vibrant centers—avoid ones with bare spots or weak growth. Prune dead stems and fertilize lightly to encourage lush blooms. Pro tip: Label varieties if you’re mixing colors!
What’s the secret to keeping mums blooming longer?
Deadhead spent blooms regularly to redirect energy to new flowers. Feed with a balanced fertilizer (10-10-10) every 3–4 weeks and ensure they get 6+ hours of sunlight daily. For extra staying power, choose late-blooming varieties like ‘Autumn Beauty’ or ‘Purple Gem’—they’ll shine until frost!
Wrapping up and next steps
Garden fall mums are the perfect way to transform your outdoor space into a vibrant autumn haven with minimal effort! 🌼 From selecting the right varieties to mastering care tips, you now have all the tools to grow stunning, long-lasting blooms that steal the show.
Whether you’re a gardening pro or a beginner, these bold colors will bring joy and warmth to your season.
Ready to take the next step? Start by picking your favorite mum colors and planting them this weekend—your fall garden will thank you! For extra flair, pair them with seasonal decor or share your progress with fellow plant lovers. Happy gardening! 🌿