
Vegetables
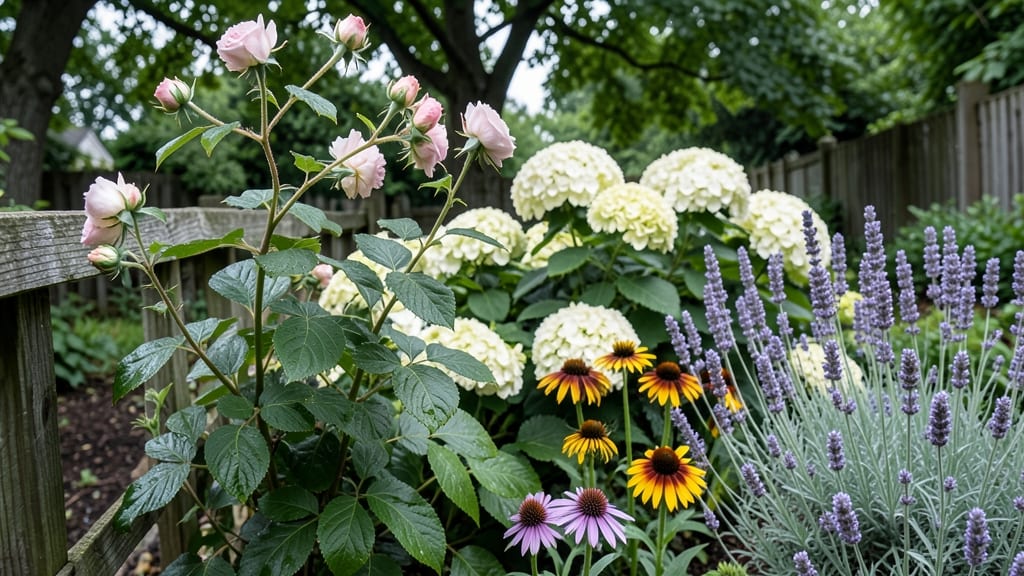
A fenced-in garden transforms your compact yard into a private sanctuary where every inch becomes valuable real estate. I remember my first attempt—stringing up lattice panels between posts and draping them with climbing roses—it instantly turned our cramped backyard into a lush, secluded retreat.
The fence didn't just contain the space; it created layers where herbs could climb trellises, tomatoes could sprawl along the top rail, and even a small raised bed could sit snug against the wooden slats.
The beauty of a fenced garden is how it turns limitations into opportunities. You're not just building a barrier; you're crafting vertical growing space that maximizes sunlight and shade.
A simple 6-foot wooden fence becomes a living wall when you add built-in shelves for containers, or when you train clematis to weave between the pickets. Metal fencing offers durability and sleek lines, while living hedges like arborvitae or boxwood provide natural privacy that also supports pollinators.
The key is matching your fence style to your garden's personality—whether that's rustic cottage charm or clean modern lines.
What you'll end up with is a space that feels intentionally designed, not just crammed together. Picture morning coffee under the dappled shade of a grapevine trellis, or the quiet hum of bees visiting your enclosed herb garden.
The fence becomes the backbone of your layout, guiding where you place paths, seating areas, and plant groupings. Even in tight spaces, you'll create zones that feel purposeful—like a dedicated cutting garden tucked behind the fence or a small fruit tree pruned to fit against the panels.
This approach works for any yard size, from urban backyards to suburban corners. The same principles apply whether you're using cedar planks, black metal panels, or even repurposed materials like pallet wood.
Start with your fence as the foundation, and everything else will fall into place—privacy, security, and a garden that actually feels like yours. The best part? You'll finally have a space that works as hard as you do, without sacrificing beauty or function.
📚 In This Guide
- What you need
- Instructions
- Tips and common mistakes
- Wrapping up and next steps
What you need
- ● Fencing: Privacy fence panels (6–8 ft tall, 4–6 ft wide) – quantity depends on yard size
- ● OR wooden lattice panels (for a rustic look, 4x8 ft sheets)
- ● Post caps (for wooden posts, 2–4 per post)
- ● Vertical Planters: Wall-mounted planter boxes (12–18" deep, adjustable height)
- ● Fabric grow bags (for hanging or attaching to fences)
- ● Pallet planters (reclaimed wood, 4x8 ft)
- ● Hardware: Galvanized screws/nails (2–2.5" for wood, 3" for metal)
- ● Heavy-duty staples (for attaching lattice or fabric)
- ● L-brackets or corner braces (for structural support)
- ● Hanging planter hooks (if using fabric or wire baskets)
- ● Soil & Drainage: High-quality potting mix (1–2 bags per planter)
- ● Drainage fabric (landscape fabric, 3x5 ft roll)
- ● Pebbles or gravel (for drainage layers, 5–10 lbs)
- ● Power drill + drill bits (1/8"–1/4")
- ● Level (4 ft)
- ● Measuring tape (25 ft)
- ● Staple gun (for lattice or fabric)
- ● Hacksaw or circular saw (for cutting wood)
- ● Post hole digger or auger (if installing new posts)
- ● Ladder (8–12 ft, depending on fence height)
- ○ Optional: Air compressor + nail gun (for faster assembly)
- ● Clear and mark your garden layout (sketch or string line)
- ● Check local building codes (permit may be needed for tall fences)
- ● Ensure proper spacing between fence posts (6–8 ft apart)
- ● Test soil drainage (amend with compost if needed)
- ○ Optional: Pre-treat wood with sealant (for longevity)
Step-by-Step instructions for designing privacy-packed vertical gardens
Transform your fenced yard into a lush, layered privacy retreat with these practical layers.
Assess Your Space and Define Vertical Zones
Start by measuring your fence height and width to determine how many vertical layers you can create. I like to divide the space into three zones: the fence itself, mid-height structures, and top layers. For example, a 6-foot fence could have a 3-foot-tall trellis at the base, a 4-foot-tall arbor midway, and climbing vines trained along the top. Sketch a rough layout to visualize how each layer will contribute to privacy while allowing light and airflow.
Check sunlight exposure at different times of day—this will dictate which plants thrive in each zone. South-facing areas can handle sun-loving climbers like morning glories, while north-facing sections may need shade-tolerant options like ivy. Note any obstructions like overhanging branches or utility lines that might affect plant placement.
Install Structural Supports for Vertical Growth
Use the fence as your primary vertical anchor, but supplement it with freestanding structures for depth. For the base layer, install a 3-foot-tall trellis made of wood or metal stakes spaced 4 feet apart along the fence line. This creates a foundation for shorter climbers or bushy plants. Mid-height, add an arbor or pergola (like a 4-foot-tall lattice frame) to support heavier vines or flowering plants.
For the top layer, train vines directly onto the fence using zip ties or soft garden twine to secure stems without damaging them. If your fence is chain-link, attach horizontal wires every 12 inches for climbers to grip. Avoid metal hardware that could rust or harm plant roots—opt for galvanized or plastic-coated options for longevity.
Layer Plants by Height and Growth Habit
Begin with the tallest plants at the back of each zone to build a solid privacy barrier. For the trellis base, plant 3-foot-tall shrubs like potentilla or hydrangeas, spaced 18 inches apart. These will fill in quickly and provide a dense foundation. In the mid-height arbor, add 4-5 foot vines like clematis or wisteria, which will cascade downward and upward for full coverage.
For the top layer, choose fast-growing climbers like morning glories or jasmine to train along the fence or arbor. These will fill vertical gaps within one growing season. Mulch the base of all plants with 2-3 inches of organic mulch to retain moisture and suppress weeds. Water deeply after planting to encourage root establishment.
Maintain Layers for Year-Round Privacy
Prune plants in early spring to shape the vertical layers and encourage bushier growth. Remove any dead or overgrown branches that block light or airflow. For vines, trim back one-third of the previous year’s growth to stimulate new, vigorous shoots. This keeps the garden looking tidy while maintaining density.
Fertilize twice a year—once in early spring with a balanced, slow-release fertilizer and again in mid-summer to support flowering and fruiting. Monitor for pests like aphids or spider mites, which can weaken climbers. A neem oil spray applied every 4-6 weeks keeps insects in check without harming beneficial pollinators.
Add Finishing Touches for Functionality
Incorporate seating or decorative elements into your vertical design to make the space usable. For example, place a bench or swing beneath the arbor for a shaded retreat. Hang solar-powered string lights along the fence for evening ambiance. If your fence is tall enough, add a small shelf or planter at the top to display seasonal decor or additional greenery.
Finally, consider adding a ground cover layer like creeping thyme or clover beneath the trellis to tie the design together. This softens the base of the vertical garden and reduces maintenance by suppressing weeds. Step back and admire your work—your fenced garden is now a private, layered oasis!
Tips & tricks for perfect vertical garden layers
Creating a lush, private garden along your fence doesn't have to be complicated. Here are the key strategies I've learned to make your vertical layers thrive and last.
Zone Planning: When sketching your layout in Step 1, consider adding a fourth zone at the very top for fast-growing annuals like morning glories. These will fill gaps quickly and provide instant privacy. I always include a 6-inch buffer at the top of my fence for this layer—it makes a surprising difference in how quickly the whole design comes together.
Material Selection: For Step 2, choose trellis materials that match your fence's durability. Cedar or redwood naturally resist rot, while galvanized metal won't corrode. I've found that powder-coated metal stakes last 10 years with minimal maintenance—worth the slightly higher upfront cost. For chain-link fences, use plastic-coated horizontal wires instead of bare metal to prevent rust from staining your plants.
Plant Spacing Precision: The 18-inch spacing for shrubs in Step 3 might seem generous, but it prevents overcrowding as plants mature. I measure from the center of each plant to ensure even distribution. For vines in the arbor zone, leave 24 inches between plants—this gives them room to spread without competing for sunlight. Trust me, this small adjustment prevents future pruning headaches.
Maintenance Shortcuts: In Step 4, I've found that adding a small watering can with a long spout to your garden toolkit makes deep watering after planting much easier. For the neem oil spray, I mix it with a few drops of dish soap—the soap helps it cling better to plant surfaces. This simple tweak makes pest control twice as effective with half the product.
Pro Tips for Fenced In Gardens
- Creating a lush, private garden along your fence doesn't have to be complicated.
- Zone Planning: When sketching your layout in Step 1, consider adding a fourth zone at the very top for fast-growing annuals like morning glories.
- Material Selection: For Step 2, choose trellis materials that match your fence's durability.
Frequently asked questions
Got questions about fenced-in gardens? You’re not alone!
Whether you're a newbie or a seasoned gardener, these answers will help you navigate the ins and outs of creating a secure, layered growing space. Let’s dive in!
What’s the best fencing material for a vegetable garden?
A sturdy, predator-proof fence is key! Opt for hardware cloth (1/2" mesh) for burrowing animals like rabbits, or woven wire (1" x 2") for larger critters. For a decorative touch, pair it with wood or bamboo panels. Avoid chain-link—it’s too easy for critters to squeeze through!
How soon can I start planting after installing the fence?
Once the fence is secure (test for gaps!), you can plant immediately for warm-season crops like tomatoes or peppers. For cool-season veggies (e.g., lettuce, spinach), wait until soil temps are ideal (usually after the last frost). Give new fences 24–48 hours to settle before planting to avoid disturbing roots.
Are there budget-friendly alternatives to traditional fencing?
Try:
- Pallet fencing: Repurpose wooden pallets (sand and seal first) for a rustic, low-cost barrier.
- Brambles or thorny shrubs: Plant blackberries, roses, or pyracantha along borders for natural deterrents.
- DIY wire cages: Bend hardware cloth into cages for individual plants (great for herbs or small veggies!).
How do I keep pests out if my fence isn’t tall enough?
Combine your fence with natural deterrents:
- Add a 12" apron of hardware cloth buried 6" deep to block moles and gophers.
- Use companion planting (e.g., marigolds repel rabbits, basil deters flies).
- Apply hot pepper spray or compost tea as a last resort.
Pro tip: Monitor for gaps—even a 1-inch hole can invite pests!
Can I still grow vertically in a fenced garden?
Yes! Fenced gardens are perfect for vertical growing. Use:
- Trellises (for cucumbers, pole beans).
- Hanging planters (herbs, strawberries).
- Pallet shelves (attach to the fence for extra space!).
Just ensure your fence is sturdy enough to support weight—especially after rain!
Wrapping up and next steps
A fenced-in garden with vertical layers isn’t just a space-saving hack—it’s a privacy-packed, productivity-boosting dream for compact yards. By stacking plants, securing boundaries, and blending function with style, you’ve got a thriving, low-maintenance oasis that feels like a retreat. 🌿
Ready to transform your yard? Start small—sketch a layout, gather your materials, and take that first step. Whether you’re growing veggies or just craving a cozy corner, your fenced-in garden sanctuary awaits!