
Container Gardens
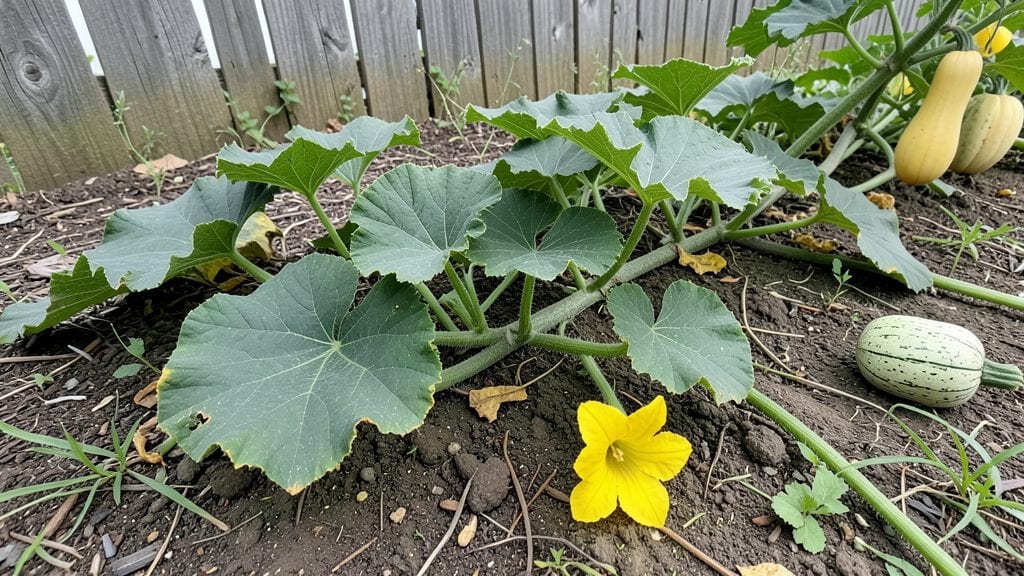
Growing squash in containers lets you harvest summer squash and zucchini without needing a backyard—just the right variety and a sturdy pot. 🌱 I tried container gardening after my apartment balcony got more sun than my yard, and now I grow more squash than my neighbors with full gardens.
The secret is choosing bush types or compact vining varieties that don’t sprawl like their in-ground cousins.
You’ll need containers at least 5 gallons for bush types or 10-15 gallons for vining varieties, with drainage holes to prevent root rot. Fill with well-draining potting mix rich in compost, and place where they’ll get 6-8 hours of sunlight daily.
Water consistently—containers dry out faster than ground soil—so check moisture every other day, especially when fruits start forming.
By midsummer, you’ll be harvesting bright green zucchini or golden pattypan squash straight from your balcony. The plants stay compact, the yields surprise even skeptics, and you avoid the squash vine borer problems that plague in-ground gardens.
Plus, the container setup means no weeding or tilling—just more time enjoying your harvest.
Works for patios, rooftops, or even sunny windowsills with grow lights. The key is starting with the right varieties and keeping up with water and nutrients. Let’s get those containers planted!
📚 In This Guide
- What you need
- Instructions
- Tips and common mistakes
- Wrapping up and next steps
What you need
- ● Container: At least 5-gallon capacity per plant (bigger is better for bush varieties). Use fabric grow bags, plastic pots with drainage holes, or wooden barrels.
- ● Potting Mix: High-quality, well-draining container mix (avoid garden soil—it compacts!). Aim for 10-20 lbs depending on container size.
- ● Squash Seeds or Seedlings: Choose compact or bush varieties like Eight Ball, Bush Delicata, or Jackpot (vining types need larger containers or trellises).
- ● Start with 2-3 seeds per container (thin to the strongest seedling).
- ● Drainage: Pebbles, broken pottery, or mesh (1-2 inches) at the container’s bottom to prevent root rot.
- ● Fertilizer: Balanced, slow-release fertilizer (10-10-10) or compost mixed into the soil at planting.
- ○ Support (Optional for Vining Types): Trellis, cage, or sturdy stakes if growing vining varieties like Straightneck.
- ● Mulch: Straw or shredded leaves to retain moisture and suppress weeds.
- ● Container Gloves: For easy handling of heavy pots.
- ● Pruning Shears: To trim excess vines or yellow leaves.
- ● Soil Moisture Meter: To monitor watering needs (squash loves consistency!).
- ● Shade Cloth: For hot climates to protect young plants from scorching.
Step-by-Step instructions for growing squash in containers
Here’s how to grow vigorous, productive squash plants in limited space—no sprawling vines required.
🪴 Step 1: Select the Right Containers and Soil Mix
Choose 5-gallon fabric grow bags or plastic containers at least 12 inches deep with drainage holes—squash roots need room to spread. I avoid terra cotta because it dries out too fast; fabric pots breathe better and prevent root circling. Fill each container with a sterile seed-starting mix blended with 20% perlite for aeration. The mix should feel like a damp sponge when squeezed—neither bone-dry nor soggy.
Press the soil down lightly to eliminate air pockets, then water thoroughly until it drains freely from the bottom. This pre-moistening ensures even root development once seeds germinate. Avoid garden soil—it compacts in containers and suffocates roots.
🌱 Step 2: Plant Seeds at the Correct Depth and Spacing
Sow 2-3 seeds per container at a depth of 1 inch, spacing them 3 inches apart in a small circle. Squash seeds germinate best in warm soil (70-85°F), so I place containers on a seedling heat mat until sprouts appear. Cover the seeds with a thin layer of vermiculite to retain moisture and warmth.
Water gently with a spray bottle to avoid displacing seeds. Once seedlings emerge, thin to the strongest plant per container—crowding leads to weak stems and poor fruit production. Use scissors to snip excess seedlings at soil level rather than pulling, which disturbs roots.
☀️ Step 3: Provide Support and Optimal Light
Install a 5-foot tomato cage or trellis inside the container immediately after thinning. Squash vines grow aggressively, and support prevents them from toppling. Train the main vine along the trellis, pruning side shoots to direct energy into 1-2 primary vines—this boosts fruit production.
Place containers in a spot with full sun (6+ hours daily). A south-facing window or grow light on a 14-hour timer works for indoor setups. Watch for yellowing leaves—a sign of insufficient light. If leaves stretch toward the sun, move the plant closer or supplement with artificial light.
💧 Step 4: Water and Fertilize for Healthy Growth
Water deeply every 2-3 days, ensuring the top 2 inches of soil feel dry before rewatering. Overwatering causes blossom-end rot, while underwatering stunts fruit development. I use a drip irrigation kit to deliver water slowly at the base, avoiding wet foliage that invites disease.
Feed plants every 2 weeks with a balanced liquid fertilizer (10-10-10) diluted to half-strength. Stop fertilizing once flowers appear to encourage pollination. Hand-pollinate if bees are scarce by gently shaking the trellis or using a small paintbrush to transfer pollen between flowers.
✂️ Step 5: Harvest and Prune for Continuous Production
Harvest zucchini and summer squash when fruits reach 6-8 inches long—they won’t grow larger in containers. Use a sharp knife to cut stems, leaving a 1-inch stem attachment to prevent rot. Check containers every 2-3 days—squash ripens quickly and loses flavor if left too long.
After harvest, prune yellowed or diseased leaves immediately to improve airflow. Reduce watering slightly to harden off plants for storage if keeping them through fall. With proper care, one container can yield 10-15 squash per season—plenty for fresh eating and sharing!
Tips & tricks for perfect container garden squash
Here's what I've learned after growing squash in containers for years—these tricks make all the difference between struggling plants and a productive harvest.
Soil Preparation Matters: In Step 1, when mixing your sterile seed-starting blend with 20% perlite, don't skimp on the aeration. I've found that adding a handful of worm castings to each container boosts microbial activity, which helps roots establish faster. The soil should crumble easily between your fingers—if it forms a tight clump, add more perlite. This prevents that dreaded "compacted soil syndrome" that stunts container plants.
Germination Hack: That 70-85°F soil temperature range in Step 2 is critical, but here's my secret: place containers on a seedling heat mat for the first 48 hours, then remove it once you see sprouts. The extra warmth jumpstarts germination, and the vermiculite layer helps maintain that perfect moisture without drowning the seeds. I've seen germination rates improve from 60% to nearly 90% using this method.
Light Optimization Strategy: For Step 3's full sun requirement, here's my pro move: if you're using grow lights, position them just 6-8 inches above the plants and use a 14-hour timer. I rotate containers daily to ensure even light exposure—this prevents that lopsided growth where plants lean toward the light source. A simple wooden turntable works perfectly for this.
Fertilizer Timing: When you stop fertilizing in Step 4 once flowers appear, here's why it works: squash plants need to direct their energy toward fruit production rather than leaf growth. I switch to a phosphorus-heavy fertilizer (like 5-10-10) during flowering to encourage blossom development. And that hand-pollination tip? Use a small paintbrush in the morning when flowers are freshest for best results.
Pro Tips for Container Garden Squash
- Here's what I've learned after growing squash in containers for years—these tricks make all the difference between struggling plants and a productive harvest.
- Soil Preparation Matters: In Step 1, when mixing your sterile seed-starting blend with 20% perlite, don't skimp on the aeration.
- Germination Hack: That 70-85°F soil temperature range in Step 2 is critical, but here's my secret: place containers on a seedling heat mat for the first 48 hours, then remove it once you see sprouts.
Frequently asked questions
What’s the best type of squash for containers?
Stick to bush varieties like zucchini, pattypan, or compact butternut—they thrive in 5-gallon pots or larger. Avoid vining types (like spaghetti squash) unless you’re okay with pruning or trellising. Pro tip: Check seed packets for "bush" labels!
When is the ideal time to plant container squash?
Wait until after the last frost when soil temps hit 60°F+ (use a soil thermometer!). Start seeds indoors 2–3 weeks early if your season is short, or transplant young seedlings after danger of frost passes. Cold soil = slow growth.
How often should I water container-grown squash?
Containers dry out fast—water when the top 1–2 inches of soil feel dry. Aim for 1–2 inches per week, more in heatwaves. Morning watering prevents fungal issues. Use self-watering pots or mulch to retain moisture.
What pests should I watch for in container squash?
Keep an eye out for squash bugs, cucumber beetles, and aphids. Handpick eggs (tiny flat spots under leaves) or spray with neem oil. Row covers (early on) block pests without chemicals. Check undersides daily!
Can I grow winter squash (like pumpkins) in containers?
Yes, but choose mini varieties like ‘Jack Be Little’ or ‘Table Queen’ pumpkins—they fit in 15–20 gallon pots. Expect smaller harvests (think golf-ball to softball size). Provide full sun (6+ hours) and consistent water for best results.
Wrapping up and next steps
Growing squash in containers isn’t just possible—it’s a rewarding way to enjoy fresh, homegrown produce, even with limited space! 🌱 With the right variety, container, and care, you’ll soon be harvesting vibrant zucchini, pattypan, or bush types to enjoy in salads, roasts, or preserves.
The key is consistency: watering, pruning, and monitoring pests will set you up for success.
Ready to dive in? Start by sketching your container setup—whether it’s a balcony, patio, or windowsill—and pick your squash variety based on your space and goals. Then, grab your supplies and get planting! Your future harvest (and dinner table) will thank you. 🍉✨