
Tools
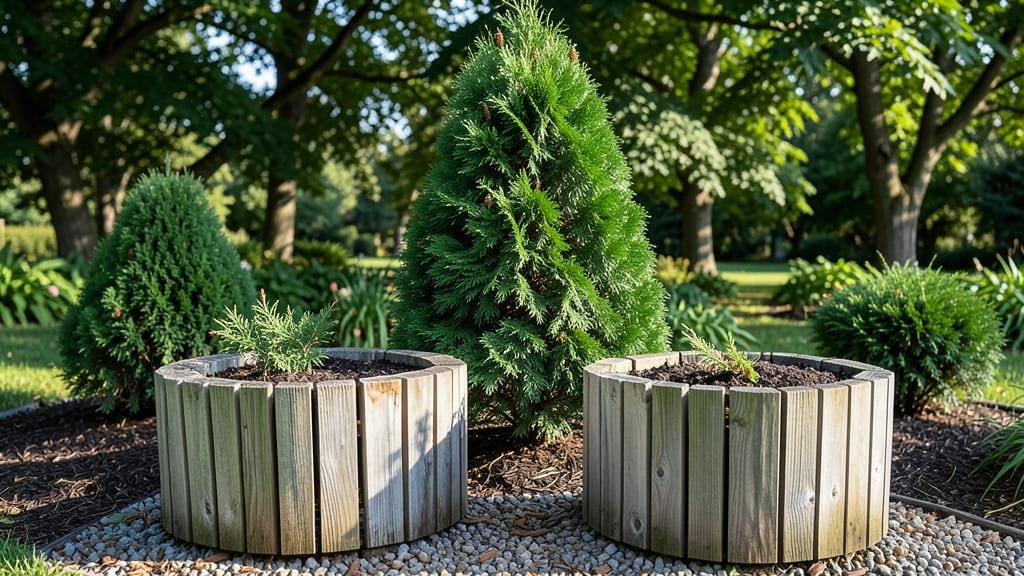
My cedar garden planters instantly transformed my backyard from ordinary to inviting—those warm, honey-toned boards hold plants like they were meant to be there. 🌿 The natural grain and earthy aroma make them feel like an extension of the garden itself, not just another container.
I’ve used them for everything from trailing ivy to dwarf conifers, and the way they weather over time only adds to their charm.
Cedar’s built-in resistance to rot and insects means these planters stay looking fresh for years with minimal upkeep. You won’t need to stain them right away—just a light coat of food-safe oil to preserve that rustic beauty.
They pair perfectly with stone pathways, wooden decks, or even modern metal furniture, bridging traditional and contemporary styles effortlessly. The best part? You can stack them vertically for small spaces or line them up for a grand garden border.
Imagine your favorite herbs spilling over the edges of a raised cedar planter, or delicate ferns tucked into a corner box that smells like a forest. These planters aren’t just functional—they’re the star of the show, turning ordinary greenery into a curated display.
Whether you’re going for cottage-core whimsy or a sleek outdoor retreat, cedar planters bring that natural elegance to every corner of your space.
Pro tip: Group planters in odd numbers for visual interest, and mix heights to create layers. For extra flair, add a few solar-powered lights tucked into the crevices—nothing says “garden magic” like soft glow on cedar at dusk.
Start small with one or two, and watch how they pull your outdoor space together.
📚 In This Guide
- What you need
- Instructions
- Tips and common mistakes
- Wrapping up and next steps
What you need
- ● Cedar lumber: 1–2 boards (1x6 or 1x8, 8 ft long) – cedar resists rot and insects perfectly!
- ● Wood screws: 1.5"–2" deck screws (10–15 screws, stainless steel for longevity)
- ● Exterior wood glue: 1 small bottle (for extra reinforcement)
- ● Sandpaper: 80-grit and 120-grit (for smoothing rough edges)
- ○ Wood stain or sealant: Outdoor-rated (optional but recommended for durability)
- ● Measuring tape (for precise cuts)
- ● Circular saw or handsaw (for cutting cedar to size)
- ● Drill/driver (with Phillips or square drive bit)
- ● Clamps (2–4, to hold pieces together while assembling)
- ● Pencil (for marking cuts and measurements)
- ● Paintbrush or foam brush (for applying stain/sealant)
- ● Corner braces (for added stability in larger planters)
- ● Landscape fabric (to prevent soil from leaking through cedar)
- ● Drill bit set (if pre-drilling screw holes for cleaner assembly)
- ● Waterproof liner (for a polished, low-maintenance finish)
How to choose and style cedar garden planters for lasting appeal
Cedar’s natural beauty and durability make it the perfect choice for planters that blend seamlessly with any outdoor setting.
🪴 Step 1: Select the Right Cedar Planters for Your Space
Start by choosing planters that match your outdoor aesthetic and functional needs. Cedar’s natural resistance to rot and insects means you’ll enjoy these planters for years without treatment. Look for thick, knot-free boards—they’ll last longer and resist warping better. For raised beds, opt for 12-inch deep planters to accommodate root growth, while window boxes or hanging planters can be shallower.
Measure your space before buying. Cedar planters come in various sizes, so ensure they fit your patio, deck, or balcony without overcrowding. If you’re placing them near a house or fence, leave at least 6 inches of clearance for airflow and easy maintenance. I like to sketch a rough layout first—it helps visualize how the planters will look together.
☀️ Step 2: Position Planters for Optimal Sunlight and Drainage
Most plants thrive in 6+ hours of sunlight daily, so place cedar planters where they’ll get the right amount for your chosen greenery. Cedar’s natural wood color won’t fade in sun, but it may darken slightly over time—this just adds to its rustic charm. For drainage, ensure each planter has holes or a sloped base to prevent waterlogging.
If your planters lack drainage, drill ¼-inch holes in the bottom before adding soil. Line the base with landscape fabric to keep soil from washing out while still allowing water to escape. Group planters near a water source for easy irrigation, but avoid placing them directly on concrete or pavement—cedar can rot if it sits in standing water for long periods.
🌱 Step 3: Fill and Plant for a Lush, Low-Maintenance Look
Use a lightweight potting mix designed for containers to avoid compacting the soil over time. Cedar planters dry out faster than in-ground beds, so mix in 10% perlite or vermiculite to improve drainage. Fill the planter to 1 inch below the rim, leaving room for watering and top dressing with mulch.
Choose plants that complement cedar’s natural tones, like lavender, rosemary, or ornamental grasses. For a cohesive look, stick to a color palette—purples, greens, and whites pair beautifully with cedar’s warm brown hues. Water thoroughly after planting, then let the soil dry slightly between waterings. Cedar planters are lightweight, so you can easily move them to follow the sun or protect plants from harsh afternoon rays.
✂️ Step 4: Maintain and Refresh for Long-Lasting Beauty
Cedar’s natural oils make it resistant to decay, but it still benefits from occasional care. Sweep off debris regularly to prevent mold or mildew buildup, especially in crevices. Every 1-2 years, apply a linseed oil or beeswax finish to enhance the wood’s grain and protect it from moisture. Avoid overwatering—cedar planters should never sit in soggy soil for more than a few hours.
To refresh the look, swap out plants seasonally or add seasonal accents like moss or dried flowers. If a planter shows signs of wear, sand lightly with 120-grit sandpaper and reapply finish. Cedar’s natural charm lies in its simplicity, so resist the urge to over-decorate. A few well-placed planters with thriving plants will elevate any outdoor space effortlessly.
Tips & tricks for perfect cedar garden planters
Cedar’s natural elegance transforms any garden, but a few strategic choices can make all the difference in longevity and curb appeal.
Material Matters: When selecting cedar planters, prioritize thick, knot-free boards—these resist warping and last longer. For raised beds, 12-inch depth accommodates root growth beautifully, while shallower window boxes work perfectly for herbs and flowers. Always check for smooth grain patterns, as rough textures can harbor moisture and lead to mold over time.
Drainage is Non-Negotiable: If your planters lack holes, drill ¼-inch drainage holes in the bottom before adding soil. Line the base with landscape fabric to prevent soil from washing out while still allowing water to escape. This simple step prevents waterlogging, which can cause cedar to rot even with its natural resistance.
Soil Strategy for Success: Cedar planters dry out faster than in-ground beds, so use a lightweight potting mix designed for containers and mix in 10% perlite or vermiculite to improve drainage. Fill planters to just 1 inch below the rim—this leaves room for watering and mulch while preventing spills. For a cohesive look, stick to a color palette that complements cedar’s warm brown tones, like purples, greens, and whites.
Maintenance Made Easy: Cedar’s natural oils make it low-maintenance, but occasional care extends its life. Sweep off debris regularly to prevent mold buildup, especially in crevices. Every 1-2 years, apply a linseed oil or beeswax finish to enhance the wood’s grain and protect it from moisture. Avoid overwatering—cedar should never sit in soggy soil for more than a few hours to prevent rot.
Pro Tips for Cedar Garden Planters
- Cedar’s natural elegance transforms any garden, but a few strategic choices can make all the difference in longevity and curb appeal.
- Material Matters: When selecting cedar planters, prioritize thick, knot-free boards—these resist warping and last longer.
- Drainage is Non-Negotiable: If your planters lack holes, drill ¼-inch drainage holes in the bottom before adding soil.
Frequently asked questions
Got questions about cedar garden planters? You’re not alone! Here are some of the most common concerns—plus straightforward answers to help you make the best choices for your space.
What makes cedar a better material than plastic or metal for planters?
Cedar is naturally rot-resistant, weatherproof, and aesthetically warm—unlike plastic, which can warp in heat, or metal, which heats up and may rust. Plus, its rich grain and earthy scent add rustic charm that blends seamlessly with gardens. Cedar also lasts decades with minimal upkeep!
How long do cedar garden planters typically last before needing replacement?
With proper care, cedar planters can last 10–20 years (or longer!). Exposure to extreme moisture or direct sunlight can speed up wear, but sealing them every 1–2 years with outdoor wood sealant extends their life. Avoid placing them in soggy soil or against wet walls to prevent rot.
Can I use cedar planters for vegetables or herbs?
Cedar is non-toxic and safe for edible plants, but avoid treating it with chemical stains or sealants if growing food. Opt for food-safe mineral oil or beeswax to protect the wood. Just ensure proper drainage—add a layer of gravel or drill holes if needed!
How do I clean and maintain cedar planters to keep them looking new?
Start by rinsing with a hose and scrubbing gently with a soft brush and mild soap. For stains, mix 1 part vinegar to 3 parts water, apply, and rinse. Reapply outdoor wood sealant every 1–2 years to protect against moisture and UV rays. Avoid pressure washers—they can damage the wood!
Are cedar planters worth the investment compared to cheaper alternatives?
Yes, if you prioritize durability and aesthetics. While plastic or resin planters cost less upfront, cedar’s natural beauty and longevity (often $50–$200 per planter) make it a smarter long-term choice. Think of it as an outdoor furniture upgrade—it adds value to your garden’s curb appeal!
Wrapping up and next steps
Transforming your outdoor space with cedar garden planters is a rewarding way to blend rustic charm with natural beauty. These versatile planters not only enhance curb appeal but also create a serene, functional retreat for your plants.
Whether you're a seasoned gardener or just starting, the key is to embrace creativity—mix textures, experiment with greenery, and let your space reflect your unique style.
Ready to get started? Grab your tools, pick your cedar planters, and let your green thumb shine! 🌿✨ For extra inspiration, browse local nurseries or Pinterest boards to gather ideas—your perfect outdoor oasis is just a few steps away.