
Landscaping
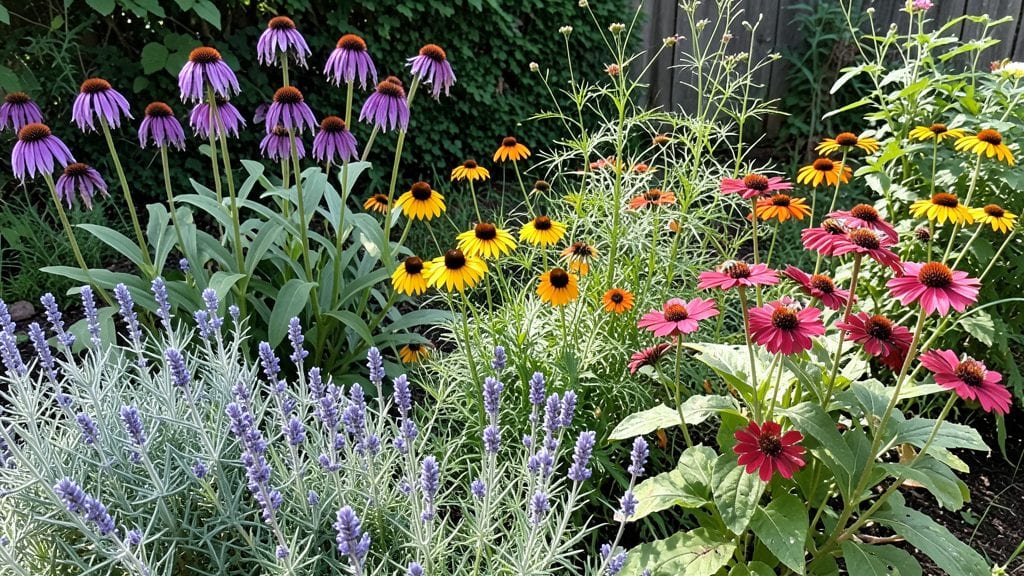
A biodiversity garden design isn’t just about pretty plants—it’s about creating a living ecosystem where every layer works together to support life all year. 🌿 I learned this the hard way after my first attempt at a "wildflower meadow" turned into a tangled mess that did nothing for pollinators.
The key? Mimicking nature’s structure with intentional layers: trees for shelter, shrubs for food, perennials for ground cover, and annuals for quick color bursts.
You don’t need a huge space to start—even a 10x10-foot plot can become a thriving mini-ecosystem. Begin with native plants (they’re already adapted to your climate), then add rocks for shelter, logs for insects, and shallow water sources for birds.
The magic happens when you let go of perfection—some "weeds" like clover are actually pollinator magnets. I’ve seen my garden go from a quiet corner to a buzzing hub of activity within just one growing season.
What you’ll end up with is a garden that feeds bees, birds, and butterflies while looking stunning—think velvety purple coneflowers swaying in the breeze, hummingbirds darting between salvia blooms, and mushrooms popping up after rains.
The best part? It requires less fuss than a traditional garden because the ecosystem does the work for you. Once established, it’s practically self-sustaining.
This approach works in urban backyards, rural fields, or even container setups on patios. The principles stay the same: layer plants by height, include food and shelter for wildlife, and avoid chemicals that disrupt the balance. Ready to transform your space into a thriving ecosystem? Let’s get growing.
📚 In This Guide
- What you need
- Instructions
- Tips and common mistakes
- Wrapping up and next steps
What you need
- ● Native plants: 15–30 species (mix of trees, shrubs, perennials, annuals, and ground covers). Aim for at least 70% native to your region.
- ● Soil amendments: Compost (2–3 cubic yards for a 500 sq. ft. garden)
- ● Mulch (3–4 inches of wood chips or straw)
- ● Organic matter (leaf mold or well-rotted manure)
- ○ Water features (optional but recommended): Small pond liner (if digging a pond, ~50 sq. ft. for wildlife)
- ● Pebbles or rocks (for pond edges or drainage)
- ● Structural elements: Log or stone seating (1–2 pieces for habitat niches)
- ● Birdhouses or bat boxes (2–3 units)
- ● Brambles or wicker fencing (for climbing plants like roses or honeysuckle)
- ● Digging & planting: Shovel (heavy-duty, 18–24 inches)
- ● Garden fork (for aerating soil)
- ● Trowel (for precision planting)
- ● Pruners (bypass for clean cuts)
- ● Measuring & layout: Measuring tape (25 ft. minimum)
- ● Stakes & twine (for marking plant zones)
- ● Garden hose with adjustable nozzle
- ● Safety & maintenance: Work gloves (heavy-duty for mulch/soil)
- ● Knee pads (for comfort during planting)
- ● Wheelbarrow (for hauling materials)
- ● Site assessment: Test soil pH (kit or lab) and sunlight exposure (track sunlight for 1–2 weeks).
- ● Permits (if applicable): Check local regulations for water features or large plantings.
- ● Wildlife research: Identify native pollinators (bees, butterflies) and birds in your area to guide plant choices.
- ● Water access: Ensure a reliable source for irrigation (drip system recommended for efficiency).
How to design a thriving biodiversity garden in layers
Create a resilient ecosystem that supports wildlife and blooms all year with this simple layered approach.
🌱 Step 1: Plan Your Base Layer with Native Ground Cover
Start with a 3-foot-deep layer of organic mulch to retain moisture and suppress weeds. I use a mix of shredded leaves and wood chips—this breaks down slowly and feeds the soil while keeping the area cool. Choose native ground covers like creeping thyme or clover for the base layer; these plants spread easily, prevent erosion, and provide early spring nectar for bees.
Spread the mulch evenly across your entire garden bed, leaving a 2-inch border at the edges. This creates a clean transition for taller plants while keeping pests out. Here's the thing—native plants require less water once established, so you'll save time and resources long-term.
🌿 Step 2: Add Mid-Height Plants for Structure and Shelter
Select 3-4 foot tall shrubs and perennials like butterfly bush or serviceberry to form the middle layer. These plants provide year-round structure and create shelter for birds and beneficial insects. Space them 3-4 feet apart to allow room for growth and airflow, which prevents fungal diseases.
Look for plants with different bloom times—some in spring, others in summer and fall—to ensure continuous food sources for pollinators. I always include a mix of evergreens like boxwood for winter interest, so the garden never looks bare. Watch for new growth in early spring; that's your signal to prune any dead stems.
☀️ Step 3: Create Vertical Interest with Climbing Plants
Install trellises, arbors, or obelisks in strategic spots to support climbing plants like clematis or honeysuckle. These vertical elements add dimension while providing habitat for insects and birds. Choose a location where the structure gets at least 6 hours of sunlight daily—most vines need full sun to thrive.
Train vines to climb by gently weaving stems through the trellis as they grow. This encourages strong attachment and prevents tangled growth. You'll see the first blooms appear in late spring, attracting hummingbirds almost instantly. Don't worry if growth seems slow at first—patience pays off with lush coverage by summer.
✂️ Step 4: Top with Tall Specimens for Year-Round Impact
Place 6-8 foot tall trees like oak or maple at the garden's perimeter to provide shade and large-scale structure. These anchor plants create microclimates that support diverse wildlife. Space them 15-20 feet apart to allow mature growth without overcrowding.
Prune young trees in late winter to shape their growth while they're dormant. You'll notice new buds forming in early spring—that's your cue to let them develop naturally. Mature trees will provide year-round benefits, from summer shade to autumn foliage and winter bird perches.
🪴 Step 5: Incorporate Water Features for Ecosystem Support
Add a small birdbath or shallow pond to complete the ecosystem. Even a simple saucer filled with water will attract insects and amphibians. Place it in partial shade where it stays cool, and add rocks for easy entry and exit. You'll see dragonflies within days—they're nature's mosquito control!
Keep the water fresh by changing it every 3-4 days during warm months. This prevents mosquito breeding while keeping the feature functional. The ripples create movement that attracts more wildlife, and the sound adds a soothing garden ambiance. This is the moment that matters: a well-placed water feature transforms a garden into a thriving habitat.
Tips & tricks for perfect biodiversity garden design
Transforming your space into a thriving layered ecosystem takes thoughtful planning—and these tips will help you avoid common pitfalls while maximizing your garden's potential.
Layering Secret: In Step 1, when creating that 3-foot-deep mulch layer, mix in a handful of compost or well-rotted manure into the bottom inch. This hidden boost gives roots a nutrient kick right where they need it most. The mulch will gradually release these nutrients as it breaks down, feeding your plants for years to come.
Plant Placement Strategy: For Step 2, think vertically when spacing your 3-4 foot shrubs. Place taller varieties on the north side of your garden to avoid shading shorter plants that need sunlight. I've found that staggering plants by height creates natural airflow paths, which dramatically reduces fungal diseases that plague crowded gardens.
Climbing Plant Tip: When installing trellises in Step 3, position them along the southern edge of your garden to maximize sunlight exposure for your vines. Most climbing plants need at least 6 hours of direct sun, so avoid placing them in permanent shade from trees or buildings. You'll notice faster growth and more abundant blooms when they get their full sun requirement.
Water Feature Wisdom: In Step 5, if you're using a simple saucer as your water feature, place it on a small platform or elevated stand. This creates an easier entry point for insects and amphibians while preventing mosquitoes from breeding in stagnant water. Change the water every 3-4 days during warm months—this small effort makes a huge difference in attracting beneficial wildlife.
Pro Tips for Biodiversity Garden Design
- Transforming your space into a thriving layered ecosystem takes thoughtful planning—and these tips will help you avoid common pitfalls while maximizing your garden's potential.
- Layering Secret: In Step 1, when creating that 3-foot-deep mulch layer, mix in a handful of compost or well-rotted manure into the bottom inch.
- Plant Placement Strategy: For Step 2, think vertically when spacing your 3-4 foot shrubs.
Frequently asked questions
Got questions about creating a thriving biodiversity garden?
You’re not alone! Here are answers to the most common concerns—from planning to maintenance—so you can design a space that buzzes with life all year.
How do I start if I have limited space?
A small space is no problem! Opt for vertical gardens (like trellises or wall-mounted planters) or container gardening with native wildflowers and herbs. Even a tiny balcony can host pollinators with a few well-chosen plants. Focus on layering—tall grasses, mid-height shrubs, and ground covers—to maximize biodiversity in square feet.
When is the best time to plant for year-round success?
Timing depends on your climate, but early spring and fall are ideal for most regions. Start with perennials and bulbs in spring, then add annuals or self-seeding flowers in late summer for fall/winter interest. In warmer climates, winter planting (Dec-Feb) can kickstart growth. Always check local frost dates and plant hardiness zones!
How do I attract pollinators without pesticides?
Skip chemical sprays—native plants (like milkweed, coneflowers, or bee balm) are the secret weapon! Add water sources (shallow dishes with rocks) and shelter (dense shrubs or leaf litter). Avoid double-flowered hybrids (they often lack pollen). Pro tip: Leave some “messy” areas—dead stems and bare soil provide habitat for bees and butterflies!
Are there budget-friendly alternatives to expensive native plants?
Start with seeds (cheaper than plugs) or divide perennials from friends’ gardens. Check local wildflower mixes or ecological restoration sales for bulk discounts. Repurpose materials like rain barrels for irrigation or pallets as raised beds. Even “weeds” like dandelions support biodiversity—let some grow!
What if my garden struggles in extreme heat/drought?
Drought-tolerant native grasses (like switchgrass) and succulents (sedum, agave) thrive with minimal water. Mulch heavily (3–4 inches) to retain moisture, and group plants with similar needs. Deep watering (1–2 times/week) encourages root growth. Consider rain gardens in low spots to capture runoff naturally.
How do I troubleshoot pests without harming beneficial insects?
Most pests are food for birds, lacewings, or ladybugs—so avoid broad-spectrum sprays! Handpick caterpillars or use neem oil (targeted sprays). Diverse plants disrupt pest cycles, and beneficial nematodes (for soil-dwelling pests) are chemical-free. If aphids appear, attract ladybugs with aphid-infested plants nearby!
Wrapping up and next steps
A biodiversity garden isn’t just a beautiful space—it’s a thriving ecosystem that supports life, beauty, and sustainability year-round. By blending native plants, layered textures, and thoughtful design, you create a haven for pollinators, wildlife, and even your own well-being. 🌿
Ready to transform your outdoor space? Start small—pick one corner of your yard or balcony and begin planting! Research local native species, observe what thrives in your climate, and let nature guide your next steps. Every seed you plant is a step toward a greener, more vibrant future.