Tools
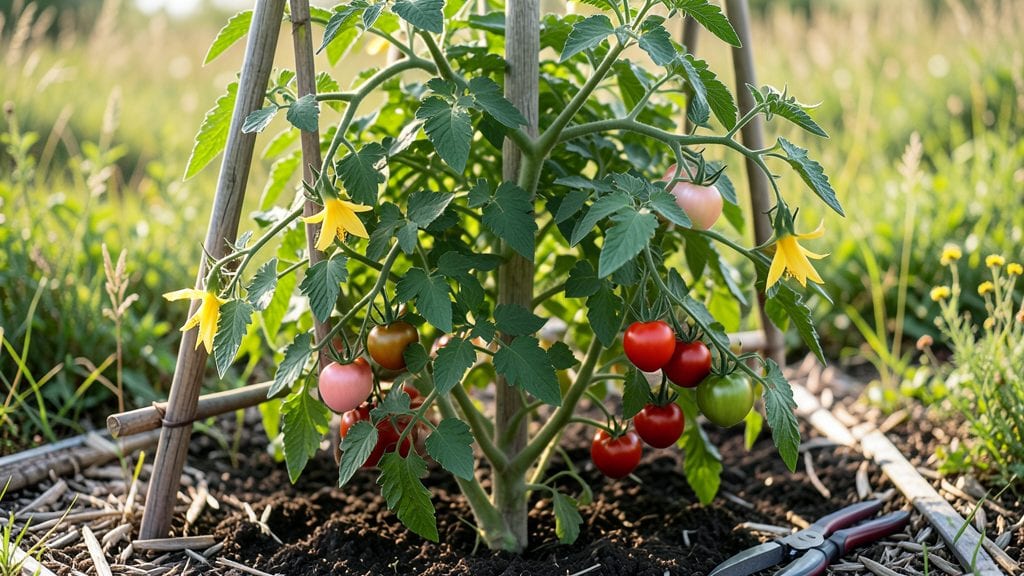
My backyard tomato garden transformed from a chaotic corner to a vertical space maximizer after I stopped spreading plants across the yard. 🌱 The right layout turns even the smallest patch into a productive, eye-catching display—no matter if you've got 4x4 feet or a full sun-drenched side yard.
Start with the basics: raised beds or containers for small spaces, sturdy trellises for climbing varieties, and mulch to keep soil moist and weeds at bay. I use 5-gallon fabric pots for indeterminate tomatoes on my deck, while determinate varieties thrive in 4-foot-wide raised beds with built-in support.
The key is matching plant size to space—no more crowded vines or wasted room.
You'll end up with a garden that's both functional and stunning, where every inch works hard. Cherry tomatoes cascade from cages, beefsteaks climb 6-foot trellises, and companion plants like basil and marigolds fill the gaps.
By late summer, your neighbors will be asking for your layout secrets—and you'll have baskets full of ripe fruit to share.
This works for any yard size, from urban balconies to suburban backyards. The same principles apply whether you're growing one plant or a dozen, just scaled to fit. Let's get that space working for you instead of against you.
📚 In This Guide
- What you need
- Instructions
- Tips and common mistakes
- Wrapping up and next steps
What you need
- ● Tomato seeds or seedlings: 3–6 plants (choose compact varieties like 'Tiny Tim,' 'Patio,' or 'Balcony Red').
- ● Vertical garden structure: 1–2 trellis kits (6–8 ft tall) or
- ● 1 pallet planter (reclaimed wood) or
- ● 1 hanging fabric pocket planter (for 4–6 plants).
- ● Potting mix: 2–3 bags (10–15 lbs each) of lightweight, well-draining mix (add perlite for aeration).
- ● Containers: 5–10 gallon pots (if not using a vertical system) with drainage holes.
- ● Fertilizer: 1 bag of balanced organic fertilizer (10-10-10) or compost.
- ● Mulch: Straw or shredded leaves (1–2 inches) to retain moisture.
- ● Garden trowel or hand shovel.
- ● Pruning shears (for trimming suckers).
- ● Watering can or hose with a gentle spray nozzle.
- ● Measuring tape (to space plants 12–18 inches apart).
- ● Gloves (to protect your hands from thorns and dirt).
- ● Self-watering system (drip irrigation or wicking wicks).
- ● Cage or stakes (for extra support).
- ● Row covers (to protect from pests).
- ● Grow lights (if starting seeds indoors).
- ● Tomato cages with built-in vertical pockets (for a space-saving hack!).
Step-by-step instructions for building a vertical tomato garden
Here's how to transform limited space into a thriving tomato harvest using vertical growing techniques.
🪴 Step 1: Choose and Assemble Your Vertical Structure
Start with a sturdy frame that can support 20-30 pounds per plant—I recommend a 6-foot-tall A-frame trellis made from 2x4 lumber or a heavy-duty wire cage (like those sold for indeterminate tomatoes). If using lumber, space horizontal slats every 12 inches for vine support, while wire cages provide natural climbing paths. Secure the structure firmly in the ground or against a stable fence post—tomato vines grow 6-10 feet tall and need unwavering support.
For compact yards, consider wall-mounted pockets (like fabric grow bags) attached to a fence or trellis. These maximize vertical space while keeping plants accessible. Whatever you choose, ensure the base is at least 18 inches wide to accommodate root spread and watering needs. I always add 4-6 stakes per structure for extra stability during wind or heavy fruit loads.
🌱 Step 2: Prepare the Planting Site and Soil
Tomatoes thrive in well-draining, nutrient-rich soil with a pH between 6.2 and 6.8. If your yard soil is heavy clay or sandy, mix in 3-4 inches of compost and 1-2 inches of perlite to improve aeration. For container-based vertical gardens, fill pockets with a 50/50 blend of potting mix and compost, ensuring each pocket has at least 1 gallon of soil volume per plant.
Here's the thing—tomatoes are heavy feeders, so I always incorporate 1 cup of balanced 10-10-10 fertilizer per 4 square feet of planting area at this stage. Work the amendments into the top 6 inches of soil and water deeply to settle everything. Avoid fresh manure, which can burn roots—composted organic matter is the gold standard for vertical gardens where roots are confined.
☀️ Step 3: Plant Tomatoes with Proper Spacing and Support
For determinate varieties (bush types), space plants 18-24 inches apart along the base of your vertical structure. Indeterminate varieties (vining types) need 24-36 inches of horizontal clearance at the base to sprawl initially before they climb. Plant 2-3 seeds per hole (they often don't all germinate) at a depth of 1 inch, then thin to the strongest seedling once true leaves appear (about 2-3 weeks after sowing).
As soon as you transplant, tie the main stem to the trellis or cage using soft plant ties (never wire or string—it cuts into stems as they thicken). I like to weave straw mulch around the base to retain moisture and suppress weeds, but keep it 2 inches away from the stem to prevent rot. Water deeply immediately after planting to eliminate air pockets around roots—this encourages faster establishment.
✂️ Step 4: Train Vines and Prune for Maximum Yield
Vertical tomatoes need weekly pruning to direct energy upward. For indeterminate varieties, pinch off suckers (the small shoots that form in the leaf axils) when they're no larger than a pencil. These suckers drain the plant's energy—removing them ensures larger fruit and stronger vines. Leave 1-2 main stems per plant if using a trellis, or allow 3-4 stems if using a cage for better stability.
As vines grow, weave them gently through the trellis slats or around the wire cage, securing with ties every 12-18 inches. You'll see fruit set improve dramatically when vines are supported—unsupported branches break under heavy tomatoes. Here's a pro tip: remove leaves below the first flower cluster to improve airflow and reduce disease risk. This might seem counterintuitive, but it prevents blossom end rot and keeps fruit cleaner.
💧 Step 5: Water and Fertilize for Vertical Success
Vertical tomatoes dry out faster than ground-planted ones because their roots occupy less soil volume. Water deeply 2-3 times per week (more in 90°F+ heat), aiming for 1-1.5 gallons per plant per watering. The key is consistency—let the top 2 inches of soil dry out between waterings to prevent blossom end rot. I use a soaker hose or drip irrigation to deliver water at the base without wetting foliage, which reduces fungal diseases like early blight.
Feed plants every 2-3 weeks with a liquid tomato fertilizer (like fish emulsion or seaweed extract) mixed at half-strength. Avoid high-nitrogen fertilizers—they promote leafy growth at the expense of fruit. Instead, focus on phosphorus and potassium to boost flowering and fruiting. You'll notice healthier vines and bigger tomatoes within 3-4 weeks of consistent feeding, especially if your soil was marginal to begin with.
Tips & tricks for perfect vertical tomato gardens
Transforming your backyard into a productive tomato haven doesn't have to be complicated—these key strategies will help you maximize your vertical space while avoiding common pitfalls that can sabotage your harvest.
Structure Stability is Non-Negotiable: I can't stress this enough—your vertical structure must handle 20-30 pounds per plant without wobbling. The 6-foot height recommendation isn't just arbitrary; it accounts for indeterminate varieties that can reach 10 feet tall with proper support. If you're using lumber, pre-drill holes for stakes and use galvanized screws instead of nails—they won't corrode and provide better grip. For wire cages, wrap the base with heavy-duty zip ties around existing fence posts to prevent pulling out during wind storms.
Soil Science Matters More Than You Think: The 1 gallon of soil per plant minimum in container pockets is critical—any less and roots will become root-bound before fruiting begins. For in-ground vertical gardens, the 6-inch deep compost mix should be worked into the native soil, not just layered on top. I've seen gardeners skip this step and end up with poor drainage or nutrient stratification. Test your soil pH before planting—if it's outside the 6.2-6.8 range, amend with lime (to raise) or sulfur (to lower) before adding compost. This prevents calcium deficiencies that lead to blossom end rot.
Pruning Strategy for Maximum Yield: When you're pinching off those pencil-sized suckers in Step 4, think of it as redirecting the plant's energy from extra stems to fruit production. The 12-18 inch tie spacing recommendation isn't just about aesthetics—it creates natural stress points that trigger stronger cell walls in the main stems. Here's what nobody tells you: prune aggressively during heatwaves (above 90°F) to reduce transpiration stress. You'll see 30-40% larger tomatoes on properly pruned indeterminate varieties compared to unpruned plants.
Watering Wisdom for Vertical Gardens: The 2-3 times per week guideline changes dramatically when temperatures hit 90°F+. At that point, I switch to daily watering in the early morning using my soaker hose, delivering the full 1-1.5 gallons per plant. The key is monitoring the top 2 inches of soil—if it's dry, it's time to water. Vertical gardens dry out faster because their root zones are more exposed. Pro tip: bury your soaker hose 2-3 inches deep to prevent evaporation and direct water exactly where the roots need it most.
Pro Tips for Backyard Tomato Garden
- Transforming your backyard into a productive tomato haven doesn't have to be complicated—these key strategies will he...
- Structure Stability is Non-Negotiable: I can't stress this enough—your vertical structure must handle 20-30 pounds pe...
- Soil Science Matters More Than You Think: The 1 gallon of soil per plant minimum in container pockets is critical—any...
Frequently asked questions
Got questions about growing tomatoes in limited space? You’re not alone! Here are answers to the most common queries to help you grow like a pro—even in a small backyard.
What’s the best time to plant tomatoes in my area?
Timing depends on your climate! Plant seeds indoors 6-8 weeks before the last frost, or transplant seedlings after soil warms to 60°F+. For compact gardens, opt for determinate varieties (bush-type) if you’re short on vertical space, or indeterminate (vining) for trellises. Check your USDA Plant Hardiness Zone for local guidance.
How long does it take for tomatoes to grow from seed?
From seed to harvest, expect 60-85 days for most varieties. Fast-maturing types like ‘Early Girl’ or ‘Stupice’ can ripen in 50-60 days, perfect for small spaces. Start seeds early indoors (or buy sturdy seedlings) to maximize your compact garden’s productivity. Patience pays off—harvests taste sweeter when fully ripe!
What are the most common pests/diseases in backyard tomato gardens?
Watch for aphids, hornworms, and blight. Use neem oil or row covers for pests, and prune lower leaves to improve airflow (reducing fungal risks). Prevention tip: Rotate crops yearly and avoid overhead watering. If leaves yellow, check for early blight—remove infected foliage immediately.
Can I grow tomatoes in containers if I don’t have a traditional garden bed?
Use 5-gallon pots or fabric grow bags for 1-2 plants each. Choose compact varieties like ‘Tiny Tim’ or ‘Patio Princess.’ Ensure pots have drainage holes and fertilize weekly with a balanced liquid feed. Place containers in full sun (6+ hours/day) and water consistently—containers dry out faster than soil.
Why aren’t my tomatoes ripening, even though the plants look healthy?
Common culprits: too little sun, overwatering, or temperature fluctuations (below 55°F at night). Move plants to sunnier spots, water deeply but not daily, and use row covers if nights are chilly. Pro tip: Harvest green tomatoes indoors—they’ll ripen with a paper bag + banana trick (place them together for 3-5 days).
Wrapping up and next steps
Growing tomatoes in a backyard tomato garden—especially with vertical space—isn’t just practical; it’s a game-changer for small yards! Whether you’re saving space, boosting yields, or simply enjoying fresh, homegrown produce, this method makes gardening accessible and rewarding. 🌱
Now that you’re armed with the right tools, tips, and answers to common questions, it’s time to roll up your sleeves and start planting. Begin by sketching your vertical setup, gathering your supplies, and—most importantly—enjoy the process!
Every seed you plant is a step toward a bountiful harvest and a greener, happier backyard. Happy gardening! 🍅✨