
Tools
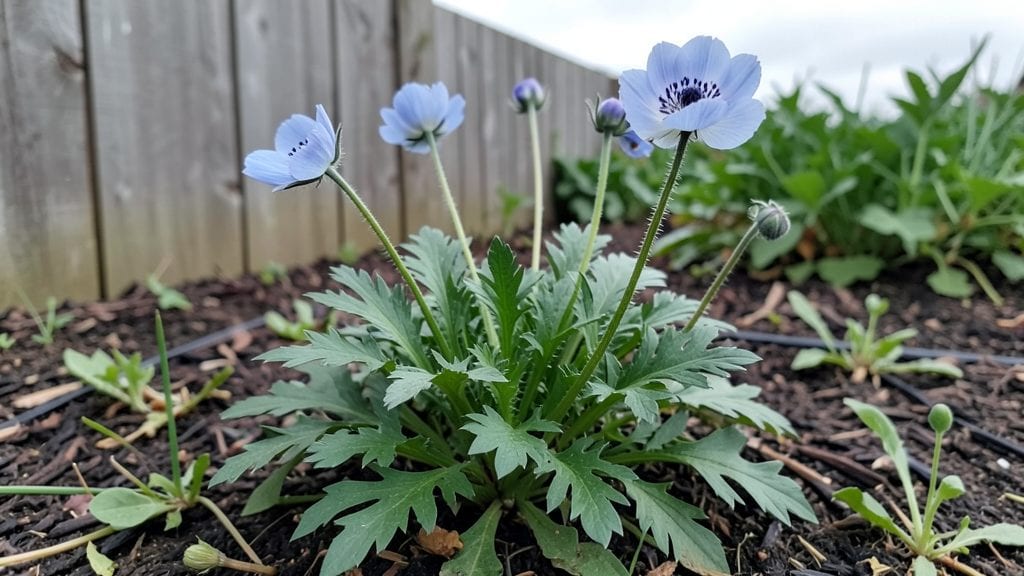
Anemones bring that effortless drama to gardens—delicate blooms that dance in the breeze and foliage that adds texture all year. 🌿 I fell for them after seeing how they transformed a shady corner into a dreamy, ever-changing display, with petals that shimmer like stained glass.
The secret lies in their versatility: they thrive in borders, containers, or even wildflower meadows, adapting to your garden’s style while adding unexpected elegance.
Start with the right varieties for your space. For shade-loving gardens, try Japanese anemones like 'Honorine Jobert' with its deep pink blooms, while windflowers like 'Blue Shades' add poppy-like charm in full sun.
Pair them with ferns, hostas, or ornamental grasses for a layered look, or contrast their soft petals with bold black-eyed Susans or purple coneflowers for a cottage-garden vibe.
Plant them where you’ll see them year-round—their lace-like foliage stays striking even when not in bloom, and their late-summer to fall flowers extend your garden’s season.
A cluster of anemones along a path or tucked into a mixed border creates movement and depth, while their floating petals catch the light in ways no other plant does.
Here’s the thing—anemones are low-maintenance once established, but their placement makes all the difference. Give them well-draining soil and a spot with dappled light or partial shade, and they’ll reward you with blooms that feel like a secret. Ready to add that whimsical touch to your garden?
📚 In This Guide
- What you need
- Instructions
- Tips and common mistakes
- Wrapping up and next steps
What you need
- ● Anemone plants: Choose between tubers (for hardy varieties like Anemone hupehensis) or seeds (for annuals like Anemone coronaria). Pro tip: Buy from reputable nurseries for disease-free stock! 💡
- ○ Well-draining soil: Mix 1 part garden soil with 1 part compost and 1 part perlite/sand to prevent root rot. Optional: Add a handful of bone meal (1 tbsp per plant) for phosphorus-rich soil.
- ● Containers or garden bed: For tubers: 6-inch pots (1 tuber per pot) or a sun-dappled garden bed (space tubers 12–18 inches apart).
- ● For seeds: Seed trays with drainage holes or a prepared seedbed (sow seeds ¼-inch deep).
- ● Watering can or hose: With a gentle spray nozzle to avoid displacing soil.
- ● Mulch: 2–3 inches of shredded bark or straw to retain moisture and suppress weeds.
- ● Garden trowel (for transplanting tubers/seeds).
- ● Pruners or scissors (for trimming dead foliage in fall).
- ● Gloves (to protect hands from thorns on some varieties).
- ○ pH test kit (optional): Anemones thrive in slightly acidic to neutral soil (pH 6.0–7.0).
- ○ Stakes or cages (optional): For tall varieties like Anemone × hybrida to support blooms.
- ● ✅ Sunlight: Partial shade (4–6 hours of morning sun)—avoid harsh afternoon rays.
- ● ✅ Patience: Tubers take 2–3 years to establish; seeds may bloom in 6–12 months.
- ● ✅ Seasonal timing: Spring: Plant tubers after the last frost (April–May in most zones).
- ● Fall: Sow seeds 6–8 weeks before first frost (or start indoors).
Step-by-Step guide to planting and maintaining anemones in your garden
Anemones bring ethereal beauty to any garden—here’s how to plant and care for them so they thrive season after season.
🌱 Step 1: Choose the Right Location and Prepare the Soil
Anemones thrive in partial shade to full sun, but afternoon shade in hot climates prevents wilting. I always test the soil first—these plants prefer moist, well-draining soil with a pH between 6.0 and 7.0. If your soil is heavy clay, amend it with 2-3 inches of compost mixed into the top 12 inches of soil to improve drainage and fertility.
Dig a hole twice as wide as the root ball but only as deep as the container it came in. Loosen the sides of the hole to encourage root spread. Here’s the thing—anemones hate soggy roots, so if your garden drains poorly, consider planting them in a raised bed or on a slight mound to prevent waterlogging.
🪴 Step 2: Plant Tubers at the Correct Depth and Spacing
Anemone tubers are delicate, so handle them gently. Plant them 2-3 inches deep, with the eyes (growth points) facing upward. Space them 12-18 inches apart—this gives them room to establish strong roots and prevents overcrowding, which leads to weak stems and fewer blooms.
Fill the hole with soil, pressing lightly to remove air pockets but not compacting it. Water deeply right after planting to settle the soil and eliminate gaps. I like to add a 1-inch layer of mulch around the base to retain moisture and suppress weeds, but keep it 2 inches away from the stems to prevent rot.
💧 Step 3: Water Consistently and Monitor Soil Moisture
Anemones need consistent moisture, especially during their first growing season. Water 1-2 times per week, depending on rainfall, ensuring the soil stays evenly moist but not waterlogged. You’ll know it’s right when the top 1-2 inches of soil feel damp—stick your finger in to check.
Once established, anemones become more drought-tolerant, but they’ll reward you with larger, more vibrant blooms if you maintain steady moisture. Avoid overhead watering, especially in the evening, to prevent fungal diseases like powdery mildew. Instead, water at the base of the plant early in the day.
☀️ Step 4: Fertilize and Support Growth for Stunning Blooms
Feed anemones in early spring with a balanced, slow-release fertilizer (10-10-10) applied at half strength. I also top-dress with compost in late fall to provide organic nutrients for the following season. Avoid high-nitrogen fertilizers—they promote leafy growth at the expense of blooms.
As stems grow, they may need support, especially in windy areas. Install bamboo stakes or small cages around the plants once they reach 6-8 inches tall. Gently tie the stems to the stakes with soft plant ties as they grow—this prevents breakage and keeps the flowers upright for better display.
✂️ Step 5: Deadhead and Prepare for Dormancy
After blooming, snip off spent flowers just above the first set of healthy leaves to encourage a second flush of blooms in some varieties. This also redirects the plant’s energy toward root development for next season. I always wear gloves when deadheading—some anemones, like the Japanese windflower, have mildly irritating sap.
In late fall, once foliage yellows and dies back, cut stems down to ground level but leave the tubers in the soil. They’ll naturally go dormant over winter. In colder climates, mulch the area with 4-6 inches of straw or shredded leaves to insulate the tubers and protect them from freezing. Real talk: This is the moment that matters—proper winter care ensures robust regrowth in spring.
Tips & tricks for perfect Anemone planting and care
A few simple strategies will help your anemones thrive and deliver those show-stopping blooms year after year.
Soil Test First: Before amending your soil, grab a soil pH test kit from your local garden center—anemones demand that 6.0-7.0 pH range. If your soil tests acidic, work in pelleted lime (about 1 pound per 100 square feet) and retest in 2-3 months. The right pH prevents nutrient deficiencies that cause pale leaves and weak stems, even if you add compost as instructed. I've seen anemones with vibrant foliage turn lifeless when planted in untested, acidic soil.
Tuber Handling Technique: When planting those delicate tubers in Step 2, don't wash off the soil clinging to the roots—this disrupts the natural microbial relationship that helps them establish. Instead, gently tease apart any tightly packed roots with your fingers. The 2-3 inch planting depth is crucial because deeper planting can cause rot, while shallower planting exposes tubers to temperature fluctuations that stress the plant. Confession: I skipped this depth rule my first year and lost half my tubers to rot.
Mulch Placement Matters: That 1-inch layer of mulch around your anemones should form a donut shape—keep it 2 inches away from stems to prevent rot. I've found that shredded hardwood mulch works better than pine straw because it breaks down more slowly, maintaining moisture without creating anaerobic conditions at the tuber level. In hot climates, add a 2-inch layer of straw mulch over the root zone in summer to protect tubers from drying out.
Watering Schedule Secret: The 1-2 times per week guideline assumes average rainfall—adjust based on your local climate. In my zone 7 garden, I water every 4-5 days during summer droughts, but check that top 1-2 inch soil layer daily. The key is consistency: anemones hate both drought stress and soggy roots. I've seen plants wilt dramatically after just one missed watering session during their first growing season.
Pro Tips for Anemone In Garden
- A few simple strategies will help your anemones thrive and deliver those show-stopping blooms year after year.
- Soil Test First: Before amending your soil, grab a soil pH test kit from your local garden center—anemones demand that 6.0-7.0 pH range.
- Tuber Handling Technique: When planting those delicate tubers in Step 2, don't wash off the soil clinging to the roots—this disrupts the natural microbial relationship that helps them establish.
Frequently asked questions
Got questions about growing anemones in your garden?
Here are answers to the most common ones—so you can enjoy their dreamy blooms with confidence!
When is the best time to plant anemones?
Plant anemones in early spring or fall when soil temps are cool (50–60°F). Avoid summer heat, which can stress tubers. For container-grown plants, transplant after flowering (late spring) to give roots time to establish before winter.
How often should I water anemones?
Keep soil consistently moist but not soggy. Water deeply 1–2 times per week, more in hot/dry spells. Mulch around plants to retain moisture. Once established, they’re drought-tolerant but bloom best with regular hydration. Pro tip: Yellowing leaves? You’re probably overwatering!
Are anemones deer- or pest-resistant?
Anemones are deer-resistant (thanks to their toxic sap), but slugs and snails may munch on leaves. Set out beer traps or use organic slug bait early in the season. Aphids are rare but can be sprayed off with water if spotted. Prevention: Plant in well-draining spots to deter pests.
Do anemones survive winter?
Most anemones are hardy to USDA Zones 3–9. In colder climates, cut back foliage in late fall, leaving 1–2 inches of stems. Mulch heavily (3–4 inches) to protect tubers. In Zone 10+, they may need winter shade to prevent leaf burn.
What’s a good alternative if anemones don’t thrive in my garden?
Try these low-maintenance, shade-tolerant bloomers:
- Bleeding heart (Dicentra) – Delicate foliage, spring blooms.
- Hellebores (Lenten rose) – Early flowers, deer-resistant.
- Astilbe – Feathery plumes, thrives in moist soil.
- Japanese painted fern – No flowers but stunning foliage.
Wrapping up and next steps
Adding anemones to your garden is like inviting a burst of year-round magic—their ethereal blooms and lush foliage bring drama, texture, and effortless beauty to any space.
Whether you’re drawn to their bold colors, low-maintenance charm, or versatile growing habits, these plants prove that stunning gardens don’t require endless work.
Ready to elevate your outdoor oasis? Start small—pick a variety that thrives in your climate, prep your soil, and let nature do the rest!
🌸 Pro tip: Snap a photo of your first anemone bloom and watch your confidence (and garden!) grow.